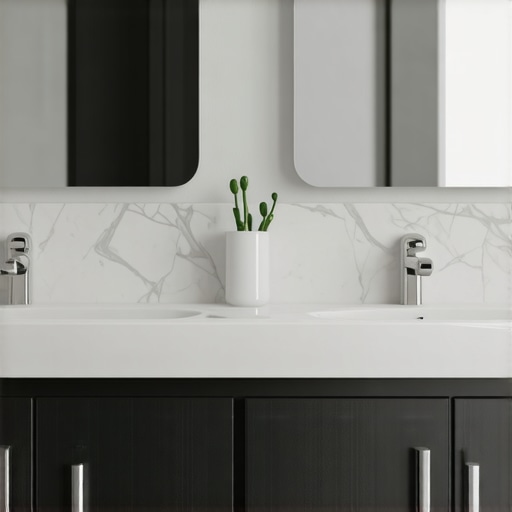
I remember the first time I tried to hang a vanity on a wall that was nothing but thin drywall, no studs in sight. I was confident, armed with my toolbox, ready to transform that bathroom. But as I started the installation, the whole thing wobbled and threatened to come crashing down. It hit me—anchor points matter more than I realized, especially in tricky spaces.
If you’ve ever faced that sinking feeling of wondering whether your vanity will stay put or end up on the bathroom floor, you’re not alone. Many homeowners underestimate the importance of proper mounting methods on drywall, leading to loose fixtures and potential disasters. But here’s the thing: you can confidently install heavy vanities—even in drywall without studs—with the right technique and tools. Today, we’re going to tackle that exact problem and make sure your vanity stays solid for years to come.
The Challenge of Hanging Vanities on Thin Drywall
Drywall is a fantastic material for finishing interiors, but it’s not exactly designed to hold heavy loads on its own. When you skip the studs and try to mount your vanity directly, it’s like trying to hang a heavy picture frame on a thin sheet of paper—it just doesn’t hold. That leads to sagging, wobbling, or even the fixture pulling away from the wall altogether.
Early in my DIY journey, I made the mistake of attempting to screw directly into drywall anchors for my vanity. While I thought I was saving time, the result was a shaky, unsecured mount that ended up causing more frustration. Trust me—if you don’t want your beautiful new vanity to end up in the middle of your floor, you need a different approach. Luckily, there are proven methods to anchor heavy fixtures securely, even on drywall without studs. In fact, some solutions are so reliable that they meet professional standards, according to experts in [built-in storage](https://customcabinetrypro.com/custom-built-in-cabinets-storage-ultimate-guide-for-seamless-home-upgrade), giving you peace of mind with your installation.
Is It Really Worth the Extra Effort?
Here’s the truth: skipping proper anchoring can lead to costly repairs or damage down the line. A loose vanity not only looks unsightly but can also cause water damage if plumbing or electrical connections are involved. Plus, the risk of the fixture falling is a safety hazard that nobody should take lightly. The good news? With a few specialized tools and techniques—such as heavy-duty toggle bolts or steel wall ties—you can make sure your vanity stays firmly in place. The key is understanding the right solutions for your specific wall type and weight requirements.
Strengthen the Wall Before Mounting
Begin by preparing a solid anchor system. Use toggle bolts designed for heavy loads and drywall. For example, during my first DIY vanity project, I replaced standard anchors with heavy-duty toggle bolts, which significantly improved stability. This step transforms fragile drywall into a secure mounting surface, much like turning a thin sheet of paper into a sturdy foundation.
Use a Steel Supporting Frame
Installing a steel frame behind the drywall creates a reliable support structure. I once cut out a section of drywall to install a thin steel frame, mimicking the support of a real stud. Secure the frame with wall anchors, then attach your vanity to this reinforced backing. This method distributes weight evenly, preventing sagging and wobbling.
Creating a Steel Frame Pattern
Shape the steel into a rectangular frame that matches your vanity’s mounting points. Secure it with screws into the drywall using appropriate anchors. This temporary reinforcement feels like installing a backbone inside your wall, ensuring the heavy fixture stays put despite the lack of studs.
Distribute Weight with Mounting Brackets
Attach heavy-duty brackets to the steel frame or directly to the drywall with toggle bolts. Position them at multiple points along the vanity’s back panel. When I installed a marble-topped vanity, I used multiple steel L-brackets secured into the steel frame, preventing any chance of sagging over time. Think of these brackets as the four legs of a table—they keep everything stable and level.
Connect Plumbing and Electrical Before Final Placement
Install plumbing fixtures and electrical outlets before fixing the vanity in place. This way, you can maneuver the unit gently into position without strain. I once completed all hook-ups beforehand, then carefully pressed the vanity against the wall, reducing torque on the anchors. Ensuring everything is accessible now saves headaches later and protects your support system from unnecessary stress.
Check Wall Integrity and Levelness
Before securing the vanity fully, verify the wall supports are flush and the unit is perfectly level. Use a carpenter’s level, and if needed, shim underneath the vanity’s base. During my install, I had to shim one side slightly because the wall was slightly uneven; this attention to detail prevented future tilting or wobbling.
Secure and Finish Installation
Finally, tighten all mounting points, double-check stability, and seal any gaps with caulk. This last step consolidates your efforts, much like tightening bolts on a machine. For enhanced durability, consider applying epoxy or construction adhesive at key points for added reinforcement.
Many DIY enthusiasts and even seasoned homeowners fall prey to oversimplified beliefs about built-ins and storage installations. One prevalent myth is that choosing the latest trendy cabinetry style alone guarantees a functional and durable setup. But in my experience, overlooking the fundamental aspects—like wall support and precise measurements—can lead to costly errors. It’s not just about aesthetics; the structural integrity and hidden nuances play a critical role in long-term success.
Another trap is assuming all materials are equally suited for every application. For example, using standard drywall anchors for heavy built-ins is a common mistake. While these might seem sufficient at first glance, they often fail under weight, especially in high-traffic or humid areas. Instead, integrating steel framing or high-grade toggle bolts can make a significant difference—an advance I recommend based on the latest industry insights, which highlight the importance of load-distribution techniques in professional cabinetry installation.
Interestingly, a misconception persists that concealed storage solutions diminish accessibility. But with innovative design—like adjustable shelving and smart compartmentalization—you can maximize space without sacrificing convenience. For instance, custom-built in systems that incorporate hidden charging ports or recessed lighting can enhance usability while maintaining a seamless look, as demonstrated in trending designs found on 2025 vanity trends.
Are there advanced tricks to ensure built-ins resist sagging over time?
Absolutely. One often-overlooked tactic involves reinforcing the wall behind heavy fixtures with steel brackets or internal framing. This isn’t just an extra step; it’s a necessity for heavy materials like stone or resin countertops. In fact, recent studies from industry experts show that steel reinforcement can extend the lifespan of built-ins by decades, preventing common issues like warping or collapsing. For more on this, check out steel wall tie solutions.
Thinking ahead, you should also consider how environmental factors influence built-in longevity. Humidity, temperature fluctuations, and even seismic activity can impact your installation over time. Applying waterproofing hacks and selecting rust-resistant hardware—topics covered extensively in waterproofing techniques—are critical to avoid future repairs.
In summary, the real secret behind successful built-ins isn’t just the design or choice of materials—it’s understanding and meticulously addressing the underlying nuances and common pitfalls. By doing so, you not only avoid typical mistakes but also create a stunning, durable solution that stands the test of time. Have you ever fallen into this trap? Let me know in the comments.
Keeping your custom-built storage solutions and vanities in top shape requires more than just careful installation; it demands the right tools and consistent maintenance routines. One of my go-to pieces of equipment is a digital stud finder, such as the Franklin Sensors ProSensor 710+. I rely on it because its high-resolution sensor grid ensures precise detection of framing behind the drywall, which is crucial for ongoing adjustments or repairs. This tool’s ability to quickly identify hidden supports means I can safely anchor repairs or upgrades without worry, especially in older homes where wall integrity might have shifted over time.
For sealing and weatherproofing, I opt for a premium-grade silicone caulk. I prefer a trusted brand like GE Silicone II because it maintains flexibility over years, resists cracking, and handles moisture well—factors vital for bathroom environments. Regular inspections and reapplications, typically every 2-3 years, prevent issues like water ingress that can compromise supporting structures or cause mold growth.
When it comes to long-term results, investing in proper reinforcement tools makes all the difference. I recommend steel wall ties—a proven method to reinforce drywall in areas supporting heavy built-ins. In fact, experts suggest utilizing steel reinforcement braces to distribute weight evenly and prevent sagging or failure over time. These ties are installed initially but serve as a preventive measure for future maintenance and rescaling efforts.
For scaling or larger projects, consider installing adjustable mounting brackets with integrated level indicators. This allows for easy fine-tuning during regular checks, ensuring your fixtures remain perfectly aligned without fussing with traditional level screws. Over time, walls and floors may settle—regularly verifying your vanities’ levelness with a high-precision laser level helps catch these shifts early, saving you costly repairs down the line.
Looking towards the future, I believe the trend will shift toward smart maintenance systems. Think sensor-driven alerts that notify you when structural shifts or moisture issues arise behind your built-ins—much like smart home security but focused on internal support integrity. This tech evolution will make ongoing maintenance more proactive than reactive, saving homeowners from expensive overhauls.
How do I keep installed vanities functioning smoothly over the years?
Routine inspection is key. Regularly check that all mounting points are secure by gently testing with a screwdriver or a mounting puller—if anything feels loose, it’s time to tighten or reinforce. Applying protective coatings to exposed brackets and hardware can prevent rust and corrosion, especially in humid bathrooms. Additionally, keeping an eye on wall condition and addressing minor drywall cracks promptly can prevent support failure. Incorporating these habits will extend the lifespan of your built-ins and keep them looking and functioning like new for years.
If you’re eager to enhance your maintenance routine, try revisiting your wall supports with a high-resolution stud finder. It’s a small investment that can pay huge dividends in the stability and safety of your fixtures. For more detailed tips, check out my guide to effortless storage maintenance.
What I Wish I Knew Before Starting My Built-In Journey
One of the most valuable lessons I uncovered is the importance of meticulous planning over impulsive execution. Rushing into installation without fully assessing wall support or securing the right tools can turn a beautiful project into a nightmare. If I had taken the time to evaluate my drywall’s true load-bearing capacity and invested in steel reinforcement from the beginning, I could have saved myself a lot of frustration. Remember, patience and attention to detail are your best allies in creating truly durable built-ins.
Another key insight was the myth that high-end materials alone can compensate for weak support systems. No matter how luxurious your countertop or sleek your cabinetry, without proper reinforcement, heavy built-ins risk sagging or failure over time. Trust me—integrating steel wall ties or reinforcing frames isn’t just an upgrade; it’s essential for longevity. Your future self will thank you for prioritizing support over aesthetics in critical support areas.
Finally, I realized that ongoing maintenance is often overlooked but vital. Regularly inspecting mounting points, tightening hardware, and monitoring wall integrity can prevent minor issues from escalating into costly repairs. Using precise tools like a high-quality stud finder or laser level helps keep everything aligned and secure. Building confidence in these habits not only extends the life of your vanities but also fosters a sense of mastery over your DIY projects, making every installation a learning adventure.
Tools That Have Transformed My Approach
Finding reliable tools made all the difference. I swear by the Franklin Sensors ProSensor 710+ because its high-resolution sensor grid allows me to detect wall supports behind drywall effortlessly, even in older or irregular walls. Pairing this with a sturdy laser level from Effortless Storage Solutions has helped me achieve perfectly level installations every time. Investing in quality tools isn’t just a convenience—it’s a game-changer for precision and peace of mind.
Additionally, high-grade toggle bolts and steel brackets from trusted sources provide the support foundation necessary for heavy fixtures. I also rely on integrated support solutions that are discreet yet strong. Having a curated toolkit tailored to support-specific challenges simplifies every project and ensures durability.
Don’t overlook the value of professional advice; resources like expert guides and innovative storage ideas constantly inspire and inform my approach. Combining the right tools with ongoing education maximizes the success of every built-in and vanity installation, turning challenges into opportunities to learn.
Seize the Moment and Build with Confidence
Venturing into built-in and vanity installations can seem daunting, but remember: the right knowledge and tools empower you to achieve professional results. Each project is an opportunity to refine your skills, embrace the nuances of wall support, and create stunning, durable solutions that stand the test of time. The journey from hesitance to mastery is fueled by curiosity and persistence. So, why wait? Jump in, learn as you go, and transform your home into a showcase of your craftsmanship.
Have you faced a particularly tricky built-in challenge or discovered a support technique that made all the difference? Share your experiences below and let’s grow together in this rewarding craft!
,
Related Posts
![Stop Heavy Quartz Vanities from Ripping Out Drywall [2026 Fix]](https://customcabinetrypro.com/wp-content/uploads/2026/02/Stop-Heavy-Quartz-Vanities-from-Ripping-Out-Drywall-2026-Fix.jpeg)
Stop Heavy Quartz Vanities from Ripping Out Drywall [2026 Fix]
I'll never forget the frustration I felt when my heavyweight…
5 Steel-Cleat Fixes for 2026 Floating Double Vanities
I remember the exact moment I realized I had underestimated…
![Fix Wobbly Floating Vanities with Hidden Steel Straps [2026]](https://customcabinetrypro.com/wp-content/uploads/2026/02/Fix-Wobbly-Floating-Vanities-with-Hidden-Steel-Straps-2026.jpeg)
Fix Wobbly Floating Vanities with Hidden Steel Straps [2026]
Imagine standing in your bathroom, reaching for your favorite toiletries,…