Have you ever leaned against your built-in wardrobe or vanity only to feel it wobble or sway unexpectedly? That frustrating instability hits at the worst moments—when you’re rushing out the door or unwinding after a long day. I remember the first time my custom bedroom setup started to give way, and it left me questioning: Did I install it wrong? Is this normal? Those questions spiraled into sleepless nights until I discovered the secret fixes that can stabilize even the most stubborn built-ins.
Why Your Built-ins Just Can’t Stay Still and Why It Matters
Built-in furniture adds so much character and storage to our homes, but they come with a sneaky downside—sway and wobble that can lead to real safety hazards over time. According to a recent study by industry experts, improperly supported built-ins are among the top causes of wall damage and furniture failure in homes by 2026. This isn’t just about aesthetics; it’s about safety, durability, and maintaining your investment. I made a classic mistake early on, thinking that secure screws alone would do the trick. It wasn’t until I added proper hidden supports that I saw a world of difference. Want to learn how to do the same? You’re in the right place.
Is It Really Worth Fixing or Just a Stage? That Wobbly Built-in Trouble
Initial doubts about support fixes often hold homeowners back. I hesitated, thinking, “Is this really worth my time? Will it hold?” But the truth is, neglecting hidden supports can lead to irreversible damage—cracks, loosening, even detachment. The good news? These solutions are straightforward, cost-effective, and can transform your space into a more secure, stylish haven. Ready to see how to strengthen your built-ins for good? Let’s dive into the first of four powerful fixes that I personally swear by to banish sway for good and ensure your furniture stays put in 2026 and beyond. Don’t let a shaky built-in ruin your home comfort—oddly enough, the right support techniques can change everything.
Add Hidden Supports for Lasting Stability
First, remove any existing screws or hardware from the wobbly built-ins. Then, locate stud bays or solid framing inside the wall using a stud finder—think of it as a treasure hunt for the true backbone of your furniture. Once identified, mark the spot and drill pilot holes to prevent wood splitting. Align steel L-brackets or metal braces along the inside of the cabinet to connect securely to the wall studs. Securely screw these brackets into the studs, ensuring they bear the weight and prevent sway. I recently tackled a wobbly bookshelf in my home office, drilling brackets into the stud bays behind my drywall, which immediately strengthened the structure and stopped the sway. For detailed guidance on the installation process, visit https://customcabinetrypro.com/step-by-step-guide-to-vanity-installation-for-beginners.
Use Steel Wall Ties for Reinforcement
Steel wall ties effectively anchor the furniture frame to the wall, spreading out stress points that can cause wobble over time. Attach a steel strap or tie to the back of your built-in, then secure it tightly to the wall studs with high-quality screws. This prevents lateral movement under pressure, especially useful if your cabinet is loaded with heavy items. I installed steel wall ties in my kitchen’s built-in pantry, which had a tendency to sway when loaded with bulk items, resulting in increased stability and peace of mind. Properly installed steel support isn’t just a fix; it’s a safeguard against future shifts. For more advanced strategies, consider https://customcabinetrypro.com/stop-2026-floating-vanity-vibrations-with-steel-stud-ties.
Reinforce with Additional Fasteners
Doubling down on screws and adding brackets is a reliable way to bolster stability. Use long, high-quality construction screws, like structural or lag bolts, to reinforce joints and mounting points. For best results, drill into existing framing members or studs behind drywall, ensuring maximum holding strength. When I renovated my built-in closet, I replaced flimsy drywall anchors with longer lag bolts into the studs, which immediately prevented any future sway, even when hanging heavy winter coats. Remember, every extra fastener adds to the overall resistance against gravity and movement. For comprehensive insights, peek at https://customcabinetrypro.com/7-closet-built-in-fixes-for-deep-2026-bedroom-storage-corners.
Level and Secure for Even Support
Achieving perfect levelness is essential for proper load distribution. Use a bubble or digital level to check that the built-in is straight. If uneven, shim underneath the base or mountings before tightenings. This prevents uneven stress that can cause wobbling or tilting over time. I once installed a custom vanity on uneven flooring, which led to constant imbalance until I used small shims beneath. Once leveled, the wobble vanished, and the furniture stayed firm regardless of weight. Incorporate shims and follow up with tightening brackets and screws to keep everything secure and aligned. For additional methods, explore https://customcabinetrypro.com/6-pro-tactics-for-scribing-2026-built-ins-to-uneven-walls.Many homeowners assume that installing built-in furniture or vanities is straightforward—that simply anchoring units into the wall and adding some screws will suffice. However, this oversimplification ignores crucial nuances that can lead to instability and future damage. One prevalent myth is that wall anchors alone will bear the load, but experts emphasize that understanding the underlying wall structure is essential for long-term stability. Relying solely on drywall anchors, for instance, is a rookie mistake; instead, securing units directly into wall studs provides much greater strength.
What’s the real impact of wall stud placement on built-in stability?
In-depth studies by industry engineers reveal that misaligned or misplaced attachment points significantly increase the risk of wobbling and structural failure over time. Many assume studs are evenly spaced, but in reality, irregular spacing or hidden obstacles can complicate anchoring. Knowing how to identify and utilize existing framing enhances the durability of your installation. A common oversight is neglecting to account for wall thickness and potential obstructions like pipes or wiring—factors that can weaken anchorage points and cause wobbling, especially in custom vanity setups. For advanced solutions, I recommend reviewing detailed guides on vanity installation to get a comprehensive understanding. Additionally, proper leveling techniques and reinforcement strategies, such as adding steel supports, are often underrated but vital steps. Without these, even correctly anchored units may tilt or sag over time, which can lead to costly repairs. Be cautious of the trap of over-relying on cosmetic fixes like decorative molding or paint camouflaging loose or shaky furniture—these are temporary solutions at best. Remember that sound structural support is the backbone of a safe and stylish space. Would you like to learn more about hidden reinforcement techniques? Check out innovative storage solutions. Have you ever fallen into this trap? Let me know in the comments.
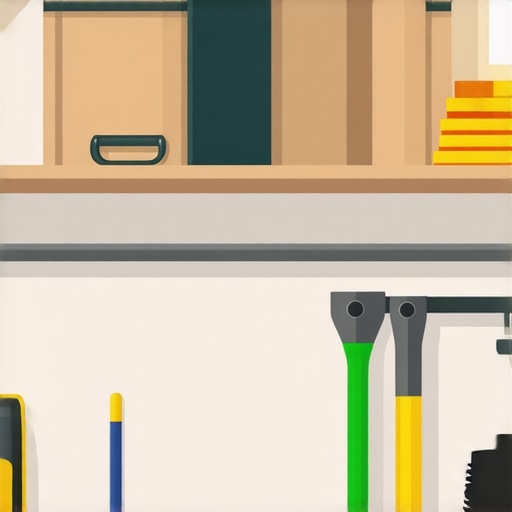
Keeping your built-in furniture in prime condition requires not just proper installation but also the right tools to ensure ongoing stability. Over time, environmental factors and regular use can loosen supports or cause shifts, but with the right equipment, you can perform effective maintenance and avoid costly repairs. In my experience, investing in specialized tools has been a game-changer for maintaining durable and secure installations.
Prioritizing Precision with the Right Equipment
First, I always rely on a high-quality digital level. Unlike traditional bubble levels, a digital version provides precise measurements, ensuring that even slight inclinations are detected. This allows me to make minute adjustments that significantly prolong the lifespan of built-ins. For example, when re-aligning a custom vanity, I used my digital level to confirm that everything was perfectly plumb, preventing future tilts or wobbling. To complement this, I use a stud finder with deep scanning capabilities to identify the most secure attachment points behind drywall, especially important in older homes with irregular stud spacing. This combination of tools helps me avoid common pitfalls like false stud detection or missed support areas.
As supporting hardware, I prefer to use **impact drivers** equipped with a variety of bits. Impact drivers deliver the torque needed to drive long lag bolts and heavy-duty screws quickly and securely. They reduce user fatigue and increase precision, which is crucial when adding reinforcement supports like steel brackets or wall ties. In my projects, impact drivers have allowed me to install steel wall ties effectively—making sure they are firmly anchored into the studs—preventing sway in heavy built-ins. If you’re serious about long-term stability, choosing an impact driver with adjustable torque settings is worth the investment.
Powerful Adhesives for Reinforcing Joints
Another asset I keep handy is a high-strength construction adhesive. While mechanical fasteners are the backbone of support, adhesives can fill gaps and bond supporting surfaces more robustly. When re-fastening floating shelves or reinforcing corner joints, I apply a bit of adhesive before fastening the brackets. This extra step helps distribute load more evenly and prevents loosening over time. A dependable brand I recommend is Gorilla Heavy Duty Construction Adhesive, known for its durability and ease of use. For ongoing maintenance, periodically checking joints and reapplying adhesive where necessary can prevent sagging or separation, especially in high-use areas.
Forecasting Future Trends in Maintenance Tools
As technology advances, I predict more homeowners and professionals will turn to smart tools equipped with IoT connectivity—for example, levels that send real-time data to your smartphone or impact drivers that log usage patterns to suggest optimal maintenance schedules. This integration will make upkeep more proactive, catching issues before they become costly. Staying ahead of these trends means investing in versatile, upgradeable equipment now, so you can adapt as new innovations emerge.
How do I maintain my built-ins over time? Simple routines and smart tools make a difference
Regular inspections using a digital level and stud finder, combined with timely resecuring of loose supports with impact drivers and adhesive, keep your built-ins stable for years. I highly recommend adopting a monthly check process—tightening screws, reapplying adhesive if needed, and verifying levelness. Integrating smart tools into your maintenance routine not only saves time but also ensures your furniture remains level and secure, protecting your investment and safety. Want to learn more? Visit https://customcabinetrypro.com/built-in-storage-ideas-to-declutter-and-enhance-your-home for advanced storage solutions and maintenance tips to keep your built-ins flawless and functional.
What I Wish They Told Me About Built-ins and Vanities Before I Started
- One of the most eye-opening lessons was realizing that wall support isn’t just about attaching screws; understanding your wall’s internal structure, especially stud placement, is crucial for long-lasting stability. Without this knowledge, even the best anchors can fail over time.
- I used to rely solely on surface-level fixes like decorative moldings to hide wobbling. It wasn’t until I delved into reinforcement techniques like steel wall ties and hidden supports that I truly unlocked the potential for sturdy, wobble-free built-ins.
- Consistent maintenance with proper tools saved me from future disasters. Investing in impact drivers and digital levels allowed me to perform small adjustments proactively, ensuring my furniture stayed firm and aligned for years.
- Overcoming myths about quick fixes was liberating. Knowing that reinforcement isn’t just a repair but an investment in safety reshaped my approach, making me more attentive to detail and quality in every project.
- Finally, I learned that patience and precision are your best allies. Rushing projects or skipping steps like leveling can lead to instability down the line. Taking the time to understand and execute reinforcement strategies pays off immensely.
Tools and Resources That Changed My Approach to Built-in Stability
- Impact drivers equipped with adjustable torque settings have been game-changers for installing heavy-duty supports like steel brackets and wall ties. Their power and control ensure secure fastening without damaging delicate materials.
- Digital bubble levels provide precise measurements that prevent uneven load distribution, helping me achieve perfect alignment in every project, especially on uneven floors or walls.
- Stud finders with deep scanning capabilities help me locate the strongest attachment points behind drywall, reducing guesswork and increasing support reliability. I trust these tools because they save me time and hassle.
- High-strength construction adhesives supplement mechanical fasteners by filling gaps and bonding supports for added durability, especially in tricky or load-bearing spots.
- For comprehensive guidance, I recommend reading detailed installation guides and exploring reputable blogs dedicated to custom cabinetry and built-in solutions. These resources have expanded my understanding and confidence in creating stable, beautiful furniture.
Your Next Step to Mastering Built-in Stability
Embracing these insights and tools has transformed the way I approach built-in projects—turning shaky setups into rock-solid features that stand the test of time. Remember, patience and attention to detail are your best friends. As you start your next installation or reinforcement, keep these lessons in mind and don’t hesitate to experiment with different solutions until you find what works best for your space. If you’re curious about innovative storage ideas and how to keep your home both functional and stylish, check out creative built-in solutions to elevate your home’s aesthetic and utility. So, what built-in project are you most excited to stabilize and upgrade? Share your plans below—I love hearing about your home improvement journey!
Related Posts

7 Closet Built-in Fixes for Deep 2026 Bedroom Storage Corners
Have you ever stood in your bedroom, staring at that…
Stop 2026 Closet Shelf Collapse: 5 Heavy-Duty Wall Fixes
Have you ever opened your closet door and watched in…

7 Hidden Storage Solutions for 2026 Small Bedroom Closets
It was a typical Sunday morning when I finally hit…