I remember the moment vividly—trying to install a heavy-duty garage rack alone, my hands shaky, muscles protesting, and that sinking feeling creeping in as I realized I had underestimated the challenge. It was a lightbulb moment that got me thinking about how crucial proper installation tactics are, especially as we gear up for the innovative storage solutions coming in 2026. If you’ve ever battled with a sagging garage rack or struggled to hold heavy tools in place without everything crashing down, you’re not alone. Many homeowners face this hassle, often because they jump into installation without a clear strategy, leading to wasted time, frustration, and unsafe setups.
In this post, we’re going to dive deep into five heavy-duty garage rack installation tactics that will set you up for success in 2026. Whether you’re upgrading your workshop or just want reliable storage, mastering these techniques is essential. I’ll share personal lessons, common pitfalls, and trusted methods to ensure your racks are sturdy, safe, and built to last. Think of this as your friendly guide to turning a daunting project into a straightforward, even enjoyable, task.
Why Proper Garage Rack Installation Matters Now More Than Ever
The garage is no longer just a parking spot; it’s becoming a multi-purpose space—everything from a home gym to a woodworking shop. As our tools and equipment grow heavier and more valuable, so does the importance of reliable storage solutions. Installing a garage rack without the proper techniques can lead to dangerous sagging, collapse, or even injury. According to a recent study by the National Fire Protection Association, poorly installed storage racks are a leading cause of home accidents involving falling objects. That’s a sobering statistic that underscores the need for solid, professionally backed installation methods.
Throughout my journey, I’ve learned that cutting corners or rushing through installation is a recipe for disaster. One early mistake I made was ignoring wall compatibility. I assumed any wall support would do, but some older drywall simply can’t bear the weight—leading to shelf failure within months. Instead, I started paying attention to details like steel framing and anchors designed specifically for heavy loads. If you’ve faced similar frustrations or fears about your garage setup, this post promises to provide practical, proven solutions and confidence to tackle your next project head-on.
Is Heavy-Duty Garage Rack Installation Really Worth the Extra Effort?
Absolutely. But I get it—your skepticism is justified. After all, who has time for complicated setup when instant shelves would do*?* Here’s the truth: investing a little extra time and effort up front can save you a ton of headaches later. A safe, secure garage rack will protect your belongings and keep your family safe. Plus, with the right techniques, installing heavy-duty racks can be surprisingly straightforward. I’ll walk you through tried-and-true methods, so stick around to learn how I avoided common pitfalls and why precision matters more than you think. Ready to elevate your garage game? Let’s start with the critical first step: assessing your wall support system.
Start with an Accurate Wall Assessment
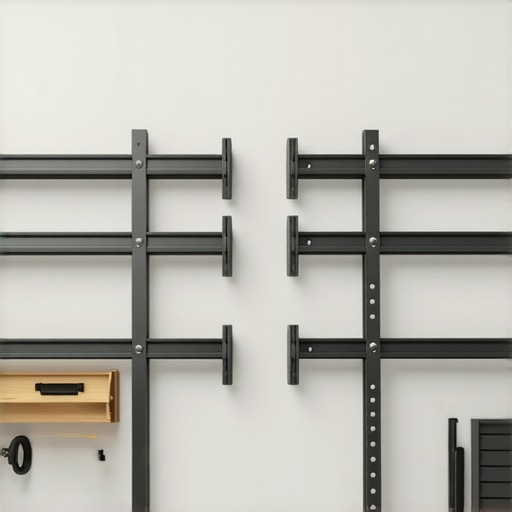
Before picking up tools, evaluate your wall’s support system. Use a stud finder to locate vertical framing members—these are your best anchors for heavy loads. When I installed my garage rack last summer, I initially assumed drywall alone would suffice, but my shelves sagged after a few months. Carefully locating studs and marking them saved me from a costly reinstallation. Consider checking the wall thickness and material as well, since older drywall might require special anchors. Once you have a clear layout, plan your shelf placement accordingly, ensuring the weight distribution aligns with the studs for maximum stability.
Select the Right Hardware for Heavy Loads
Choosing appropriate anchors and brackets is crucial. Heavy-duty toggle bolts, sleeve anchors, and steel brackets are your best friends. Think of it like building a ship—every bolt and bracket must withstand significant force. I recommend using steel L-brackets with lag screws designed for concrete or wood. For added security, I installed steel plates behind the drywall at key load points, similar to how builders reinforce load-bearing walls in commercial construction. Always match your hardware’s weight ratings with your planned load—overestimating slightly provides an extra safety margin. For detailed guidance, check out these heavy-duty garage rack fixes.
Prepare Your Surface and Mark Drill Points
Preparation is like preparing a canvas before painting. Clean the area and double-check your measurements. Use a level and pencil to mark where your brackets or supports will go, ensuring even weight distribution. When I installed my rack, I used painter’s tape as a temporary guide, which prevented slipping—the same way a magician’s assistant helps hold props steady. For precision, double-check your markings before drilling; a misplaced hole could weaken support and cause failure. Remember, patience now prevents headaches later. Also, consider scribing the positions to match wall imperfections—this ensures a snug fit that adds strength and appearance.
Drilling and Anchoring with Confidence
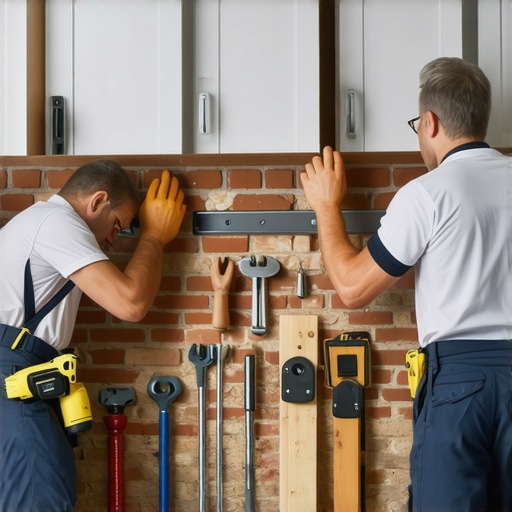
Heave heavy-duty hardware into the wall with authority—this is the core action. Use a hammer drill if concrete or masonry is involved. For example, I used a hammer drill to create holes in my basement concrete wall, paying attention to dust management to keep the workspace safe. When inserting anchors, follow the manufacturer’s instructions—some require expanding once inserted, like a cork in a bottle. Tighten fasteners gradually in a criss-cross pattern to distribute pressure evenly, much like tightening lug nuts on a car wheel. This approach prevents warping or cracking the support material. Never overtighten, as it can strip threads or damage the wall, reducing load capacity.
Secure the Frame and Load Test
Once mounted, attach your shelves or rack components tightly. Use a level to verify the evenness of the setup—an uneven shelf is like a leaning tower of Pisa; it risks imbalance. After installation, perform a load test with weight similar to your typical items. For example, I placed several loaded bins on my rack, checking for any signs of strain or movement. Make adjustments if necessary—adding extra anchors or reinforcing with steel braces. This step is crucial for safety and longevity. Remember, a well-secured rack isn’t just about holding your tools; it’s about ensuring your safety and protecting your belongings over time.
 Many DIY enthusiasts believe that installing built-ins, vanities, or storage solutions is straightforward—measure, drill, assemble, and you’re done. However, this oversimplification misses critical nuances that can make or break your project’s success. One common misconception is assuming that standard hardware and generic installation techniques suffice for all wall types and load requirements. In reality, different materials like drywall, concrete, or plaster demand tailored reinforcement strategies, which, if ignored, lead to sagging, cracks, or even failure over time. This is where expertise matters; knowing when to use steel brackets, hidden supports, or specialized anchors can save you from costly mistakes.
Another prevalent myth is that symmetry guarantees stability. While aligning shelves and vanities visually is important, the real secret lies in understanding load distribution and anchoring points. For instance, heavy stone vanities require reinforcement into wall studs and sometimes additional steel reinforcements—even if they appear visually supported—since surface anchors alone won’t bear the weight reliably. Neglecting this nuance can result in dangerous collapses, especially in busy households. For comprehensive guidance, exploring detailed installation hacks can be invaluable, especially when dealing with complex projects.
Why do so many built-in installations fail under heavy loads, even with seemingly correct procedures?
It turns out that many installers underestimate the importance of proper load calculations and surface reinforcement. Experts emphasize that understanding the structural properties of your wall materials and load-bearing thresholds is essential—something that often gets overlooked in DIY attempts. For example, a homeowner installing a custom built-in bookshelf might assume anchoring into drywall suffices, but a study by the American Institute of Architects highlights that most drywall anchors are only rated for light loads. For heavy items, attaching into wall studs and reinforcing the wall from behind are critical steps. Ignoring these advanced details often leads to sagging or dangerous detachment over time. To avoid this trap, always consult specialized guides or professionals, especially when working with heavier or more complex setups.
External insights from construction experts underscore that the key difference between a durable installation and a failure lies in recognizing subtle structural details. For instance, the use of steel wall ties or steel braces, as recommended in several expert home improvement articles, significantly enhances the safety and longevity of heavy built-ins. Remember, proper reinforcement isn’t just about going heavy; it’s about understanding how different components work together to distribute weight effectively. For more nuanced strategies and to avoid costly missteps, I recommend reviewing advanced installation techniques and expert advice, which can be found in related guides on [custom cabinetry](https://customcabinetrypro.com/creative-built-ins-for-seamless-storage-and-home-aesthetics).
Have you ever fallen into this trap? Let me know in the comments.
Invest in Quality Tools for Reliable Installation
To ensure your heavy-duty garage racks and built-ins stand the test of time, the right tools are essential. I personally swear by infrared laser levels, which provide precise horizontal and vertical alignment, minimizing installation errors. Unlike traditional bubble levels, laser levels facilitate quick, accurate measurements across extended distances, saving time and avoiding misalignment that can compromise stability.
For drilling into tough materials like concrete or brick, a hammer drill equipped with a diamond-tipped bit is non-negotiable. This combination ensures clean, accurate holes without overheating or damaging the wall material. I’ve found that an impact driver with a set of high-torque, short-shank screwdriver bits speeds up assembly, especially when securing heavy brackets or anchors.
Don’t overlook safety gear—wearing a reliable dust mask and safety goggles protects you during drilling and grinding, especially when working with old drywall or masonry. These tools, used properly, dramatically reduce the risk of mishaps and help achieve professional-quality results that last for years.
Software Can Streamline Your Storage Projects
Adopting planning software like SketchUp or Home Designer Suite allows you to visualize your storage solutions before physical installation. I use these tools to map out optimal shelf heights, support placement, and load distribution—key factors for long-term durability. Visualizing your layout beforehand helps prevent costly mistakes, such as placing support anchors where studs don’t exist or oversizing shelves for unsupported drywall.
For homeowners aiming to scale their storage solutions in the coming years, CAD software enables detailed modeling for custom builds that are easily adjustable. This foresight ensures your investment remains effective as your storage needs grow or change, reinforcing the importance of thorough planning.
Maintain Your Storage Systems to Sustain Performance
Long-term results depend on regular maintenance. Check support brackets and fasteners biannually—tighten loose components and replace any corroded hardware promptly. Applying protective coatings, such as rust-resistant paint or sealant, extends the life of metal supports, especially in humid environments.
For wooden supports or shelves, inspecting for warping, cracking, or pest damage helps prevent sudden failures. Implementing a routine inspection and maintenance schedule, supported by a checklist from trusted sources, ensures your garage storage remains secure, functional, and safe for years to come.
How do I maintain my garage storage systems over time?
Consistent upkeep includes tightening fasteners, replacing corroded hardware, and addressing any structural issues immediately. Using specialized tools like torque wrenches guarantees fasteners are secured to manufacturers’ specifications, preventing over-tightening or loosening that can compromise support integrity. Regular inspections and proactive repairs keep your investment performing well, even as your storage demands evolve—consider consulting detailed guides on reinforcement techniques to stay ahead of potential issues.
Looking ahead, advancements in smart monitoring systems may soon offer real-time alerts for support fatigue or instability, further safeguarding your long-term storage solutions. Embracing these innovations now can future-proof your garage, making maintenance more straightforward and ensuring systems continue to serve reliably in 2026 and beyond.
The Hardest Lesson I Learned About installation, built-ins, vanities, storage solutions
One of the most valuable lessons I discovered was the importance of never rushing the wall assessment process. Early on, I skipped careful stud location checks, assuming drywall alone could handle the weight. The result was a sagging shelf within months. Now, I always dedicate time to accurately locate studs, wall material types, and load points before starting any installation. This seemingly small step saves time and prevents costly errors down the line.
3 Myths About installation, built-ins, vanities, storage solutions That Held Me Back
First, I believed that using standard drywall anchors was sufficient for heavy-duty storage, but I learned these are only rated for light loads. Second, I thought that visual symmetry guaranteed stability—until one heavy shelf tipped because support wasn’t properly reinforced. Third, I assumed that once brackets were bolted in, the job was done; in reality, periodic check-ups are essential to maintain safety. Busting these myths has transformed my approach to garage storage.
What Experts Won’t Tell You About installation, built-ins, vanities, storage solutions
Even seasoned professionals emphasize that understanding your wall’s structural integrity is crucial. They often recommend behind-the-wall reinforcement like steel braces or mounting into wall studs, especially for heavy gear. Moreover, experts advise performing load tests after installation—applying weight gradually to ensure stability. My own experience followed this advice, and the confidence it brought made future upgrades much smoother.
Curated Resources to Elevate Your Garage Setup
- Smart Storage Solutions Guide: This comprehensive resource helped me plan optimal use of space and select appropriate hardware. It’s packed with tips for different wall materials, making DIY installation safer and more reliable.
- Heavy-Duty Anchor Reviews: Trusted by professionals, these reviews helped me choose anchors that truly support significant weight, preventing sagging and potential accidents.
- CAD Planning Software: Visualizing the layout before drilling saved me from placement errors. It’s an indispensable tool for complex projects involving multiple supports and loads.
Your Next Step Starts Here
Now that you’ve learned these insights, it’s time to put them into action. A well-installed garage rack isn’t just about organization; it’s about safety and peace of mind. Remember, mastering installation techniques today paves the way for a more durable and efficient storage system in 2026. Don’t hesitate to tackle your project with confidence and care. Share your experiences or questions below—let’s build a safer, more organized garage together!
,
Related Posts
7 Steel Bracing Fixes for Sagging 2026 Garage Storage Racks
Ever opened your garage and felt that sting of disappointment…
How to Anchor 2026 Garage Cabinets to Uneven Brick Walls
You know that frustrating moment when you try to hang…
How to Support Heavy 2026 Garage Shelves on Aging Brick
Have you ever flipped on the garage light only to…