I vividly remember the first time I installed a heavy built-in shelf in my living room. It was a beautiful unit, sturdy and sleek—until a few months later when I noticed the drywall starting to crack and the entire thing pulling away from the wall. That sinking feeling? I’ve been there, and I know many homeowners have faced this frustrating dilemma.
It turns out, the weight of modern custom built-ins is often underestimated, leading to drywall failures and costly repairs. The good news? With a few smart strategies, you can reinforce your walls and prevent those heavy installations from tearing off drywall in the future.
Why Heavy Built-ins Threaten Our Walls More Than Ever
The problem isn’t just the weight; it’s how that weight is supported. Traditional drywall anchors simply can’t handle the load of substantial shelving, cabinets, or entertainment units. According to home improvement experts, improper support can cause drywall to sag or even fall apart under stress, risking damage to your wall and your investment. Early on, I made the mistake of overloading with generic anchors, which only made the situation worse. This experience taught me the importance of using the right support system from day one.
Is It Really Worth the Extra Effort and Cost?
Many homeowners wonder whether reinforcing drywall is necessary or just an over-the-top precaution. Trust me, neglecting proper support can result in costly damage and unsafe installations. Reinforcing support isn’t just about avoiding mess; it’s about ensuring safety and longevity. Plus, exploring effective solutions early can save you headaches down the line. For more ideas on stylish yet sturdy solutions, check out built-in storage ideas that balance form and function.
Now, let’s dive into five proven fixes that will help you secure your heavy built-ins and keep your drywall safe and sound for years to come.
Secure the Wall Frame First
Begin by locating wall studs using a stud finder—this is your foundation for every support. Mark their positions clearly. In my experience, relying solely on drywall anchors for heavy shelves is a recipe for disaster. Once the studs are marked, attach a sturdy ledger board directly to the studs using long lag bolts. This board distributes the weight evenly across the wall, preventing drywall pull-out. Think of it like building a bridge—solid supports underneath mean stability for the entire structure.
Use Steel Brackets for Reinforcement
Choose Heavy-Duty Brackets
Opt for steel L-brackets or bracket strips rated for high loads. I once installed a custom media unit and used thin brackets, which bent under weight. Upgrading to thicker, steel brackets, and securing them into studs, provided peace of mind. Position these brackets every 16 to 24 inches along the support board to create a reinforced backbone, akin to adding ribs to a torso for strength.
Install Steel Wall Ties or Cleats
Steel wall ties anchor the built-in frame directly to the wall, preventing side-to-side movement and sagging. I sank steel cleats into the wall and screwed them into the frame’s underside, creating a hidden yet robust support system. These are especially effective for floating vanities or cabinets that rest on the wall—think of them as invisible braces that hold everything firm without sacrificing style.
Distribute Weight with Back Panels and Support Blocks
Attach a back panel made of plywood or MDF to strengthen the entire unit. For heavy shelving, I added horizontal support blocks between the studs, securing shelves to these blocks rather than just drywall anchors. This is like placing a load-bearing wall inside your built-in—ensuring the weight isn’t just supported at one point but spread across a durable surface.
Incorporate Custom Fasteners and Anchors
Standard toggle bolts can fail under substantial weight. Instead, use lag bolts combined with heavy-duty anchors designed for drywall or masonry, depending on your wall type. When installing a heavy pantry for my kitchen, I used ¼-inch lag bolts into wall studs with washers, creating a secure anchorage that held even the heaviest items without shifting. Visualize it as giving your built-in a set of steel bones to handle the strain.
Final Tips for Long-Term Durability
Always double-check the alignment and level before tightening everything down. Avoid overloading shelves beyond their rated capacity; if you need to store particularly heavy items, ensure support is directly attached to the studs. To discover more innovative storage options that balance aesthetics with stability, explore built-in storage ideas. Remember, thoughtful reinforcement at each step preserves your wall’s integrity and keeps your stunning built-ins looking flawless for years.
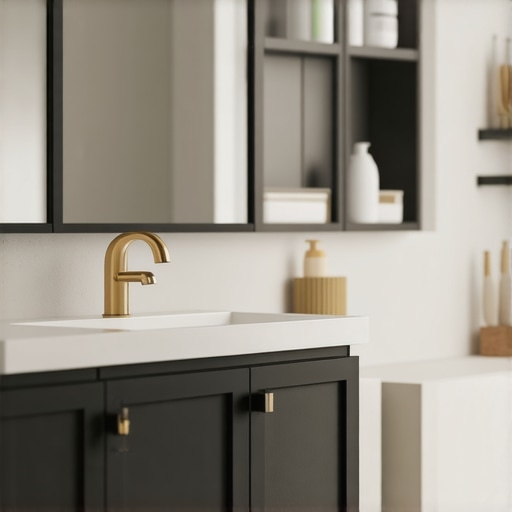
When planning a vanity or built-in storage, many homeowners rely on common assumptions that can sabotage their results. One widespread misconception is that standard hardware and generic installation methods suffice for heavy, high-end vanities or built-ins. In reality, overlooking the detailed nuances—such as precise support framing, specialized fasteners, and wall compatibility—can lead to sagging, damage, or even safety hazards. For instance, many believe that drywall anchors are enough for wall-mounted vanities, but expert builders emphasize that securing directly into wall studs using lag bolts offers a far more durable solution. This is especially critical for heavy countertops, integrated electronics, or dense cabinetry, where distributed load support is essential.
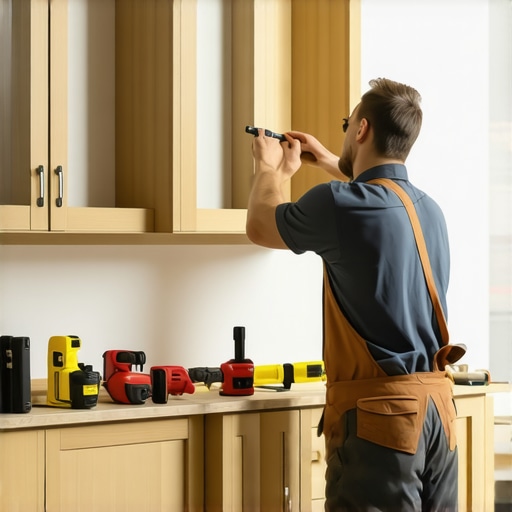
Keep It Running Smoothly: My Top Maintenance Tools
Staying on top of your built-in vanities and storage solutions requires more than just initial installation; it demands regular upkeep with reliable tools. I swear by a high-quality cordless drill like the DeWalt DCD791D2 because its torque and battery longevity make it perfect for tightening or adjusting support brackets without hassle. Pair this with a digital stud finder, such as the Zircon StudSensor e50, which I prefer over traditional models due to its precision in locating studs behind dense drywall—crucial for re-support or reinforcement tasks. These tools ensure that your installations remain secure over time, preventing sagging or damage.
For measuring, I rely on a laser level like the Bosch GCL100-50, which delivers accurate, self-leveling lines that simplify aligning shelves or cabinetry. Maintaining your vanities and built-ins involves periodic inspections; a small inspection mirror helps peek behind tight, inaccessible spots, ensuring supports and fasteners remain tight and secure. For cleaning, microfiber cloths combined with compressed air can keep dust and debris away from delicate support points, prolonging the lifespan of your installations.
Tools I Recommend for Scaling Your Storage in Style
As your needs grow, so does the complexity of your storage systems. To scale effectively, investing in a modular system like the Kreg Jig K5 can be transformative. It allows me to quickly create strong, hidden joints when adding new shelves or sections, seamlessly expanding storage without compromising stability. For custom support framing, a cordless angle grinder with a diamond blade helps cut metal or wood supports precisely, ensuring any additional units integrate perfectly with existing structures.
Furthermore, a cordless impact wrench such as the Milwaukee M18 Fuel can fasten heavy-duty brackets and anchors into studs, saving time and effort during larger-scaled projects. Incorporating these tools means you’re prepared to adapt your storage as your needs evolve, without calling in expensive contractors. To visualize how this adaptability can work in your space, check out built-in storage ideas that combine smart design with durable support systems.
How do I maintain long-term performance of my built-ins?
Regularly inspecting fasteners, support structures, and seals ensures your installations stay sturdy. Applying a bit of thread lock compound on critical fasteners can prevent loosening over time, especially in areas exposed to humidity or temperature fluctuations. Also, scheduling annual check-ups with precise tools like a digital stud finder and level can preempt sagging or shifting, saving you from costly repairs later. Inspired by expert advice from industry leaders, I encourage you to adopt a proactive maintenance routine tailored to your specific storage solutions. Try using a laser level during your next adjustment to ensure everything stays perfectly aligned over the years.
Lessons I Wish I Learned About Sturdy Built-ins
One of my earliest mistakes was assuming that fancy brackets alone would carry the weight of my heavy vanities. The lightbulb moment was realizing that proper support framing and studying wall structures are essential for durability. I discovered that overestimating drywall anchors can lead to costly repairs, and the importance of integrating reinforcement techniques into my planning process cannot be overstated. This lesson transformed my approach from trial-and-error to a methodical system that ensures safety and longevity.
Another insight came when I underestimated the significance of supporting frameworks behind cabinetry. After installing a custom floating shelf that sagged over time, I learned that distributing weight across studs and using steel support strips is vital. Now, I make it a point to visualize the entire support ecosystem before drilling, which saves me frustration and money long-term.
Finally, I realized that regular maintenance and inspections are game-changers. Using precision tools like digital stud finders and laser levels, I monitor support integrity over the years. This proactive approach keeps my built-ins looking immaculate and functioning flawlessly, proving that planning for the long haul is the key to enduring style and strength.
Tools That Elevate My Built-in Game
My must-have toolkit starts with a high-quality cordless drill, like the DeWalt DCD791D2, which provides reliable power for securing heavy brackets and supports. Paired with a Zircon StudSensor e50, I can accurately locate wall studs behind dense drywall, ensuring every support is anchored correctly. For precise alignment of my shelves and cabinets, I rely on the Bosch GCL100-50 laser level, which delivers perfect lines every time.
To ensure my storage solutions remain stable as I expand, I use joint-making tools like the Kreg Jig K5, enabling me to create strong, concealed connections. For cutting support materials precisely, a cordless angle grinder with a diamond blade is invaluable. These tools collectively save me time, prevent errors, and give me confidence in my installations, making my built-ins both beautiful and doubtlessly durable.
Your Turn to Build with Confidence
Transforming your space with heavy built-ins is a rewarding challenge that requires attention to detail and the right support strategies. Remember, the secret lies in understanding your wall’s structure, employing the appropriate reinforcement techniques, and maintaining regular check-ins to keep everything solid. When equipped with proper tools and knowledge, you’re not just installing storage—you’re creating a lasting feature that enhances your home’s style and safety. Ready to start reinforcing your next project? Dive into the inspiring built-in storage ideas and design your perfect solution today. What heavy fixture are you planning to install next? Share your goals below!
Related Posts

Expert Guide to Built-in Cabinets & Storage Solutions Installation
I remember the exact moment I realized I had bitten…
Fixing Gaps: How to Scribe Custom Built-in Cabinets to Uneven Walls
I'll never forget the time I installed a beautiful set…
Best Built-in Storage Solutions & Vanities Installation Guide 2025
I remember the first time I realized my home lacked…