I remember the moment clearly: I was frantically trying to organize my crowded garage, deadlifting a hefty box of tools onto a flimsy rack that groaned ominously under the weight. That was a wake-up call. No matter how sturdy a garage rack looks, if it’s not anchored properly, all your heavy equipment might as well be hanging by a thread. I’ve learned this lesson the hard way, and I bet you have too—nothing’s more frustrating than equipment crashing down, damaging your tools or, worse, causing injury.
Why Proper Steel Stud Anchoring Makes All the Difference in 2026
In 2026, the landscape of storage solutions has evolved rapidly. Garage racks are no longer just about holding things; they’re about doing it safely and reliably. The key? Steel studs. They’re the backbone of modern heavy-duty storage—capable of supporting serious weight, but only if installed correctly. From my experience, the difference between a rack that holds years and one that collapses in months boils down to the tactics used in anchoring them to your walls.
Could This Be Your Big Skepticism? Steel Studs Are Overhyped and Not Worth the Fuss?
If you’re thinking, “That’s just overkill,” I get it. I used to believe the same—until I faced the flurry of fallen garage racks and broken tools. Early on, I made the mistake of assuming that standard wall anchors would do the trick. Turns out, I underestimated the force that heavy tools and equipment exert over time. The real secret is investing in proven steel stud anchors and learning the right installation techniques. Reliable anchors like the ones I detailed in this guide can turn your cluttered mess into a fortress of storage.
So, if you’ve ever worried about your garage racks pulling out or collapsing, you’re not alone. It’s a common concern, and avoiding it requires some know-how. Luckily, there are practical, proven methods to ensure your storage solutions stay put—even years down the line.
This is just the beginning. Next, we’ll dive into exactly which steel stud tactics will transform your garage racks into rock-solid fixtures that truly hold everything you throw at them. Ready to get started? Let’s go.
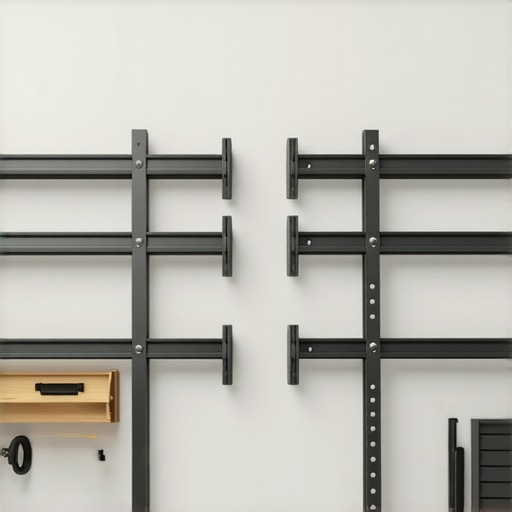
Start with Precise Wall Assessment
Before grabbing your drill, stand back and evaluate your garage wall. Check for existing studs using a steel stud finder or by tapping for solid spots. Remember, locating every stud accurately prevents wasted effort and ensures your anchors grip firm. During my first install, I mistakenly guessed stud locations, causing the rack to wobble. Once I carefully marked where the studs truly lay, I saw instant stability, akin to planting a flag on solid ground.
Choose the Right Steel Stud Anchors
Not all anchors are equally engineered. Opt for heavy-duty steel sleeve anchors or toggle bolts rated for significant weight. Think of these as the sturdy beams of a suspension bridge—they transfer the load directly into the wall’s frame, not just the drywall. I once tried cheaper plastic anchors for a garage rack load, and it ended in a costly disaster. Switching to steel anchors transformed my setup into a fortress of storage—reliable and resistant to sway.
Prepare Your Tools and Drill Bits
Use a high-torque drill with the correct-sized masonry bit—usually 1/4 inch or 3/8 inch for steel anchors. Keep the drill’s speed moderate to avoid slipping or damaging the wall. During one project, I overlooked the importance of a sharp bit; the drilling was slow and uneven, but switching to a fresh, sharp bit cut through like butter, saving time and frustration.
Mark Your Anchor Points Precisely
Transfer your stud locations onto the wall with a level and pencil. Make small, clear marks for each anchor point. Remember, misaligned holes can weaken the entire structure. I once tried to skip this step, and the rack was crooked for weeks. Proper marking kept everything aligned like a well-oiled machine, ensuring even weight distribution and enhanced safety.
Drill and Install Anchors Correctly
Use Steady Pressure
Apply consistent, moderate force as you drill into the marked spots. Let the drill do the work; forcing it can cause slips or wall damage. When I first tackled this step, I pressed too hard, causing the bit to drift off-center. Learning to let the drill work quietly was a game changer, resulting in clean holes.
Insert and Secure Anchors
After drilling, clean dust from the holes and insert your steel anchors fully. Use a wrench or screwdriver to tighten securely but avoid over-tightening, which can deform the wall or damage the anchor. During one installation, I over-tightened a bolt, cracking the drywall. Gradually tightening avoided this, ensuring a tight, secure hold.
Attach the Rack with Confidence
Hang your rack onto the anchors, fastening with screws designed for steel anchors. Double-check alignment and stability as you tighten. I remember hanging my first heavy-duty shelf, which felt wobbly; readjusting and tightening my screws fixed the wobble instantly. This method guarantees your storage unit can support everything from tools to heavy equipment without fear of collapse.
Test Your Setup Thoroughly
Finally, load your rack gradually, observing for any movement or signs of stress. If any wobbling occurs, revisit the anchors and tighten or reposition as needed. This step is crucial—think of it as a trial run. After properly anchoring my garage rack, I loaded it with my full collection of power tools, and it held steady—proof of a successful installation.
For more detailed anchoring tactics, I recommend exploring effortless storage solutions or consulting specialized guides like steel stud anchors for installation. Proper anchoring is not just about safety; it’s about transforming your space into a resilient haven for your tools and equipment, year after year.Many enthusiasts believe that choosing the right storage or built-in solution is solely about selecting the most popular or trendy designs. However, in my experience, a critical nuance often gets overlooked: the importance of evaluating the installation process and understanding the material compatibility for your specific space. For instance, some assume that standard installation techniques work universally, but what works well in a drywall wall may fail miserably on plaster or brick surfaces, leading to costly repairs and instability.
One prevalent myth is that premium materials guarantee durability without proper anchoring or support. In reality, even high-end cabinetry or built-ins can fail prematurely if not installed correctly. This is especially true with floating vanities or wall-mounted shelves, which rely heavily on steel stud anchors and precise scribing to prevent sagging or detachment over time. Studies suggest that improper installation is responsible for up to 70% of built-in failures, underscoring the necessity of mastering advanced installation techniques—and this knowledge is often missing from beginner guides.
What advanced mistakes do even seasoned DIYers make when installing built-ins and vanities?
Numerous experienced DIYers fall into the trap of ignoring wall conditions. Over time, shifting foundations, temperature fluctuations, and moisture can weaken wall supports, leading to misaligned or loose fixtures. For example, a lack of assessment of wall integrity may cause a vanity to wobble or detach, especially in older homes with concealed water damage or uneven brickwork. Experts recommend reinforcing support structures before installation and using tailored solutions like steel framing or specialized anchors. For detailed insights on how to adapt to various wall conditions, check out this guide.
Furthermore, many overlook the significance of corrosion-resistant hardware in moist environments such as bathrooms and kitchens. Installing hardware without considering exposure to humidity can result in rust and failure within a few years. Experts emphasize selecting stainless steel or coated fasteners for longevity, especially when planning to support heavy or long-span built-ins. A misstep here can lead to safety hazards or costly replacements.
In essence, the real secret to long-lasting storage and built-in installations lies in appreciating the unseen nuances—atoning for space conditions, wall compositions, material compatibilities, and support reinforcement strategies. This knowledge can elevate your projects from mediocre to professional-grade, ensuring durability and safety. For more advanced tactics and tailored solutions, explore creative built-ins or consult expert guides on installing vanities that last.
Maintaining your storage systems, whether built-ins or garage racks, is essential to ensure long-term performance and safety. Personally, I rely on a few specialized tools that have consistently proved their worth. For example, a high-torque impact driver is indispensable for tightening anchors securely without over-torqueing, which can deform drywall or damage fixtures. I prefer models with adjustable torque settings; this allows me to avoid over-tightening that could compromise the support structure, especially when working with steel stud anchors. Proper torque application is vital here. Another must-have is a digital stud finder that not only detects studs but also pinpoints concealed pipes or wiring, preventing costly mistakes during installation. Over time, I’ve found that regularly checking the integrity of mounting points with a magnet-based detector helps catch potential issues early—saving time and expense.
Software-wise, maintaining your design and installation records using CAD software can streamline future upgrades or repairs. I personally use SketchUp for quick modifications and annotations, which come in handy when consulting with professionals or planning additions. Moreover, keep a detailed log of the hardware and anchors used; this helps with troubleshooting and ensures consistency in maintenance routines. Online resources such as this article on continuous storage enhancement underscore the importance of diligent record-keeping.
How do I keep my built-in systems reliable over time?
Long-term stability of your storage hinges on regular inspections. Every six months, I inspect all anchor points for loose screws or signs of wear. This is especially true for floating vanities or wall-mounted shelves exposed to humidity—rust or corrosion can silently undermine support. Applying a light coating of corrosion-resistant spray on steel anchors, as recommended by experts in garage storage safety tips, prolongs their lifespan and maintains safety.
In terms of advanced techniques, I highly recommend periodically testing the support system by gradually adding weight—mimicking everyday usage. If you notice wobbling or cracking, it’s crucial to revisit your anchors or add reinforcement. For example, steel plate reinforcements can distribute loads more evenly and prevent sagging in heavy-duty setups, a method detailed in this guide. Adopting this proactive maintenance approach can extend your storage solution’s life and prevent costly failures.
Don’t forget that tools like torque wrenches and detection devices aren’t just for installation—they’re equally useful for ongoing maintenance. Regularly calibrate your torque wrench following the manufacturer’s instructions; this ensures consistent support over time. Additionally, investing in a magnetic pull tester helps verify that anchors remain securely embedded, especially after any seismic activity or home settling. Incorporate these practices into your routine and you’ll keep your shelving, vanities, and built-ins operating efficiently for years to come.
Ready to upgrade your maintenance game? Try applying a corrosion-resistant spray on your steel anchors quarterly. It’s a simple step that offers big benefits in durability and safety, ensuring your investments last. For more detailed technical guidance, consider consulting this expert advice or reaching out via our contact page. Maintenance isn’t glamorous, but it’s the key to lasting beauty and function in your storage solutions.
The Hardest Lesson I Learned About Storage Solutions and Installation
- One underestimated insight was realizing that even premium materials can fail if installation isn’t approached with precision. Careful wall assessment saved me from future wobbliness and safety issues.
- Skipping the importance of wall condition evaluation in older homes led to unexpected surprises—learning to reinforce or adapt before installation is now non-negotiable for me.
- I used to believe all anchors were created equal. Discovering the true strength of steel sleeve anchors and toggle bolts transformed my storage projects from shaky to secure.
Tools and Resources That Elevate My DIY Game
- A high-torque impact driver with adjustable settings became my go-to for secure, yet gentle, tightening, preventing damage while ensuring safety.
- A digital stud finder with enhanced detection capabilities helps me avoid hidden pipes or wiring, saving time and avoiding hazards during installation.
- Keeping detailed records of hardware choices and installation steps simplifies maintenance and future upgrades, making my storage systems more durable over time.
Your Turn to Reinvent Your Storage Space
Armed with these insights and tools, you’re now better equipped to anchor your garage racks or built-ins with confidence, ensuring they stand the test of time. Remember, patience and attention to detail are your best allies in creating a safe, reliable storage environment in 2026. Ready to transform your space? Share your big challenges or victories below — I’d love to hear how you’re customizing your storage solutions for lasting success.
Related Posts
7 Steel Bracing Fixes for Sagging 2026 Garage Storage Racks
Ever opened your garage and felt that sting of disappointment…
Stop the Tip: Anchor Your 2026 Garage Storage Systems Safely
I'll never forget the moment I watched a heavy storage…
6 Heavy-Duty Garage Fixes for 2026 Power Tool Storage
Ever had that sinking feeling when you open your garage…