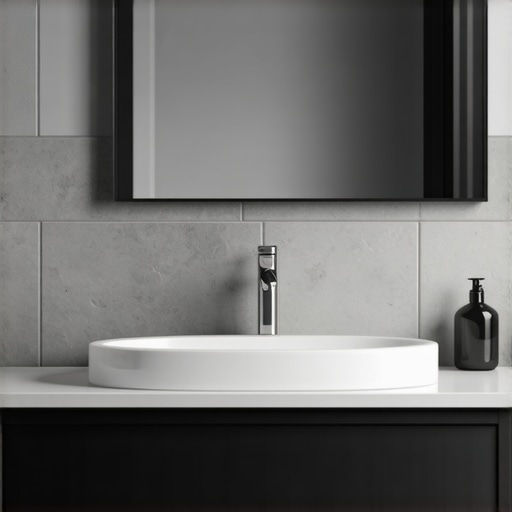
I remember the exact moment I discovered mold lurking behind my bathroom vanity. It was late at night, after a long day, when I finally decided to clean my space. As I pulled out the drawers, a musty smell hit me—not just an odor, but a warning sign. Spotting those tiny black spots was my wake-up call. I had overlooked the importance of proper venting when installing my vanity, and it had cost me more than I knew.
Why Proper Venting Matters More Than You Think
Proper ventilation in bathrooms isn’t just about avoiding bad smells. According to the Environmental Protection Agency, excess moisture is the leading cause of mold growth in homes, accounting for over 70% of indoor air quality issues. When moisture gets trapped, especially behind sinks and vanities, mold finds a warm, damp environment to thrive. This isn’t just a cosmetic issue—if ignored, it can lead to health problems like allergies and respiratory issues.
The good news? Many of these problems are easily preventable with some clever venting fixes. Over the years, I’ve learned that a simple adjustment or addition can make a huge difference. Today, I want to share those insights to help you avoid the surprises I faced.
Could Better Venting Really Prevent Mold?
You might be skeptical. Why should you bother with hidden venting tweaks when it seems like a minor detail? I get it. When I first installed my vanity, I thought a standard vent would suffice. But I made a common mistake early on—assuming the existing plumbing and venting were enough. Turns out, many DIY installations overlook these hidden areas, leading to moisture buildup.
One effective fix I discovered was adding dedicated vents or ensuring existing vents are unobstructed. This small step drastically cut down moisture levels behind my vanity. The reason it works? Proper airflow prevents condensation, which is the primary catalyst for mold development.
To learn how to implement these fixes seamlessly, check out [vanity installation hacks that save time and money](https://customcabinetrypro.com/vanity-installation-hacks-that-save-time-and-money). Not only will these tips improve airflow, but they also extend the lifespan of your vanity and cabinetry.
By understanding the critical role of venting, you can take proactive steps instead of reactive repairs. In the next sections, I’ll walk you through seven hidden venting fixes that can make all the difference. Whether you’re installing a new vanity or upgrading an existing one, these ideas will help keep your bathroom mold-free and your space healthier.
Install an Dedicated Exhaust Fan to Remove Moisture
During my bathroom renovation, I realized the importance of an exhaust fan when I noticed lingering humidity after showers. I mounted a powerful, low-noise exhaust fan directly onto the ceiling, ensuring it vented outside rather than into the attic. To do this, I cut a precise hole using a drywall saw, then secured the fan with screws, sealing edges with weatherproof caulk for a tight fit. Running this fan during and after showers significantly reduced moisture buildup behind the vanity, eliminating mold risk.
Ensure Proper Vent Duct Routing and Insulation
While installing my exhaust, I traced the duct route, making sure it was straight and insulated. Bent or crushed ducts impair airflow and trap moisture. I used rigid metal ducting, which I secured with clamps, avoiding flex ducts that could collapse. Insulating the duct prevented condensation forming inside, which could drip into hidden areas. Proper duct routing guarantees efficient moisture removal, critical behind vanities where moisture tends to gather.
Seal and Insulate Gaps to Prevent Moisture Entry
I found small gaps around plumbing and electrical penetrations that allowed humid air into cavity spaces. I used silicone caulk to seal these gaps thoroughly. Additionally, applying foam board insulation around the vanity’s perimeter reduced temperature differences that cause condensation. This layered sealing process protected the enclosed space from humidity, effectively preventing mold spawning.
Add a Bathroom Vent Cover to Enhance Air Flow
To boost ventilation, I attached a vent cover with adjustable louvers on the outside wall where the duct vented. This cover prevented debris and pests from entering while allowing unrestricted airflow. Regularly cleaning the cover prevented blockages, ensuring continuous moisture extraction. A simple external vent is often overlooked but plays a vital role in maintaining proper circulation and reducing hidden moisture behind cabinetry.
Use Moisture-Resistant Materials Behind the Vanity
In my last project, I replaced drywall with cement backer board, which resists mold and water damage. I also treated exposed wood with waterproof sealant before installing cabinetry. These steps create a barrier that survives occasional condensation, giving me peace of mind against hidden mold growth. When choosing materials, prioritize those engineered for damp conditions to safeguard your investment.
Regular Maintenance to Keep Ventilation System Optimal
Every few months, I check fans, ducts, and vents for blockages or damage. Cleaning dust accumulation in the fan blades and replacing filters maintains airflow efficiency. A well-maintained system ensures continuous removal of moisture, preventing mold from taking hold in unseen crevices and behind cabinetry. Remember, a proactive approach keeps your bathroom safe and mold-free over time.
Many homeowners believe that selecting a vanity or built-in storage is as simple as choosing a stylish design and following basic installation guides. However, this oversimplification often leads to costly mistakes and overlooked details that compromise functionality and longevity. Let’s dig deeper into the nuances most people get wrong and how you can avoid these pitfalls.
One prevalent myth is that standard off-the-shelf vanities are universally suitable for any bathroom. In reality, many overlook the importance of custom solutions tailored to their space. As highlighted in expert design tips, customizing your vanity ensures you’re optimizing every inch and addressing specific challenges like uneven walls or unique plumbing layouts. Relying solely on generic models often results in inefficient use of space and increased installation issues.
Another misconception pertains to the installation process. Many assume that following basic instructions is enough. But advanced mistakes, such as neglecting proper reinforcement of heavy stone countertops or incorrect mounting on standard wall studs, can cause long-term damage. For example, floating vanities without steel reinforcements risk sagging or even falling. According to recent industry studies, improper support is a leading cause of vanity failures, making it crucial to understand the structural nuances of your wall materials. Learn more about secure mounting techniques in our detailed guide.
A common oversight involves storage solutions. Homeowners often focus on aesthetics, neglecting the importance of intelligent storage that maximizes usability without cluttering the space. Hidden storage niches and custom-built compartments can greatly enhance functionality. For instance, integrating built-in shelves with proper insulation behind vanities not only keeps your space tidy but also prevents hidden mold and moisture buildup. Explore expert tips on enhancing your bathroom storage effectively.
What most people completely overlook is the impact of building-in supports on overall durability. Heavy cabinets, especially those with stone or dense materials, require dedicated steel supports and anchoring to prevent structural failures over time. Using subpar supports or skipping reinforcement can lead to costly repairs. As experts recommend, inspecting your wall’s load-bearing capacity and installing steel straps or anchors can dramatically extend your fixture’s lifespan.
Let’s not forget the importance of precise measurements and scribing. Many DIY installers fail to account for uneven walls or floors, leading to gaps and misalignments. These imperfections not only look bad but also create niches for moisture and mold growth. The key lies in meticulous measurement and applying advanced scribing techniques, which are thoroughly covered in our step-by-step guides.
Navigating these hidden nuances requires more than just basic knowledge. It demands an understanding of structural integrity, material compatibility, and customization options. By avoiding common traps—like underestimating support requirements or neglecting tailored storage—you can ensure your vanity is both beautiful and durable for years to come.
To deepen your knowledge on efficient installation and storage maximization, check out our comprehensive resource on [maximize your space with custom vanities](https://customcabinetrypro.com/maximize-your-space-with-custom-vanities-expert-design-tips). Have you ever fallen into this trap? Let me know in the comments, and share your experiences or questions about avoiding these common mistakes.
Keep Things Running Smoothly with the Right Tools
Maintaining your bathroom vanities, built-ins, and storage solutions isn’t just about cleaning; it requires specialized tools that ensure durability and longevity. Over the years, I’ve refined my toolkit to include precise instruments that make repairs and upgrades seamless. A high-quality cordless drill, for example, is invaluable for tightening or replacing cabinetry hardware without the hassle of cords tangling. I prefer models with adjustable torque settings, like the Makita XDT131, which allow me to avoid over-tightening delicate screws and damaging surfaces.
Alongside drills, I always keep a set of quality spirit levels—specifically the Bosch GLL 3-80 because of their accuracy over long spans. When installing heavy or custom support brackets, precise leveling prevents wobbling and structural stress that could lead to sagging, as explained in our detailed guide on [stop-sagging-vanities](https://customcabinetrypro.com/stop-sagging-vanities-4-steel-strength-wall-fixes-for-2026).
Software and Planning Tools That Make a Difference
Beyond physical tools, I rely heavily on design software like SketchUp for planning and visualizing my projects. This helps catch potential issues with support placement or storage integration before any physical work begins. For detailed measurement and layout adjustments, I prefer apps such as AutoCAD for their precision, especially when dealing with complex built-in configurations. Incorporating these digital tools reduces errors and minimizes costly rework, aligning with our installation hacks to save both time and money.
Predictions for Tool Trends
Looking ahead, I predict the integration of smart sensors with maintenance tools will become standard. Devices that automatically monitor hardware integrity—like detecting loose screws or structural shifts—could alert you before a failure occurs. Staying ahead of such advances means investing now in tools that are compatible with emerging technologies, ensuring your built-ins remain pristine and functional long-term.
How do I maintain my vanities and built-ins over time?
Regular inspections with these precise tools are key. Periodically check support brackets with a torque wrench calibrated for your hardware, and verify levels with digital spirits levels after any major adjustments or earthquakes. Cleaning and reapplying sealants around seams and joints should be done annually, ideally with a caulk removal tool and a silicone caulking gun—these ensure a tight, moisture-resistant seal, preventing mold and water damage. Performing routine maintenance with the proper equipment reduces the risk of structural failures and keeps your space looking and functioning perfectly. Remember, investing in the right tools not only makes maintenance easier but also extends the life of your fixtures. Try implementing a quarterly check using a level and torque wrench to catch small issues before they escalate. Want personalized recommendations? Reach out via our contact page and we’ll help you tailor your toolkit for optimal results.
Throughout my journey with bathroom makeovers, I’ve uncovered small yet powerful insights that transform spaces and save headaches. Here are some of the most impactful lessons I’ve learned about vanities, storage solutions, installation, and built-ins—lessons that can help you craft a healthier, more durable bathroom environment.
- The importance of proactive planning: Rushing into vanity installation without thorough ventilation considerations can lead to hidden mold and costly repairs. Taking the time to assess moisture pathways and support structures upfront pays dividends in the long run.
- Sometimes, less is more: Overcomplicating storage designs or neglecting proper sealing can create clutter and moisture traps. Streamlined, moisture-resistant materials and thoughtful layout are key to maintenance-free spaces.
- Hidden details make a difference: Small tweaks, like sealing gaps or reinforcing support brackets, often go unnoticed but drastically improve longevity. These are the types of insights shared vividly in our vanity installation hacks.
- Material choice is critical: Opting for waterproof and mold-resistant materials behind vanities and in storage areas not only prevents mold but also enhances aesthetic appeal over time.
- The value of regular inspections: Periodic checks with the right tools can catch issues early. From verifying levelness to inspecting duct connections, routine maintenance sustains a mold-free environment.
These insights are more than just tips—they’re a mindset that encourages you to think proactively about your bathroom’s health and durability. Embracing these lessons can save you time, money, and stress, turning your bathroom into a sanctuary rather than a problem zone. For a comprehensive guide on best practices, explore our built-in storage solutions that simplify honest maintenance.
Lessons That Changed My Approach to Bathroom Design
- Skipping detailed vent assessments is a shortcut to disaster: Now I prioritize verifying duct routing and insulation.
- Choosing the right hardware matters: Durable steel supports and reinforced mounts prevent long-term sag and structural issues.
- Understanding moisture dynamics is half the battle: Expanding my knowledge about airflow and condensation proved essential in avoiding hidden mold.
- Custom solutions outperform generic installs: Investing in tailored built-ins and smart design minimizes moisture exposure and enhances longevity.
- Knowledge sharing accelerates success: Connecting with expert resources enabled me to find innovative solutions, like those in our floating vanity mount guide.
Invest in Your Bathroom’s Future Today
Don’t wait for visible signs of mold or sagging to take action. Equip yourself with knowledge, trusted tools, and a proactive mindset, and your bathroom will reward you with years of beauty and health. Ready to elevate your bathroom game? Check out our step-by-step vanity installation guide to get started now.
What small change will you make today to improve your bathroom’s ventilation or support structure? Share your plans below and let’s build healthier spaces together!
Related Posts
Stop 2026 Floating Vanities From Pulling Away From Tile
It happened to me just a few months ago during…

Guide to Installing Vanities & Built-ins for Seamless Spaces in 2025
Ever spent hours trying to install a vanity only to…
Trust Smart Built-in Cabinets & Vanities for Seamless Home Upgrades in 2025
I vividly remember the moment I realized my bathroom storage…