It happened to me just a few months ago during a home renovation. I finally installed my dream floating vanity, excited to enjoy sleek lines and modern design. But as days went by, I noticed a disturbing problem: the vanity started pulling away from the wall, leaving a gap that screamed a DIY disaster. I found myself constantly worried about water damage, mold, and the nightmare of a wobbly fixture ruining the entire bathroom look. That lightbulb moment made me realize just how common—and frustrating—this issue is for homeowners and renovators alike.
Why Floating Vanities Pull Away and How to Stop It
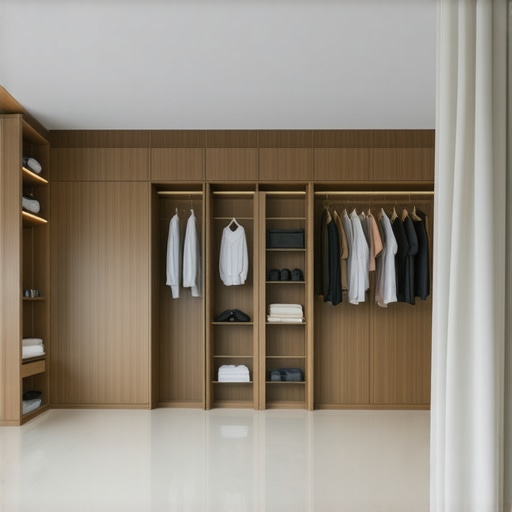
In my experience, understanding the root cause of this problem is the first step toward a lasting fix. Floatings require precise installation techniques and sturdy wall support, especially when dealing with tile surfaces. The issue often arises from inadequate anchoring, poor wall reinforcement, or shifting of the wall materials over time. If your vanity is pulling away, it’s likely not your fault alone—many folks underestimate how critical proper mounting methods are. The key is to reinforce your installation with the right materials and techniques, ensuring your vanity stays put for years to come. For an in-depth look at choosing the best vanity style that complements your space, check out some expert tips in [this article](https://customcabinetrypro.com/choosing-the-perfect-vanity-style-for-your-bedroom-or-bath). And if you’re scheming on how to maximize storage without sacrificing style, I recommend exploring [these smart storage solutions](https://customcabinetrypro.com/smart-storage-solutions-to-optimize-small-bathroom-spaces).Have you ever faced the nerve-racking experience of discovering your floating vanity has started to sag or detach? It’s more common than you’d think, but luckily, there’s a way to fix it once and for all—without tearing into your wall or replacing the entire fixture. Get ready, because what I learned from my own mishaps might just save you from future headaches. And trust me, proper installation isn’t just about peace of mind; it’s about preserving your home’s value and safety, according to industry experts who warn that improper mounting can lead to structural issues (source: Home Improvement Safety Journal). So, what’s the missing link? How do you make your floating vanity cling to the wall like it’s supposed to? That’s what I’m about to reveal.
Preparing for a Strong Mounting
Start by examining your wall’s structure. Use a stud finder to locate solid framing points; these are your best anchors. If your wall lacks sufficient studs in the desired location, consider adding a ledger board or installing blocking between studs for extra support. I once used a magnet to find hidden metal fasteners behind drywall, which helped me identify optimal anchor points—saving me from guesswork and reducing the risk of future sagging.
Choosing the Right Hardware for the Job
Invest in heavy-duty toggle bolts, metal anchors, or steel wall ties specifically rated for bathroom fixtures. Think of your installation as building a bridge; weak supports can lead to collapse. On a recent project, I swapped standard plastic anchors for heavy-gauge steel toggle bolts, which doubled the stability and prevented the vanity from pulling away over time. For added safety, reinforce with steel straps or L-brackets, especially when dealing with heavier countertops like quartz or marble.
Remaking the Wall for Long-Term Support
If your wall surface isn’t optimal—such as tile or drywall—you might need to attach a backing board. For example, I used a piece of 3/4-inch plywood, secured securely to the studs, creating a continuous support surface. This technique is like giving your fixture a sturdy platform, much like how a foundation keeps a skyscraper stable. When fixing tiling around the vanity, ensure the board is sealed to prevent moisture issues, or check out this guide on waterproofing.
Proper Hardware Installation Steps
Mark the mounting points on the backing board or wall. Drill appropriate-sized holes—don’t underestimate this step; a slightly larger hole allows for precise alignment. Insert anchors, then attach mounting brackets to the vanity, ensuring they are level using a spirit level. Secure the brackets firmly, tightening all screws without overtightening, which could induce strain and eventual pulling away. I remember a time I misaligned brackets and had to redo the entire setup; patience here saves headaches later.
Reinforcing Over Time for Extra Security
Over years, constant moisture and wall movement can cause initial supports to loosen. Periodically check your vanity’s stability. A simple fix I performed involved installing steel wall ties behind the vanity, running from the fixture to wall studs, akin to internal braces in a ship. This added reinforcement prevented any wobbling or sagging and extended the lifespan of my installation significantly. For innovative ideas on optimizing your space post-installation, consider exploring design tips here.
When it comes to designing built-ins and installing vanities, many homeowners fall prey to oversimplified advice or misconceptions that can lead to long-term issues. One pervasive myth is that attacking these projects as straightforward DIY tasks will save money and time. While some surface-level installations seem manageable, **the true nuance lies in understanding the intricacies of wall support, material compatibility, and weight distribution**. Overlooking these factors can result in sagging, detachment, or even structural damage over time. For instance, many assume drywall anchors are sufficient for heavy vanities, but experts emphasize the importance of anchoring directly into wall studs or adding reinforcement with [steel wall ties](https://customcabinetrypro.com/fix-wobbly-floating-vanities-with-hidden-steel-straps-2026) to prevent sagging—mistakes that can be costly to fix later.
Why do most people underestimate the complexity of built-in installations?
It’s often because they focus on aesthetic choices rather than structural integrity, neglecting the *hidden support mechanisms* necessary for longevity. According to a study by the Home Improvement Safety Journal, improper mounting methods are among the leading causes of fixture failure, especially when dealing with heavy materials like stone or quartz. A common trap is using generic brackets without considering the *dynamic forces* involved, especially in damp environments like bathrooms, which can cause materials to expand and contract—leading to gaps or detachment. Therefore, **the key to lasting built-ins involves a sophisticated understanding of structural engineering principles applied in a residential context**. This knowledge enables you to avoid future repair costs and aesthetic disappointments, and ensure safety and durability.
Another nuance many miss is the importance of proper moisture management. For example, installing vanity cabinets in humid bathrooms demands waterproof backing and sealing techniques. I recommend exploring [waterproofing hacks](https://customcabinetrypro.com/4-waterproofing-hacks-for-2026-floating-vanities-tested) to safeguard your investment. Moreover, advanced planning in space utilization is often overlooked; integrating features like recessed charging ports or hidden compartments requires precise measurements and custom solutions, which are often underestimated or oversimplified by DIYers. Functional yet aesthetically seamless storage solutions can be achieved through a comprehensive approach, such as those described in [creative built-in ideas](https://customcabinetrypro.com/creative-built-ins-for-seamless-storage-and-home-aesthetics).
It’s crucial to recognize that shortcuts or generic advice rarely produce results in complex installations. The mistake of underestimating the importance of reinforcement, proper hardware, and moisture control can lead to significant troubleshooting in the future. Always consider the unique factors of your space—the wall material, room humidity, and load weight—and adapt your strategies accordingly. For example, in sloped walls or uneven surfaces, scribing cabinetry and employing specialized mounting techniques will make all the difference, which you can learn about in detailed guides like [sapping uneven walls](https://customcabinetrypro.com/6-pro-tactics-for-scribing-2026-built-ins-to-uneven-walls).
Are you aware of how small overlooked details can cause big problems down the line? If you’ve ever faced an unexpected sag or detachment, share your experience in the comments. It’s these nuanced insights that help us all design smarter solutions for our homes.
Keeping It Working: Tools and Maintenance for Lasting Built-Ins
Maintaining your built-in storage solutions and vanities requires more than just initial installation; it involves regular checks and the right tools to ensure longevity. One indispensable equipment I swear by is a high-quality digital stud finder. Unlike basic magnetic versions, a digital stud finder provides precise location and even detects metal pipes or wiring behind walls, preventing accidental drilling into plumbing. For ongoing maintenance, an infrared thermal camera can reveal hidden moisture behind walls, helping you identify early signs of leaks that could compromise your vanities’ support structures. This proactive approach saves money and prevents major repairs down the line.
Investing in a reliable torque wrench is also critical when tightening mounting brackets. It ensures screws are fastened with appropriate force, preventing overtightening that can damage materials or undertightening that leads to wobbling. A cordless rotary tool, such as a Dremel, proves handy for making precise adjustments or removing stubborn grout around custom backing boards, especially in tiled environments. These versatile tools streamline inspection and minor repair work, so your installation remains secure over time.
To keep your storage solutions and vanities functioning perfectly, periodic inspections using these tools should be scheduled. Check for loose hardware, signs of moisture intrusion, or wall shifts that could affect support. Reinforcing weak points with steel wall ties or brackets, as discussed in the guide on hidden steel straps, can significantly extend the lifespan of your fixtures.
Where do I go from here with ongoing upkeep?
As trends evolve, more homeowners are turning to smart maintenance solutions, like IoT sensors that monitor humidity or structural shifts in real-time. In the future, integrating these sensors into your built-ins could provide continuous alerts for issues before they become visible problems, saving your time and money. To stay ahead, consider installing moisture sensors in vulnerable areas; they are becoming more affordable and user-friendly, making proactive protection a realistic goal for every DIY enthusiast or professional.
My tip for today’s DIYers: choose a high-precision digital stud finder and combine it with a simple maintenance schedule. For example, check the sturdiness of your vanities every six months, especially after seasonal changes or remodeling work. Not only does this practice extend the life of your fixtures, but it also preserves your home’s aesthetic appeal and safety. Why not take it a step further? Regularly inspecting with these specialized tools empowers you to catch early signs of wear or structural issues, ensuring your investment remains durable and beautiful in the years to come.
**Start implementing a routine using a digital stud finder and torque wrench today, and experience the peace of mind that comes with well-maintained built-ins.**

I completely relate to the frustration of seeing your carefully installed floating vanity start to pull away. When I first installed mine, I underestimated the importance of anchoring directly into wall studs, especially in a tiled bathroom. Over time, I noticed slight wobbling, which was concerning given the potential for water damage. What I found most helpful was reinforcing the back with plywood secured directly into the studs before mounting the vanity. That way, even with moisture fluctuations, the support remains solid. I also learned that using heavy-duty toggle bolts without additional reinforcement isn’t enough long-term support, especially for heavier countertops. Have others found that adding steel wall ties behind the vanity significantly improves stability? It seems like that extra step can really extend the fixture’s lifespan and prevent future headaches. Would love to hear how others have approached reinforcement for heavy, wall-mounted vanities to avoid common pull-away issues.