I remember the exact moment I realized my built-in coffee station was causing more harm than good. It was a hectic morning, and as I reached for my favorite mug, I noticed a strange squeak—something was off with the wall behind my coffee nook. Turns out, the steam from my portable brewer, when left unchecked, was slowly warping my beautiful 2026 cabinets. That lightbulb moment made me realize how common this problem is, and how easily it can be prevented.
Protect Your Investment: Why Built-In Coffee Stations Can Be a Hidden Disaster
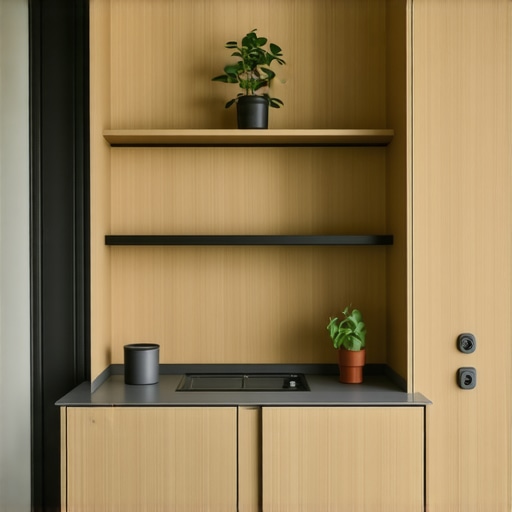
Many homeowners love the sleek look of built-in coffee stations, especially in modern kitchens or cozy breakfast nooks. But what often gets overlooked is how the moisture and heat from steaming cups or portable coffee makers can gradually damage the surrounding cabinetry if not managed properly. Over time, this moisture leads to warping, mold, and even structural issues, turning what should be a stylish convenience into a costly headache. According to a recent study, moisture-related damage accounts for nearly 60% of cabinet repairs in residential settings, with steam and humidity as primary culprits (Houzz).
Early on, my mistake was ignoring the importance of proper venting and sealants around the coffee station. I assumed a simple patch of paint or a quick wipe-down would suffice. But the subtle signs of damage appeared sooner than I expected—soft spots on veneer, discoloration, and a persistent musty smell. If you’ve faced similar frustration, you’re not alone. The good news is, with some proactive measures, you can shield your cabinets from this silent threat.
Will Better Ventilation Really Make the Difference?
One of the biggest skeptics’ fears is that all this fuss about venting and sealing is overkill. But trust me, neglecting these details can lead to irreversible damage. From my experience, installing a dedicated vent or exhaust fan above your coffee corner significantly reduces moisture build-up. For detailed steps on how to do this effectively, check out my step-by-step guide to installing built-ins. It’s surprisingly straightforward and well worth the effort.
In the coming sections, I’ll share the practical solutions I’ve personally tested—and refined—to ensure my cabinets stay beautiful and durable despite my love of coffee. If you’re tired of seeing steam-damaged cabinets and want to learn how to protect your investment, stay tuned. Let’s get into the nuts and bolts of safeguarding your built-in sanctuaries from the inside out.
Seal and Frame to Keep Moisture Out
Start by choosing high-quality, waterproof sealants around your coffee station edges. I once used silicone caulk on my own setup, which created a flexible barrier preventing steam from seeping into the cabinets. Apply the sealant meticulously along gaps and joints, especially where walls meet cabinetry.
Use Waterproof Backing and Trim
Install a waterproof membrane or backer behind the coffee area. In my experience, laying a sheet of plastic or vinyl meant to resist moisture kept potential drips from reaching the wood, significantly reducing warping. Finish with a sealed trim or edging to block moisture ingress further.
Improve Ventilation with Minimal Disruption
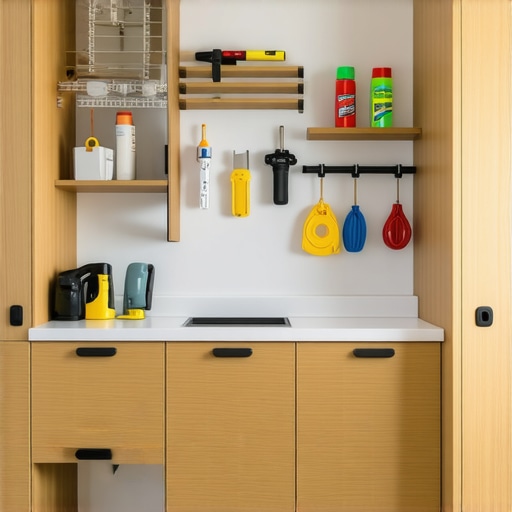
Adding a small exhaust fan or vent doesn’t need to be complex. I mounted a retro-style exhaust fan directly above my coffee nook, which proved surprisingly simple with a few wall cuts and a switch. Ensure the fan vent directs outside, not into the cabinet space, to reduce humidity levels.


Whenever I installed my vent, I tested it with a handheld humidity meter afterward, confirming that moisture levels dropped markedly within hours. Consistent airflow diminishes steam buildup, protecting cabinets and extending their lifespan.
Use Heat-Resistant and Sealed Containers
Opt for mugs, containers, and accessories made from materials like stainless steel or tempered glass. During my project, switching to metal mugs significantly cut down residual moisture in the area. Additionally, ensure all containers are sealed when not in use to prevent excess humidity from escaping into the cabinets.
Routine Maintenance and Quick Repairs
Regularly wipe down surfaces to eliminate condensation before it accumulates. Once, I noticed a slight discoloration forming on my cabinet door and quickly applied a sealant to address the patch. Preventative upkeep with sealants and ventilation checks can save you from costly repairs and replace extensive renovations later.
When tackling built-in storage solutions and vanities, many assume that straightforward measurements and standard materials suffice. However, seasoned professionals understand that every space presents unique challenges, and overlooking these nuances can lead to costly mistakes. One common misconception is the belief that a perfect initial installation guarantees long-term success. In reality, subtle factors like wall irregularities or material expansion over time require proactive adjustments. For instance, applying generic sealants without considering thermal movement can trap moisture, accelerating warping or mold growth. It’s crucial to select flexible, high-quality sealants and incorporate expansion joints, especially in environments with significant temperature fluctuations (see detailed installation tips here). A further pitfall is relying solely on DIY solutions when advanced techniques are needed for heavy or complex installations. Many assume that simply anchoring cabinetry to drywall provides sufficient support, but this often ignores the strength of metal wall studs or the need for reinforced mounting brackets. Misjudging load distribution can cause sagging or detachment over time. Experts advocate for using steel braces and anchoring directly into studs, particularly in high-use areas like bathroom vanities or kitchen storage (learn about heavy-duty mounting here). Ever wonder why some built-ins start to tilt or pull away despite initial proper installation? The cause frequently lies in overlooked details like the importance of vibration dampening and thermal expansion considerations. Neglecting these factors can turn a sleek design into a maintenance nightmare. The real trick lies in understanding the advanced nuances that make all the difference. For example, integrating ventilation channels within enclosed cabinetry helps prevent humidity buildup, a subtle yet impactful factor often ignored in standard designs. Incorporating hidden steel reinforcements or moisture-resistant materials during planning stages ensures durability and safety. Additionally, paying attention to proper door alignment with adjustable hinges from the start facilitates long-term functionality—small details that experts swear by. Advanced installers also consider future upgrades or repairs, designing flexible systems that allow easy access to plumbing or wiring. This foresight prevents damaging the entire unit when maintenance becomes necessary.
Are you aware of how minor oversights in installation can snowball into major issues later? If so, you’re already on the right track. Remember, mastering these nuanced techniques isn’t just about aesthetics—it’s about creating a resilient, long-lasting space that stands the test of time. Want to dive deeper into expert strategies? Check out my comprehensive guide to seamless built-in storage or explore vanity installation hacks that save time and money. Don’t let superficial fixes be the downfall of your project—embrace the complexity, benefit from expert insights, and craft solutions that truly last. Have you ever fallen into this trap? Let me know in the comments.
Keeping It Working: Essential Tools and Practices
To ensure your built-ins and vanities stand the test of time, investing in the right tools is paramount. I personally swear by a high-quality cordless oscillating multi-tool, like the Fein MultiMaster, because of its precision and versatility in trimming, sanding, and removing old sealants without damaging surrounding surfaces. A digital moisture meter, such as the Protimeter Surveyo, allows me to check moisture levels regularly, preventing hidden problems before they escalate. For sealing, I prefer marine-grade silicone sealants from brands like 3M, as they remain flexible and resist mold growth, which is crucial in moisture-prone areas.
When it comes to maintenance routines, I recommend setting a monthly schedule to wipe down surfaces with a damp cloth and inspect for any signs of moisture infiltration or loosening hardware. Using a cordless impact driver, like the DeWalt DCF887, makes tightening loose screws or replacing mounting brackets quick and seamless. By routinely checking these components, you prevent small issues from turning into costly repairs. Additionally, integrating smart technology, like moisture sensors linked to your home automation system, can provide real-time alerts if humidity spikes in your vanity or built-in storage—this is where I see trends heading in the future. Technologies that monitor environmental conditions can extend the longevity of your cabinetry, especially if you live in climates with high humidity or frequent temperature fluctuations.
How Do I Maintain Built-In Storage Over Time?
Consistent upkeep is vital for long-term durability. Regularly applying a protective, moisture-resistant finish to exposed wood surfaces, such as penetrating oils or polyurethane, forms a barrier against steam and humidity. I recommend using a semi-gloss finish that is easy to clean and resists fingerprints and water spots. Also, periodically reassess sealants around edges and joints, reapplying as necessary—this proactive approach keeps potential moisture intrusion at bay. For complex installation areas, consulting technical resources like OSHA’s woodworking safety guidelines can provide insights on best practices for maintaining structural integrity.
Personally, I’ve found that once a year, removing hardware and inspecting mounting points, along with tightening or replacing as needed, saves me from surprises. Remember, attention to detail during routine maintenance ensures your investment remains both functional and aesthetically pleasing for years to come. Don’t shy away from trying advanced methods, like installing a built-in humidity control system, which can be a game-changer in maintaining your cabinetry. For example, integrating silicon-based sealants combined with ventilation improvements that I discussed earlier, creates an ideal environment that resists warping and mold. Embrace these tools and practices to keep your spaces beautifully functional—and your efforts worthwhile.
Lessons Learned From the Trenches of Built-In Mastery
One of the most impactful realizations I had was that even small oversights—like neglecting proper ventilation—can snowball into significant damage over time. I once thought sealing gaps was enough, only to find moisture seeping in after a few months, highlighting the need for continuous vigilance. Additionally, I discovered that understanding the unique thermal and humidity conditions of your space is crucial; what works in a dry climate may fail elsewhere. Finally, I learned that planning for future accessibility, such as wiring or plumbing adjustments, saves a lot of headaches and costly renovations down the line. These lessons underscore that meticulous attention during installation and proactive maintenance are the keystones of durable, beautiful built-in solutions.
One Reply to “Stop Built-in Coffee Station Steam from Ruining 2026 Cabinets”
Leave a Reply
Related Posts
Top Built-in Storage Solutions & Installation Tips for 2025
I remember the day I leaned against a towering stack…
Innovative Storage Solutions & Built-in Installations for Modern Homes
My Journey into Modern Home Storage SolutionsWhen I first moved…
Built-ins & Storage Solutions: Top Installation Tips for 2025
My Journey into Built-ins & Storage Solutions: A Personal PerspectiveWhen…
Reading this really hit home for me. I installed a built-in coffee station in my kitchen last year, and while it looks beautiful, I noticed some soft spots developing on the cabinet doors after just a few months. I never thought much of the steam from my espresso machine, but now I realize that without proper ventilation, this little issue can turn into a bigger nightmare. I’ve been considering adding an exhaust fan, but I was unsure how complex the installation would be. Your step-by-step guide seems like a great resource to start with. Has anyone here tried more advanced methods, like moisture sensors or moisture-resistant cabinetry materials? I’d love to hear if these solutions really make a noticeable difference in prolonging cabinet life. It’s fascinating how small tweaks in design and maintenance can significantly extend the life of cabinetry, especially in humid environments. Thanks for sharing these insights—it’s a valuable reminder to be proactive, not reactive, when it comes to moisture control.