I remember the moment vividly—trying to secure a charming wooden entryway bench against my old, flaky plaster wall, only to have it wobble or, worse, pull out completely after just a few weeks. Frustration blossomed, and I wondered if I was missing a secret technique. It turned out, anchoring furniture to ancient walls isn’t just a matter of screwing things in; it’s about understanding the quirks of aging plaster and how to work with its flaws, not against them. If you’ve ever wrestled with a wobbly bench or hesitated to install one because you fear it might damage your vintage wall, you’re not alone. Many homeowners face this challenge, but the good news is, there’s a way to do it confidently and securely.
Why Proper Anchoring Makes All the Difference
The key to a stable, lasting installation lies in choosing the right anchoring method tailored for aging plaster walls. Over the years, I’ve learned that many DIY fix-ups fail because of a simple mistake: assuming that drywall anchors or standard screws will suffice. This misconception can lead to damage or instability, which is the last thing anyone wants in their inviting entrance. In fact, improper installation can cause the wall to crumble or the fixture to become a hazard. Fortunately, with a bit of knowledge and the right tools, you can ensure your entryway bench stays put, no matter how delicate or brittle your walls have become. To explore innovative ways that protect your walls while securely anchoring heavier items, take a look at this article on storage solutions—it offers some surprisingly useful insights.
Is This Approach Really Worth the Effort?
I’d be lying if I said I didn’t make my fair share of mistakes early on. I once tried to anchor a sizable storage bench using only standard plastic anchors—thinking it would hold just fine. Spoiler: it didn’t. The bench shifted, and I was left with a stubborn hole in the wall, plus a hefty repair job. That experience taught me the importance of understanding the wall’s material and selecting anchors designed specifically for plaster. According to building experts, using steel toggle anchors or chemical wall anchors can significantly improve load support without compromising the wall’s integrity. If you’re contemplating your first installation, I recommend reading more about step-by-step installation—it saved me from plenty of rookie mistakes and can do the same for you.
Now that I’ve shared my personal journey, let’s dive into proven techniques that will make your anchoring project both safe and successful. Whether your walls are perfectly sound or showing their age, there’s a reliable method waiting for you.
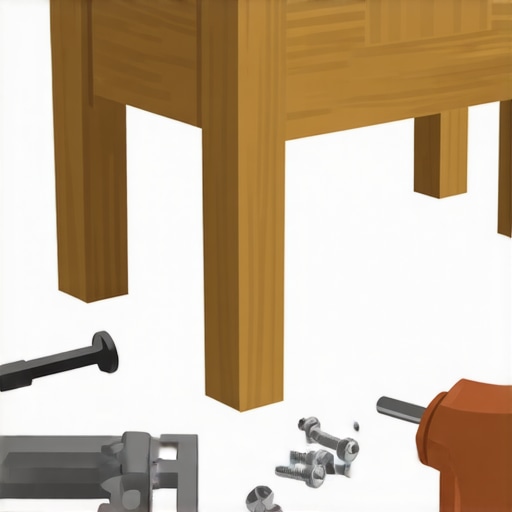
Select the Right Anchors for Old Walls
When I installed my vintage wooden bench, I chose toggle bolts designed for plaster walls, which expanded behind the surface, providing a firm grip without risking crumbles. Think of anchors as the muscles behind your project—strong, reliable, and tailored for the task. Avoid generic plastic anchors; instead, opt for steel toggle or chemical wall anchors that distribute weight evenly. Remember, the key is matching the anchor type to your wall’s age and material; a mismatched anchor can turn a simple install into a wall-repair nightmare. For heavier fixtures, consider using step-by-step installation guides to ensure you’re selecting the best hardware and techniques.
Pre-Drill with Precision and Confidence
Instead of hammering blindly, I used a drill with a masonry bit to create pilot holes. This step is like preparing a path—you prevent wandering and unnecessary damage. Measure carefully where each anchor will sit, mark your spots clearly, and drill slowly to avoid cracking the plaster. For instance, I once misaligned a hole, which caused the anchor to wobble, leading to an unstable mount. To fix that, I learned to scribe the wall with painter’s tape before drilling and double-check measurements. These small steps make a big difference and are detailed in vanity installation hacks.
Ensure Solid Mounts by Properly Distributing Load
Once the anchors are in place, attach your vanity or bench using screws that snugly fit and engage the anchors fully. The analogy here is likening your mounting to a tight hug—firm, even, and supportive. Don’t overtighten, as this can stress brittle plaster, but ensure the fixture doesn’t sag. I used steel brackets and spaced them strategically along the wall for extra stability, especially on longer surfaces. For especially heavy pieces, I reinforced the mounting with custom steel supports, which you can learn more about in heavy-duty reinforcement techniques. Proper load distribution is vital to prevent pulling or crumbling over time.
Check and Reassess Before Finishing
After mounting, test the stability by applying gentle pressure to the fixture—like giving it a little handshake. If it wobbles, identify the weak points and tighten or reposition accordingly. I once failed to do this and found out later that my bench had shifted, leaving marks on the wall. Now, I always revisit the installation to ensure nothing shifts, especially after several days. This ongoing assessment keeps your fixtures safe and your walls intact. For more nuanced fixes and advanced reinforcement techniques, explore rock-solid mounting tips. By following these concrete steps, you can confidently anchor heavy furniture and built-ins into delicate old walls, creating a sturdy, safe, and beautiful space.Many homeowners assume that all vanities, storage solutions, and built-ins are straightforward, but in my experience, there’s a lot more nuance involved. A frequent misconception is believing that standard hardware or DIY techniques suffice for all wall types and fixture weights. However, overestimating your wall’s strength or choosing the wrong anchors can lead to costly repairs or dangerous collapses. For example, many assume that toggle bolts are suitable for every situation—yet, in brittle old plaster walls, they might cause crumbling or fail to provide adequate support. It’s crucial to understand the specific properties of your wall material to select the right anchoring method, such as steel toggle or chemical anchors, which distribute load more effectively and prevent damage. Plus, many overlook the importance of proper load distribution—using brackets, reinforcement, and thoughtful placement can significantly extend the lifespan of your installation. Additionally, a common trap is neglecting precise measurement and pilot hole drilling. Skipping these steps might seem minor, but they can cause misalignments, increased wall stress, or gaps that compromise both aesthetic and safety. Experts recommend measuring multiple times, using painter’s tape as a guide, and drilling carefully to avoid cracks. Moreover, I often see people tighten screws excessively, thinking it secures the fixture, but overtightening can stress brittle plaster and lead to cracking. Instead, tighten just enough to engage the anchor securely. Finally, a surprisingly overlooked aspect is post-installation checks. Testing stability after installation helps identify weak points before they turn into failures, saving time and money. For advanced techniques and detailed guides, I recommend exploring this installation guide—it’s a game changer. Have you ever fallen into this trap? Let me know in the comments. To further enhance your projects, consider innovative storage and reinforcement approaches that protect your investment and elevate your home’s style.
Investing in Reliable Tools for Longevity
To ensure your custom vanities and built-in storage solutions stand the test of time, having the right tools at your disposal is crucial. I personally rely on a high-quality rotary hammer drill, like the Makita HR2475, because its power and versatility allow me to drill into various wall materials, including brittle plaster, without causing damage. Paired with a set of precision masonry drill bits, I can pre-drill holes accurately, minimizing wall stress and ensuring secure anchors. A digital stud finder, such as the Zircon MultiScanner, helps locate safe mounting points, especially when dealing with walls that have internal framing or hidden utilities. Using these tools consistently makes the installation process smoother and reduces the risk of future issues like wobbling or loosening.
Adopting Effective Maintenance Routines
Maintaining your built-ins involves more than just initial installation; it’s about proactive upkeep. Regularly inspecting for loose screws, especially around heavy fixtures, can prevent sagging or damage over time. Applying a light coat of silicone-based lubricant to moving parts or hinges ensures smooth operation and prevents squeaks. For surfaces exposed to moisture, such as bathroom vanities, using a marine-grade sealant on seams and joints helps prevent water infiltration and mold growth. Additionally, scheduling periodic checks of back braces or support brackets can catch early signs of stress, allowing you to reinforce or adjust them before major failure occurs. This preventative approach extends the lifespan of your investments and keeps everything functioning flawlessly.
Future Trends in Tool Technology and Materials
The ongoing evolution of construction and installation tools points toward smarter, more efficient solutions. For instance, laser-guided drills and magnetic stud locators are becoming more affordable, enabling even novice DIYers to achieve professional-grade results. Advances in adhesive technologies, like construction epoxies with longer working times and higher bond strength, are revolutionizing how built-ins are secured without traditional hardware. As materials like lightweight composites and reinforced plastics improve, the durability of shelving and fixtures will increase while reducing weight – a game-changer for overhanging or floating designs. Embracing these innovations now will prepare you for future projects that require less effort and yield better results.
How do I maintain my storage solutions and built-ins over time?
Incorporating a mix of routine inspections and strategic upgrades is vital. For example, periodically tightening all connections prevents loosening caused by vibrations or shifting structures. Applying protective finishes or sealants to surface materials safeguards against staining, warping, or moisture damage. If you notice signs of wear or instability—such as wobbly shelves or creaking joints—address them promptly using proper reinforcement techniques. For complex issues, consulting detailed guides like vanity installation hacks can provide step-by-step instructions. To streamline long-term care, I recommend setting a quarterly inspection routine, which allows you to catch problems early and apply fixes before they escalate. Incorporating these habits will ensure your storage solutions continue to serve confidently for years to come. Don’t hesitate to try out advanced reinforcement methods, like steel bracing or high-strength adhesives, to give your built-ins that extra layer of resilience and peace of mind.
Lessons Hidden in My Mounting Mishaps
The most valuable insight I gained was that patience trumps speed. Rushing through the pilot drilling or choosing the first anchor I found often led to failures or wall damage. Taking my time to measure, mark, and drill precisely saved me from repeat headaches. Another lesson was recognizing the importance of understanding wall material: brittle plaster isn’t the same as drywall, and each requires a tailored approach. I’ve also learned that consulting specialists or dedicated resources beforehand can prevent costly mistakes—it’s an investment in peace of mind. Lastly, I discovered that every wall has a story; acknowledging its age and quirks helped me adapt my installation strategies, resulting in secure, long-lasting fixtures.
One Reply to “How to Anchor 2026 Entryway Benches to Aging Plaster Walls”
Leave a Reply
Related Posts

Fix Floor Scuffs: 5 Best Feet for 2026 Entryway Benches
Imagine this: I was rushing out the door, eager to…
Stop 2026 Entryway Bench Wobble: 5 Hidden Sub-Floor Fixes
Ever stepped onto your entryway bench and felt it wobble…

6 Slim-Profile Entryway Bench Fixes for 2026 Battery Hubs
Imagine this: you're rushing out the door, juggling your keys,…
Reading this post resonated with me because I recently struggled with anchoring a vintage mirror into my old plaster walls. I used standard plastic anchors initially, but the mirror wobbled and eventually fell. It was a big learning curve understanding that specific anchors, like toggle bolts or chemical anchors, are a game changer for fragile surfaces. I also appreciated the tip about pre-drilling with painter’s tape; I never thought of that, but it sounds so simple and effective. My question is, how do you decide when to reinforce the wall with additional supports versus just switching to stronger anchors? Sometimes, I feel my walls are too delicate for any hardware to hold even with proper anchors. Would love to hear others’ experience on reinforcing especially old and brittle walls, as this is a common challenge I believe many of us face.