

I will never forget the distinct, slow-motion sound of my ceramic coffee mug sliding toward the center of my brand-new, eight-foot walnut desk. It wasn’t a ghost; it was gravity. I had spent nearly a month’s worth of weekends sanding, oiling, and obsessing over that slab, only to realize I had built a very expensive, very beautiful wooden hammock. My ‘minimalist’ dream of a long, leg-less span was literally collapsing under the weight of a single monitor and my own pride. I thought 1.5 inches of solid hardwood could defy the laws of physics. I was wrong, and that realization was a punch to the gut.
The Day My Dream Desk Started to Sink
In those early days of my workshop obsession, I made the classic mistake of thinking thickness equaled strength. I figured if I just used heavier material, it wouldn’t bow. But here is the hard reality: even the densest oak will eventually yield to its own weight over a long distance. It is a phenomenon engineers call ‘creep,’ and once it starts, you cannot just sand it away. I tried adding some hidden steel brackets for heavy-duty built-in office desks, but the span was simply too long for external fixes alone. That is when a retired cabinet maker friend of mine stopped by, saw my sagging masterpiece, and whispered about the ‘internal rib.’ Not an external brace that ruins the silhouette, but a secret skeleton hidden inside the desk itself.
Does This Internal Ribbing Secret Actually Work?
You are probably skeptical. I was too. You are likely thinking, ‘If I cut into my wood to add ribs, won’t that actually make it weaker?’ or ‘Is this just a torsion box with a fancy name?’ It is a fair concern. We have all seen why a built-in bookcase starts sagging and wondered if there is a better way than just shoving an ugly support leg in the middle. The answer is a resounding yes, but it requires a shift in how you think about structural integrity. According to structural engineering principles often cited by the American Wood Council, the stiffness of a beam increases significantly with its vertical depth, which is why internal vertical ribbing is the ‘cheat code’ for those massive spans.
Why Thick Wood Alone Fails the Test of Time
Today, I am going to show you how to use internal ribbing to achieve that ‘impossible’ floating look without the dreaded mid-span dip. We are not just talking about stopping floating shelf sag; we are talking about a structural overhaul that allows for massive, uninterrupted workspaces. This technique is what separates a shaky DIY weekend project from a professional-grade installation. Have you ever spent a fortune on a desktop or a custom vanity design only to watch it slowly turn into a bowl? I would love to hear about your own sagging horror stories—misery loves company, after all. Let us get into the practical steps so you never have to watch your coffee mug take an uninvited trip again.
Carving the Hidden Channel for Your Desk’s Spine
To transform a sagging slab into a rigid masterpiece, you first have to perform a little surgery. Think of it like creating a bone for your desk. You will need a plunge router and a straight edge guide. I typically mark out three parallel lines along the length of the underside, spaced about 8 to 10 inches apart. You want to plunge about two-thirds of the way through the thickness of the wood. When I first did this, I was terrified I would punch through the top of my walnut slab. I actually kept a scrap piece of the same wood next to me to test the depth first—a move that saved me from turning my desk into a very expensive piece of swiss cheese. If you are worried about the structural impact of these cuts, remember that stop-floating shelf sag with internal torsion box engineering works on this exact principle: removing internal mass to replace it with high-tension materials. 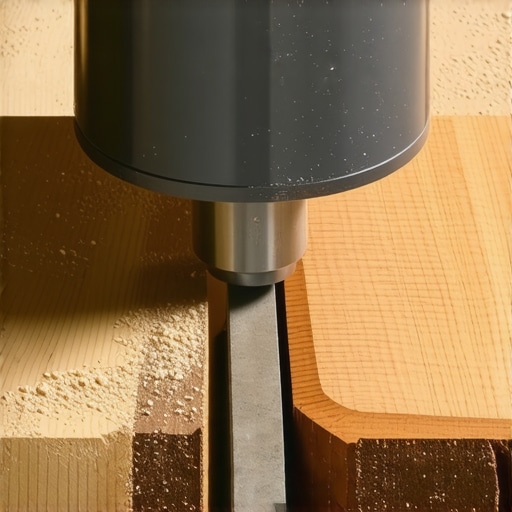
Choose the Right Material for the Internal Rib
Once those channels are cut, you are not just stuffing them with more wood. You need a material that resists stretching and bending better than the timber itself. For my heavy-duty builds, I swear by 1/2-inch thick cold-rolled steel flats or even square aluminum tubing for lighter loads. The steel acts like rebar in a concrete skyscraper. I once tried using a simple oak strip as a rib, thinking the grain orientation would be enough. Within three months, the oak had just bowed right along with the walnut. It was a wasted weekend. Now, I always go for metal. This is the same logic used when you need 4 internal steel stiffeners that stop massive bookcase shelves from turning into smiles.
The Epoxy Bond That Makes it Permanent
Just dropping a steel bar into a wood slot does almost nothing. For the ribbing to actually provide strength, it has to be perfectly bonded to the wood so they move—or rather, do not move—as one unit. This is where high-strength epoxy comes in. I fill the bottom third of the channel with epoxy, press the steel bar in, and then cap it with more epoxy or a thin wood shim. This creates a composite beam. It is messy, sticky, and you will definitely ruin a pair of gloves, but once that epoxy cures, that desk will be stiffer than a frozen board. It is a similar level of overkill to how to support quartz counters on custom floating vanities, where the weight of the stone requires the cabinetry to act as a structural bridge.
Testing the Span for Zero Deflection
Before you flip the desk over and call it a day, you need to verify the fix. I like to set the desk on its legs and literally sit on it—carefully. If I see even a millimeter of movement, I know I need to add the internal brace move for extra long floating shelves to the back edge for horizontal stability. On one office project, I neglected the horizontal rack and the desk wobbled side-to-side like a nervous puppy. I had to go back in and add a perpendicular rib just to stop the sway. It taught me that while vertical sag is the enemy of the coffee mug, horizontal sway is the enemy of the sanity.Most DIYers and even some seasoned pros fall into the ‘thickness trap.’ The common wisdom says if a 1-inch board sags, a 3-inch board will be three times as strong. While technically true in terms of the moment of inertia, you are also adding massive amounts of dead weight that the structure has to support 24/7. This is exactly why your heavy quartz vanity is cracking the cabinet frame; the material is so dense it becomes its own worst enemy. In my experience, a thinner 1.25-inch slab with strategically placed internal steel ribs is significantly more stable over a ten-year period than a massive, unreinforced 3-inch block of oak. The USDA Forest Products Laboratory notes in their Wood Handbook that the ‘modulus of elasticity’ is the defining factor in deflection, and by introducing steel, you are effectively hijacking a higher modulus without the weight penalty. 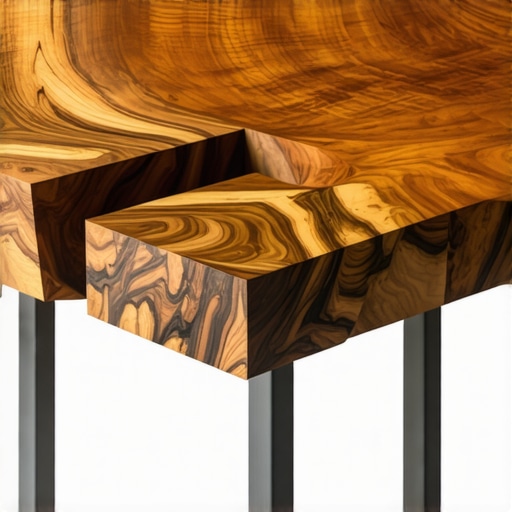
Can Steel Ribs Actually Crack Your Tabletop During Seasonal Changes?
This is the advanced question I get most often. The answer is a terrifying ‘yes’ if you do it wrong. Wood expands and contracts with humidity; steel does not. If you encapsulate a six-foot steel bar in a rigid epoxy and the humidity in your office drops to 10% in the winter, the wood will try to shrink while the steel stays the same size. Something has to give, and it’s usually your beautiful wood grain. To avoid this ‘Oops’ factor, I never epoxy the entire length of the bar. I glue the center 12 inches to lock it in place and let the ends ‘float’ within the channel, or I use a specialized flexible construction adhesive. If you are building for wet environments, you also need to look into 7 moisture barriers for vanities in high-humidity bathrooms to keep that expansion under control. Mastering these tiny details is what separates a piece of furniture from a lifelong heirloom. When you are planning your next build, do not just think about how it looks on day one; think about how it will fight physics in year five. When you maximize your space with custom vanities, remember that structural integrity and aesthetics are two sides of the same coin. Check out our expert guide to flawless vanity installation tricks and tips for more on managing these structural loads. Have you ever had a project literally pull itself apart because of seasonal shifts? Let me know in the comments—I have been there, and I know how much it hurts.To keep these massive spans from failing, you need more than just a good eye; you need the right kit in your workshop. I stopped relying on cheap hardware store levels years ago after a built-in media center ended up with a subtle 1/4-inch lean that haunted my dreams. Now, I don’t start a project without my Starrett 98 Precision Machinists’ Level. It’s overkill for most, but when you are dealing with the internal brace move for extra long floating shelves, that level of accuracy is the only way to ensure your steel ribs are perfectly horizontal. For the actual surgery on the wood, I use a Festool OF 1400 router with a dedicated guide rail. The precision of a plunge router ensures that the channels for your steel stiffeners are uniform. If the channel is uneven, the epoxy bond won’t be consistent, and you risk the steel ‘floating’ rather than reinforcing. This is a critical step if you want to avoid vanity installation hacks that save time and money but sacrifice the long-term structural integrity of the piece.
How can I keep my custom built-ins perfectly stable over the years?
Maintenance isn’t just about a fresh coat of oil. It’s about monitoring the points where the wood meets the wall. I recommend checking your mounting points every two years, especially for heavy-duty setups. Use a simple digital moisture meter to ensure the wood isn’t absorbing too much ambient humidity, which can lead to the expansion issues I mentioned earlier. If you notice even a hair-width gap forming at the wall, it’s time to look at 6 heavy-duty L-brackets for reinforcing custom built-in units. For those working with uneven surfaces, the scribing tool for cabinets against textured plaster walls is your best friend to ensure the load is distributed across the entire wall surface, not just the high spots. 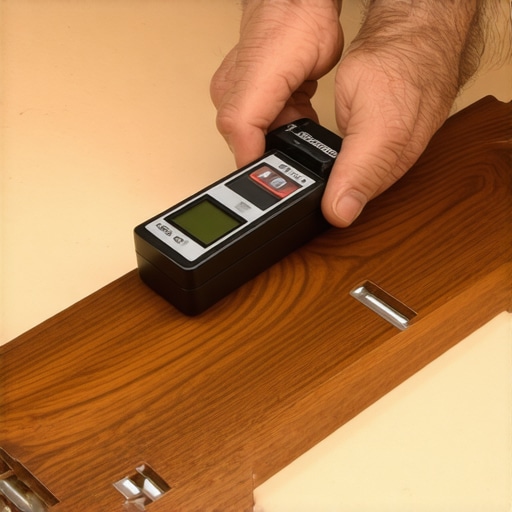 Looking ahead, I suspect we are moving toward ‘smart’ cabinetry. I’ve already experimented with embedding small piezo-electric strain gauges into the epoxy channels of my long spans. These sensors can alert you via a smartphone app if the desk starts to deflect beyond a pre-set threshold. It sounds like science fiction, but as we push for thinner profiles and longer spans in top trends in vanity designs for 2025, digital monitoring will become the standard for high-end installs. According to the National Design Specification (NDS) for Wood Construction by the American Wood Council, calculating the exact ‘allowable stress’ for these composite builds is complex, which is why I always over-engineer by at least 20%. My advice? Don’t just trust the math—build for the worst-case scenario. If you’re ready to level up, try using a two-part structural epoxy like West System 105 for your next steel-to-wood bond; it is a game-changer for rigidity.
Hard Truths from a Decade of Sagging Slabs
I used to think that adding a fourth leg was the only way to save a long span. I was wrong. The biggest shift for me was realizing that tension is just as important as compression. If you can control how the bottom of a board stretches, you control the sag. Another lightbulb moment? Never underestimate a client’s tendency to lean on a desk during a video call. I now build every long-span project with a 200lb lean factor in mind. Lastly, the beauty of the build is only as good as its foundation; if you are not checking for level across the entire length, you are just building a very expensive slide for your coffee mug. Wood is a living material, and treating it like static plastic is the fastest way to watch your hard work warp.
Tools and Resources for Engineering a Solid Build
For those just starting, I highly recommend checking out a step-by-step guide to vanity installation for beginners to get the basics of weight distribution down. When it comes to precision, I do not settle for close enough. A Starrett 98 level is my non-negotiable tool; if a span is eight feet long, a fraction of a degree off at the start becomes a disaster at the end. For high-stakes bonds, I stick with West System 105 Epoxy. It is a chemical bond that standard wood glue simply cannot touch. If you are dealing with stone instead of wood, you will need more than just internal ribs. Look into 6 heavy-duty wall fixes for massive quartz top vanities to understand how to transfer that load effectively into the studs. To truly maximize your space with custom vanities, you must balance these technical tools with an eye for structural geometry.
Stop the Sag and Build with Confidence
Do not let the fear of a bowing board keep you from trying those ambitious built-in storage ideas to declutter and enhance your home. The first time you hear that thunk of a rock-solid, steel-reinforced desk, you will never go back to basic slabs again. You have the knowledge now to move beyond the thickness trap and create pieces that remain perfectly flat for decades. Whether you are following the top trends in vanity designs for 2025 or crafting a bespoke workspace, remember that the best designs are the ones that respect the laws of physics. Now, go grab your router and start carving out that hidden spine. #IMAGE_PLACEHOLDER_E# What is the longest span you have ever tried to build without a center leg? Let me know your success or sag stories in the comments below!