

I still remember the sound of that splintering drywall. It wasn’t a loud bang, but a slow, agonizing crunch followed by a heavy thud. My brother-in-law, a man who certainly enjoys his Sunday roasts, had just sat down on my masterpiece—a sleek, floating entryway bench I had spent all weekend installing. I thought I was a genius because I had hit three studs with standard wood screws. I was wrong. Leverage is a cruel mistress, and I learned the hard way that when you are building something people actually sit on, the math changes instantly. If you have ever felt that terrifying wiggle when sitting on a wall-mounted seat, you know exactly the pit in the stomach I am talking about. [IMAGE_PLACEHOLDER]
Stop Trusting Your Studs Alone for Floating Seats
After the Great Bench Collapse, I went back to the drawing board. I realized that most vanity installation hacks that save time and money focus on cabinets that have at least some floor contact, but a floating bench is a different animal. You aren’t just fighting gravity; you are fighting the rotational torque that wants to rip your fasteners clean out of the wall. That is when a friend in commercial construction showed me the hidden T-bracket move. It is the absolute secret sauce for enhancing your home with sleek built-in vanities or seating that needs to look weightless but feel like a fortress. My big mistake early on was thinking that four inches of steel screw was enough. It isn’t. You need the lateral stability of a bracket that bridges the gap between the internal stud and the bench frame itself.
Is a heavy steel bracket actually worth the extra effort?
You might be thinking that a few extra lag bolts could do the same job. I used to think that too. However, a single bolt acts as a pivot point, whereas a T-bracket creates a structural spine. According to the American Wood Council, the withdrawal strength of fasteners depends heavily on the specific gravity of the wood, and in many modern homes, those pine studs are softer than we like to admit. A T-bracket distributes the load across a much wider surface area, ensuring your wall doesn’t fail before the bench does. This is the same logic I use when figuring out how to support quartz counters on custom floating vanities. Steel does not bend, but wood eventually cries uncle. Have you ever had a DIY project literally fall off the wall? I would love to hear your horror stories in the comments below.
The Magic of Recessed Structural Support
The reason people fail with these projects is usually tied to why your mudroom bench is pulling away from the wall in the first place: poor anchoring. The T-bracket move involves recessing the bracket into the stud itself so it sits flush behind the drywall. It is much more sophisticated than the plywood plate move for secure entryway bench anchoring, though that has its place too. By using the T-bracket, you are essentially building a cantilevered skeleton. This ensures that when you go to sleep at night, you aren’t worried about the next guest who decides to plop down with their luggage. We are going to dive into the exact measurements you need to make this work without turning your entryway into a construction zone for a month.
Prep the Wall for a Structural Spine
To get that ‘floating’ look without the ‘collapsing’ reality, you have to look behind the drywall. Start by marking the center of your studs where the seat will live. Use a laser level; if you’re off by even an eighth of an inch, the bench will look like it’s sliding down a hill. I once tried to eye-ball a custom vanity design and ended up having to shim the entire base just to keep a marble from rolling off the top. Once marked, you need to cut out a vertical strip of drywall. This isn’t just about making space; it’s about exposing the vertical wood so the steel can marry the stud directly. This level of preparation is the same foundation needed for enhancing your home with sleek built-in vanities that stay level for decades.
Notch the Wood or Regret the Bump
Here is the part that scares most DIYers: you have to notch the stud. Using a router or a sharp chisel, create a recess the exact thickness of your T-bracket. If the bracket is 1/4-inch thick, remove 1/4-inch of wood. If you skip this, the bracket will sit on top of the stud, creating a bulge in your finished wall that looks like a botched repair job. It is a similar principle to the scribing hack for perfect built-in gaps—precision at the hidden layer saves you hours of sanding later. I remember my first attempt; I didn’t notch deep enough, and when I re-patched the drywall, it looked like a snake had swallowed a brick. It completely ruined the aesthetic of what should have been one of my effortless storage solutions. 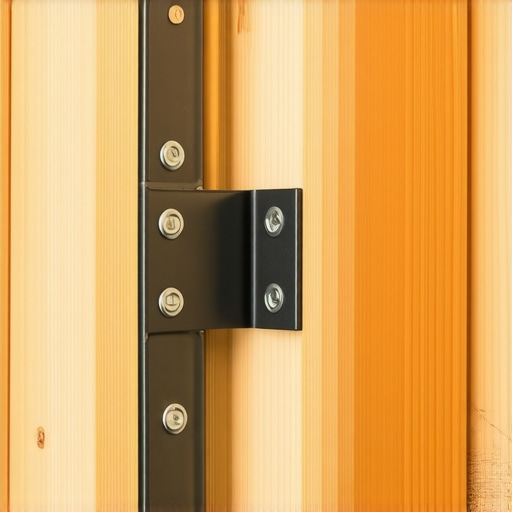
Choose Fasteners That Won’t Snap Under Pressure
You aren’t just looking for length; you’re looking for shear strength. Standard wood screws are great for cabinets, but for a seat, you need lag bolts or structural screws like GRKs. This is critical for stopping wobbly custom built-ins. Drive your bolts through the T-bracket and deep into the center of the stud. If you’re working with older homes, be careful—dry, 50-year-old pine can split like a toothpick if you don’t drill a pilot hole first. Think of it like heavy duty wall fixes for massive quartz top vanities; the weight isn’t the only enemy, it’s the sudden impact of someone sitting down.
How to Level the Cantilever Without Shims
Once the brackets are in, they might not be perfectly perpendicular to the wall. Before you mount the bench frame, check the level of the protruding steel arms. If they are sagging, you can slightly shim the bracket *inside* the notch before tightening the bolts. This prevents that dreaded ‘forward tilt’ common in floating furniture. It’s the same logic used in stealth wall anchor fixes for forward tilting floating seats. I’ve found that a thin piece of flashing behind the bottom of the bracket can tilt the support arm up just enough to account for the weight of the wood you’re about to add. This ensures your sub-frame strategy for rock-solid entryway benches actually works when the full load is applied.
The Great Blocking Myth That Ruins Custom Projects
We have all heard the advice: just throw some 2×4 blocking between the studs and you are good to go. In my experience, this is the single biggest misconception in the DIY world. While blocking provides a wider target for your screws, it does very little to prevent the rotational twist that occurs when a 200-pound person sits on the edge of a 15-inch deep bench. This is a common pitfall when people look for an expert guide to flawless vanity installation tricks and tips. The leverage exerted on the wall is immense. If you don’t address the physics of the cantilever, that blocking will eventually pull forward, crushing the gypsum in the drywall and leaving you with a bench that tilts toward the floor. I have seen beautifully finished projects ruined because the builder focused on ‘more’ fasteners rather than ‘smarter’ structural placement. Have you ever fallen into this trap where the anchors held but the wall itself seemed to give up? Let me know in the comments below.
Why does your seat feel like a diving board even with perfect anchors?
The answer lies in the ‘moment arm.’ According to architectural standards set by the American Society of Civil Engineers (ASCE), a cantilevered load creates a force that is essentially a giant pry bar. Every inch your bench sticks out from the wall increases the stress on the top fastener. If you are trying to figure out how to support extra long closet shelving without center studs, you are fighting the same battle. You aren’t just supporting vertical weight; you are fighting a rotational force that wants to pop the top of your bracket out of the stud. This is why standard wood screws fail—they lack the shear strength to handle the sudden, dynamic impact of someone sitting down. I always recommend structural lags with a minimum of 3 inches of thread engagement into the actual meat of the timber, not just the drywall.
Build a Torsion Box or Prepare for the Sag
The ‘Oops’ factor that most people miss isn’t just about the wall—it is the bench itself. If you build a floating seat out of a solid slab of wood or basic plywood, it will eventually bow or cup. To achieve true professional results, you need to use stop floating shelf sag with internal torsion box engineering. A torsion box uses a grid-like internal structure sandwiched between two skins, creating a rigid beam that is incredibly light but refuses to bend. 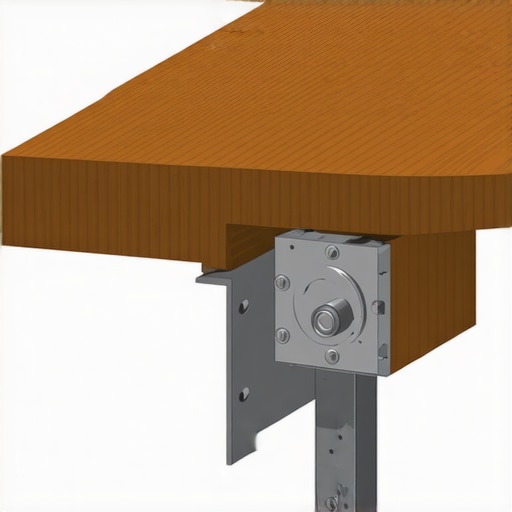 This is the same principle used in aircraft wings and high-end furniture. Without this internal rigidity, the bench frame will flex independently of your wall brackets, creating that ‘spongy’ feeling that makes guests nervous. I learned this when I tried to use a simple ladder frame for a heavy mudroom seat; even with steel brackets, the wood flexed so much it felt like sitting on a trampoline.
Mastering the Internal Bracing Game
For those tackling deeper projects, like floating vanities with heavy stone tops, you have to think like a mechanical engineer. You might need the hidden internal bracing trick for extra deep kitchen sink bases to ensure the cabinetry doesn’t fold under the pressure. The secret is to tie the front of the bench or vanity back to the wall through the internal structure of the unit itself. This creates a closed loop of strength. If you are just relying on the ‘back’ of the box to hold everything up, you are asking for trouble. Precision is key here; if your internal frame isn’t square to the wall brackets, you’ll be fighting the installation every step of the way. When I finally switched to this torsion-box-plus-steel-bracket method, the difference was night and day. No more creaks, no more wiggles, just a rock-solid seat that looks like it is defying gravity.
Stop Stripping Screws with a Real Impact Driver
After years of trial and error, I have learned that your basic cordless drill is not your friend when it comes to structural anchoring. You need an impact driver with at least 1,500 inch-pounds of torque. I personally use a brushless Makita because the tangential force prevents the bit from camming out of the screw head, which is a nightmare when you are mid-way through a step-by-step guide to vanity installation for beginners. If you strip a head inside a stud, you are stuck with a permanent piece of useless metal that ruins your alignment. Use the right tool and you will never have to back out a mangled screw with pliers again. 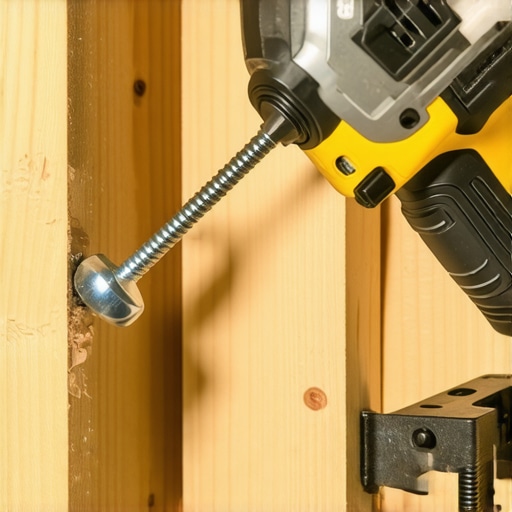
Why Structural Screws Beat Standard Hardware Every Time
I have completely abandoned standard wood screws for anything that bears weight. Instead, I rely on GRK RSS structural screws. According to the technical load-rating specifications from GRK Fasteners, these screws are made of specially hardened steel to provide high tensile, torque, and shear strength. This is the difference between a project that stays put and one that ends in a disaster. When you follow an expert guide to flawless vanity installation tricks and tips, you realize that the ‘built-in’ look is only as good as the steel holding it up. These structural lags zip through wood like butter and provide a clamping force that standard hardware simply cannot match.
How do I keep my custom storage looking new for years?
Maintenance is the part most DIYers ignore until something starts to squeak. Wood is a living material; it expands and contracts with the seasons. You should check your door and drawer alignments every six months. If things look crooked, you need to know how to fix drawer fronts that won’t stay aligned by adjusting the lateral screws on your drawer slides. Similarly, if your hardware feels sluggish, look into why your soft-close drawers are slamming and the tension fix. A simple quarter-turn on the tension tab can restore that premium feel instantly.
The Smart Tech Coming to Your Built-ins in 2025
Looking ahead, the world of custom cabinetry is moving toward ‘active’ storage. We are seeing a massive surge in top trends in vanity designs you need to know in 2025, specifically regarding integrated LED lighting and motion-sensing internal power strips. These aren’t just gadgets; they are becoming standard for smart storage solutions to optimize small bathroom spaces. The future isn’t just about how much you can fit in a cabinet, but how the cabinet assists your daily routine. If you are starting a project now, I highly recommend pre-wiring your carcasses for low-voltage lighting. It is significantly easier to do now than to retrofit later. My advanced tip for you: next time you are at the hardware store, skip the ‘all-purpose’ screws and buy a box of structural lags for your main wall plates. It will change the way you feel about the stability of your home.
After years of sawdust and a few bruised egos, I realized that the wall is more than just a surface; it is a dynamic system. You have to respect the grain of the wood and the chemistry of the steel if you want your project to stand the test of time.
Hard Lessons from My Most Expensive Failures
I’ve learned the hard way that weight isn’t static. A 180-pound person doesn’t just apply 180 pounds of force; when they sit down quickly, that force doubles for a split second. Here are a few lightbulb moments from my journey:
- Wood density is a liar: Even within the same wall, one stud might be rock hard while the next feels like balsa wood. Always test your pilot holes to feel the resistance.
- Leverage is a multiplier: Every extra inch of bench depth increases the ‘pull’ on your top wall fasteners exponentially. If you go deeper than 16 inches, your bracing needs to be twice as beefy.
- Silence is success: If a bench creaks when you sit, something is moving. And if it’s moving, it’s eventually failing. When I started using the stop wobbly custom built-ins with 4 hidden steel plate fixes, the silence was my favorite part of the job.
When you start creating creative built-ins for seamless storage and home aesthetics, you’ll find that these hidden structural details are what separate the amateurs from the pros.
Gear That Keeps My Projects from Falling Down
I don’t get paid to promote these tools, but I wouldn’t dream of starting a structural job without them. They are the backbone of my workflow. [IMAGE_PLACEHOLDER]
- Stabila Magnetic Levels: If your seat is even half a degree off, the human eye will catch it against the horizontal lines of your floor or ceiling. Don’t trust a cheap plastic level.
- GRK Structural Lags: I’ve seen standard lag bolts snap under shear stress, but these are engineered to bend before they break. I’ve used them for everything from benches to the hidden wall plate strategy for floating media shelves.
- Wera Impaktor Bits: If you use an impact driver, you need bits that won’t shatter. There is nothing worse than a broken bit stuck inside a screw head when the bench is halfway on the wall.
It’s easy to get frustrated during the messy middle of a project, but knowing how to fix uneven gaps in custom built-in doors or misaligned frames will give you the confidence to see the job through to the end.
Build Something That Lasts for Generations
There is a unique kind of satisfaction that comes from sitting on something you built with your own two hands—especially when you know it’s not going anywhere. These built-in storage ideas to declutter and enhance your home are meant to be enjoyed for years, providing both function and a touch of modern magic to your space. Don’t be intimidated by the steel or the drywall dust. Once you master the cantilever, the entire house becomes a canvas for your storage solutions. Have you ever felt a seat wiggle and wondered if it was actually going to hold your weight? Let me know your DIY close calls in the comments below!