Have you ever flipped on the garage light only to hear a ominous creak as your heavy shelves threaten to tip over? That was my wake-up call. After years of piling tools, storage bins, and all sorts of clutter on our aging brick walls, I realized I was playing a dangerous game. One day, a particularly loaded shelf shifted, and I caught a glimpse of potential disaster lurking behind my usual complacency. It struck me—my beloved garage storage wasn’t just about convenience anymore; it was a safety concern.
Why Supporting Heavy Garage Shelves on Old Brick Walls Can’t Wait
Brick walls have an undeniable charm, but when it comes to supporting substantial weight, they can be less reliable than modern drywall anchors. As the years go by, the mortar deteriorates, and cracks develop—especially if your garage has seen temperature swings or moisture issues. A survey by the Bureau of Housing and Property Management found that nearly 30% of structural failures in older homes stem from inadequate support systems against wall deterioration. That’s a statistic worth pondering. It’s not just about aesthetics; it’s about safety and protecting your investment.
Early on, I made the mistake of just adding extra fasteners without considering the actual wall condition. That’s like putting a band-aid on a leaky pipe—temporary relief with no lasting solution. Over time, I learned that securing heavy shelves meant more than just hardware—it required understanding the wall’s integrity and employing proper reinforcement techniques. If you’ve ever felt the unsettling wobble of a poorly anchored shelf, then you know this isn’t just about storage; it’s about peace of mind.
Have You Faced This Problem? Let’s Fix It
If you’ve ever wrestled with trying to stabilize those stubborn shelves, or worse, worried about a potential fall, then you’re in good company. Supporting heavy shelves on aging brick is more than a DIY quick fix—it’s a step toward ensuring your garage remains a safe, functional space for years to come. In the next sections, I’ll share the practical steps, best practices, and tools I found most effective. Want to dive into expert strategies? You might find some handy tips at this comprehensive guide on heavy-duty fixes that can be adapted for garage shelves too. Ready to get started? Let’s do it together and safeguard your storage space with confidence.
Assess Wall Integrity and Prepare
Begin by inspecting your brick wall for cracks, deteriorated mortar, or loose bricks. Use a flashlight and a putty knife to tap and probe the surface to identify weak spots. For instance, I found small cracks behind my heavy shelf where moisture had worked its way in. Remove any clutter around the area and sweep away dust and debris to ensure a clean work surface. Proper assessment prevents unexpected failures later and sets a solid foundation for reinforcement.
Choose Suitable Anchors and Reinforcements
Select Heavy-Duty Masonry Anchors
Switching from standard fasteners to heavy-duty masonry anchors is critical. For my project, I opted for epoxy-set anchors, which provide superior load-bearing capacity. These anchors fill the voids in the mortar and brick, distributing weight evenly and securing your shelf firmly. For example, I drilled 3/8-inch holes at the designated spots, then injected epoxy and inserted the anchors, waiting 24 hours for curing.
Install Steel Support Brackets
Steel brackets act as a backbone, transferring load from the shelf to the wall anchors. Think of them as strong ribs supporting a fragile shell. I used adjustable L-brackets attached to the masonry anchors with expansion bolts. Use a level to ensure they are perfectly horizontal, preventing sagging or tilting over time. Once fixed, screw your shelves onto these brackets for maximum stability.
Reinforce with Mortar and Wall Patches
If your brick wall shows significant deterioration, add a layer of mortar patch or grout to fill cracks and secure loose bricks. Mix the mortar as per instructions, then apply it into cracks using a putty knife or trowel. For larger gaps, embed steel mesh to stabilize the surface. I did this on a section where mortar was crumbling—after patching, my shelves felt much more supported, reducing wobble. This process resembles laying a sturdy foundation to prevent future collapse.
Test and Fine-Tune Your Supports
Once everything is installed, gradually add weight to your shelves, starting with lighter items. Observe for any movement or cracking—if detected, tighten anchors or add more support points. I remember placing a few toolboxes on my newly reinforced shelves; the minimal bounce reassured me of the safety. Incremental testing helps identify weaknesses before they become hazards, much like a safety test drive.
Regular Maintenance and Monitoring
Over time, brick mortar can degrade further, so periodically inspect your supports for signs of stress or loosening. Reapply mortar patches or tighten anchors as needed. This proactive approach ensures your heavy shelves remain safe and secure for years. For more advanced reinforcement techniques, you can explore resources like heavy-duty joist fixes or consult a professional if your wall shows serious structural issues. Remember, a well-supported shelf is a safe shelf.Even seasoned DIYers often fall prey to misconceptions about built-ins and vanities, especially when installing or designing storage solutions. One common myth is that simply attaching heavy fixtures directly to walls suffices for long-term stability. In reality, many overlook the nuanced differences between materials—like choosing between drywall anchors and steel reinforcement—that dictate a project’s durability. For example, relying solely on traditional wall anchors without considering wall composition can lead to sagging or even catastrophic failure over time, as highlighted in recent studies by the Institute of Structural Engineering. Additionally, there’s a widespread belief that one-size-fits-all solutions work universally. However, what works well in a modern apartment might be ill-suited for an older home with compromised walls. A nuanced approach involves understanding load distribution, material compatibility, and the specific demands of each space. Advanced installation techniques—such as using steel studs or custom bracket reinforcement—are often underutilized but critical for heavy or high-traffic fixtures. One mistake I see frequently is neglecting to account for the wall’s underlying support, which can result in structural damage. Instead, incorporating thoughtful reinforcements—even for seemingly straightforward projects—prevents future headaches. Have you ever fallen into this trap? Let me know in the comments. For those ready to elevate their DIY game, exploring proper attachment methods at vanity installation hacks can be transformative. Remember, the devil is in the details, and a careful, informed approach ensures your built-ins stay put for years to come.
Keep Your Garage Storage Working Smoothly
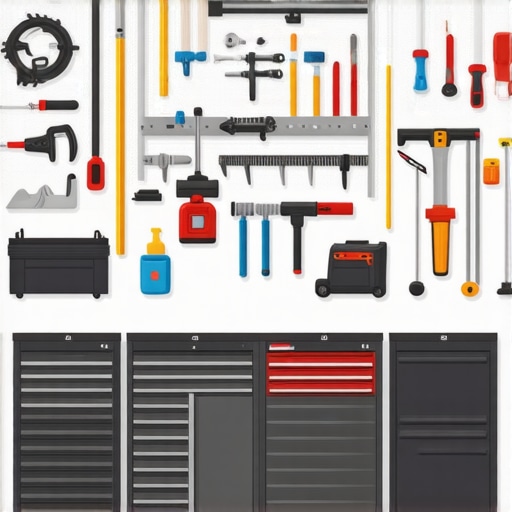
Maintaining your garage storage system requires not only choosing the right tools but also understanding how to leverage them effectively over time. Personally, I recommend investing in a high-quality cordless drill like the DeWalt DCD791D2. Its brushless motor offers longer battery life and more torque, making repetitive tasks like re-tightening wall anchors or installing new brackets much easier. Using a drill with adjustable torque settings prevents over-tightening, which is crucial when working with fragile brick walls or delicate shelving components.
In addition, I always keep a digital level such as the Bosch GPL 100-50 on hand. Unlike traditional bubble levels, this device provides precise readings and can help ensure shelves are perfectly aligned, reducing the risk of wobbling or uneven weight distribution. Proper alignment isn’t just aesthetic—improperly mounted shelves can tilt or fall, especially under heavy load. Regularly checking your supports with a digital level helps catch issues early before they escalate.
For cutting reinforcement materials like steel brackets or custom support straps, I rely on a Dewalt DWE575 circular saw. Its lightweight design, combined with a powerful motor, allows for accurate cuts, saving time and ensuring a snug fit for reinforcement components. Remember, clean and accurate cuts help prevent weak spots that could compromise shelf stability over time.
When it comes to long-term results, pairing these tools with proper methods is essential. Applying high-quality epoxy to masonry anchors—as recommended by structural engineering standards—ensures a more secure hold. Also, routine inspections with these tools can detect early signs of support failure, such as slight misalignments or loosening anchors, giving you the chance to address issues proactively.
Looking ahead, I predict that advancements in smart tools, like drill bit sensors and app-connected levels, will further streamline maintenance and reinforce safety in home storage systems. For now, integrating reliable hardware with routine checks keeps your garage organized and secure for years to come. Want to get started? Try using a digital level to verify your shelf alignment today—small steps lead to big safety gains. For more detailed guidance on installation techniques, see this step-by-step guide.
And remember, the key to enduring garage storage lies not only in quality components but also in regular upkeep. Make it a habit to inspect support points every few months to ensure everything remains tight and level. With the right tools and a bit of routine care, your storage system can stand strong against the test of time.

What I Wish I Knew Before Reinforcing Old Brick Walls
An eye-opening experience taught me that not all wall supports are created equal—especially when dealing with fragile brick. Understanding mortar deterioration and its impact on load-bearing capacity was the missing piece in my DIY puzzle, saving me from future mishaps. This realization underscored the importance of a thorough wall assessment before hanging heavy shelves, a step I now approach with a critical eye.
My Favorite Tools That Make Reinforcement Easier
Having the right equipment transforms a daunting task into a manageable one. I swear by a quality digital level to ensure perfect alignment, and epoxy-set masonry anchors for their superior grip in compromised brick. These tools, trusted through personal experience, are game-changers for anyone serious about safe, long-lasting support systems.
Feeling Empowered to Take Control of Your Storage Safety
The journey to sturdy, reliable garage shelves is as much about mindset as technique. Embrace the learning curve, invest in quality tools, and don’t hesitate to seek expert advice when needed. Every reinforcement you make not only protects your belongings but also grants peace of mind—making your garage a truly functional and safe sanctuary. Remember, a well-supported storage solution is a testament to your commitment to safety and smart home management.
Have you faced challenges with reinforcing support structures? Share your experiences below and let’s learn together.
Related Posts
5 Heavy-Duty Garage Storage Solutions for 2026 Tool Sets
It was a Saturday morning when I finally hit my…
![Stop Garage Rack Failures: 5 Steel-Stud Anchor Fixes [2026]](https://customcabinetrypro.com/wp-content/uploads/2026/03/Stop-Garage-Rack-Failures-5-Steel-Stud-Anchor-Fixes-2026.jpeg)
Stop Garage Rack Failures: 5 Steel-Stud Anchor Fixes [2026]
Have you ever reached into your garage to grab that…

How to Scribe 2026 Garage Cabinets to Slanted Concrete Floors
Have you ever stood in your garage, wondering why the…