

I remember the sound most of all—a slow, agonizing creak followed by the rhythmic sliding of a ceramic bowl. I had spent three days crafting what I thought was a masterpiece: a seven-foot walnut floating shelf. It looked sleek, modern, and perfectly level. For about a week. Then, the ‘sad shelf syndrome’ set in. I’d used those standard mounting rods you find at the big-box stores, thinking that more screws equaled more strength. I was wrong. The shelf didn’t just wobble; it bowed in the middle like a tired bridge. It was embarrassing, especially when a neighbor asked if I’d intentionally designed it with a ‘custom curve.’ That failure sent me down a rabbit hole of structural engineering that changed how I build everything from long floating shelves to heavy-duty vanities. Today, I’m going to show you how to use internal torsion box engineering to ensure your shelves stay dead-level, no matter how many heavy art books you pile on them.
Why standard brackets fail long spans
Most people assume that if a shelf sags, the problem is at the wall. They buy bigger lag bolts or more expensive anchors, but the real enemy is usually the material itself. Solid wood is heavy, and over a long span, its own weight contributes to the deflection. If you are using particle board or thin plywood, the fibers simply don’t have the structural integrity to resist gravity over time. I learned this the hard way when I tried to fix a dipping shelf by just adding a internal bolt move without addressing the core. The secret isn’t just better anchors; it’s creating a rigid internal skeleton.
Does this advanced framing actually matter for home DIY?
You might be thinking that a torsion box sounds like something reserved for aerospace engineering or high-end furniture galleries. Is it really worth the extra effort for a kitchen shelf? The short answer is yes, absolutely. According to structural studies from the Forest Products Laboratory, a torsion box—which consists of two ‘skins’ glued to a grid core—creates a phenomenal strength-to-weight ratio that solid lumber can’t touch. This is the same principle that keeps airplane wings from snapping off. By using an internal torsion box trick, you aren’t just building a shelf; you’re building a structural beam that happens to look beautiful. It eliminates the need for ugly external brackets and gives you that ‘magic’ floating look that actually holds up. Have you ever had a shelf slowly turn into a slide for your decorations? It’s a frustrating rite of passage for many of us, but it’s completely preventable once you understand how to manipulate wood tension. Now, let’s look at how we actually assemble these skeletons so they lock into your wall with zero play.
Forget solid lumber and build a hollow grid instead
To stop a shelf from bowing, you have to rethink the physics of the span. A solid piece of 8/4 walnut is incredibly heavy; by the time you mount it, the wood is already fighting its own mass. The torsion box solves this by creating a stressed-skin structure. You are essentially building a wooden I-beam that covers the entire surface area of the shelf. I start by ripping a series of internal ‘ribs’ from stable 3/4-inch plywood. These ribs should be spaced no more than 8 inches apart. When you sandwich this grid between two thin ‘skins’—usually 1/4-inch or 1/2-inch plywood—and bond them with plenty of wood glue and clamps, the assembly becomes incredibly rigid. This is the same logic used in the internal steel support for long floating desks where high tension prevents any vertical deflection. By the time the glue dries, the shelf acts as a single, unified unit that resists bending far better than any solid board ever could. 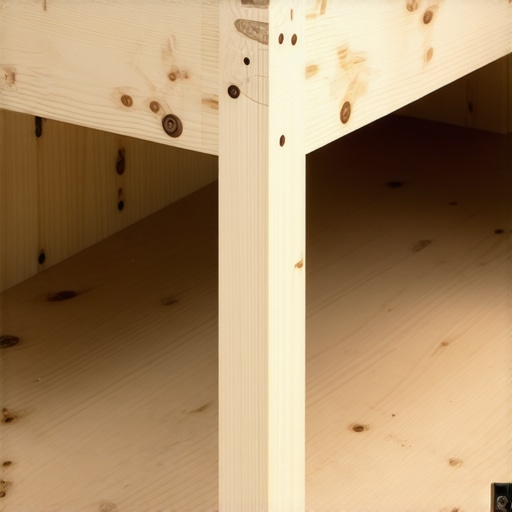
The ledger is your only line of defense against gravity
The biggest mistake I see in DIY floating projects is a weak mounting point. You can’t just hope for the best with drywall anchors. For a long-span torsion box, you need a heavy-duty internal ledger that is bolted directly into every single wall stud. I prefer using a 2×4 or a double-layered plywood strip for this. Think of it like the hidden ledger trick for rock-solid entryway seating; if the foundation isn’t locked into the framing of the house, the rest of the build is just a ticking time bomb. Use 3.5-inch GRK structural screws. These have a built-in washer head that won’t pull through the wood and offer significantly more shear strength than standard gold screws. If you find your shelf is still leaning forward after the ledger is up, you might need to look at 4 stealth wall anchor fixes for forward tilting floating seats to correct the angle before sliding the box onto the frame.
How to fight back against crooked drywall
Walls are never flat. I learned this the hard way back in 2019 when I was installing an eleven-foot shelf in a client’s dining room. The wall was so wavy it looked like a literal ocean. When I tried to push my perfectly straight torsion box against it, there was a massive gap in the middle where the drywall bowed inward. It looked amateur. That was the day I mastered the scribing hack for fitting built-ins. I had to use a compass to trace the wall’s wonky profile onto the back of the shelf and then carefully plane it down to match the curve. It’s a tedious step, but it’s the difference between a shelf that looks ‘tacked on’ and one that looks like it grew out of the wall.
Don’t let your shelf become a slide
Even with a perfect torsion box, a heavy load can cause the wall itself to compress slightly. To prevent the ‘slide’ effect, where items slowly migrate toward the edge of the shelf, I build a slight 1 or 2-degree upward pitch into the ledger mounting. This ensures that once the weight of your books or pottery is added, the shelf settles into a perfectly level position. If you’re dealing with even more weight, like a desk surface, you might want to investigate why your built-in desk is bowing to see if a middle support is required, but for most decorative or kitchen shelving, the torsion box is more than enough to handle the load. Once your skeleton is built and your ledger is scribed and leveled, you’re ready to slide the box home and lock it in from underneath with trim screws.It’s a common misconception that ‘level’ is the only metric that matters during a high-end installation. In fact, following the bubble blindly can lead to a visual disaster when your home’s architectural lines are out of whack. I’ve seen countless pros struggle with the leveling move for vanities on slanted bathroom floors because they prioritize the tool over the environment. If your floor drops half an inch but you mount the cabinet perfectly level, the resulting gap at the base will scream ‘amateur’ to anyone walking in. Sometimes, you have to split the difference to maintain the illusion of perfection.
Can standard wood vanities really hold a heavy stone top?
This is the question that separates the weekend warriors from the master builders. Everyone assumes a standard cabinet box can handle a 3cm quartz slab, but they ignore the principle of ‘creep.’ According to the USDA Forest Service’s Wood Handbook, wood under a constant heavy load will gradually deform over time, even if it doesn’t break immediately. This is why I always implement the hidden sub-frame move for supporting massive quartz top vanities. By adding an internal perimeter of 3/4-inch plywood or even steel, you redirect that weight through the cabinet walls directly into the floor or the wall studs, rather than letting the top rail of the vanity take the brunt of the pressure. 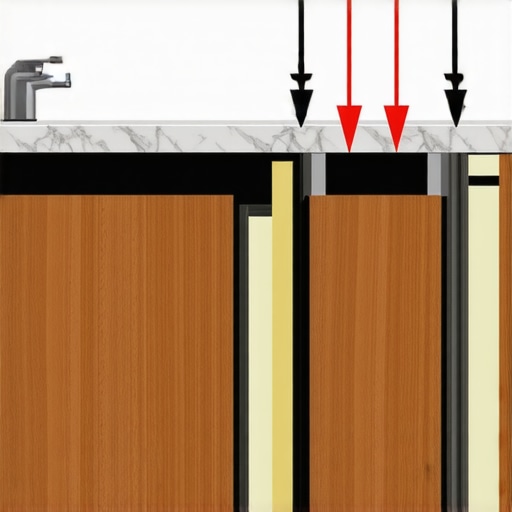 If you are skipping this step, you are essentially gambling with your investment.
The plumbing clearance trap most DIYers miss
Another hidden nuance involves the intersection of aesthetics and utility—specifically, when your smart storage solutions collide with the P-trap. I once watched a friend spend two weeks on a custom vanity only to realize the drawers couldn’t close because they hit the drainpipe. It’s a classic ‘oops’ moment. You have to measure the rough-in height of your plumbing before you even think about the drawer box dimensions. If you find yourself in a tight spot, studying how we fixed deep vanity drawers that kept hitting plumbing can save you from a complete rebuild. Beyond just the fit, you need to ensure there is enough room for maintenance; if why your vanity plumbing is leaking into the cabinet base becomes a question you have to answer later, you’ll want enough room to actually get a wrench in there. We often think that more storage is always better, but a drawer that is 2 inches shorter but actually functions is a much better win than a deep drawer that sits in the garage because it wouldn’t fit. Using 7 tactics for supporting heavy quartz counters on standard wood vanities ensures the whole unit stays rigid, even when you’re cutting into the back for pipe access. Have you ever fallen into this trap? Let me know in the comments.
Building a beautiful shelf or vanity is only half the battle; the real test comes six months later when the wood has adjusted to your home’s microclimate. I’ve found that the difference between a project that lasts decades and one that requires a service call usually comes down to the precision of the initial install. To get that pro-level finish, I stopped relying on cheap torpedo levels and invested in a high-quality 360-degree green beam laser level. It allows me to map out an entire room’s discrepancies in seconds, which is essential when you are following an expert guide to flawless vanity installation tricks tips. Without that level of precision, you’ll find yourself fighting against physics from day one.
Invest in the gear that prevents future failures
I personally swear by the Lamello Zeta P2 for my internal joinery. It’s an expensive piece of kit, but it creates a P-System connector that allows for rock-solid, invisible joints that can actually be disassembled if needed. This is a game-changer for complex installs where you might need to dry-fit a unit three or four times. When you are looking for creative storage solutions for vanities, being able to precisely machine your slots for dividers and pull-outs makes the assembly feel like a high-end puzzle rather than a struggle. I also recommend keeping a set of long-reach clamps and a high-torque right-angle drill driver in your kit; you’ll thank me when you’re trying to secure a screw inside a narrow 12-inch cabinet carcass.

How do I keep my custom built-ins looking new for years?
Maintenance is where most people drop the ball. Wood is a living material, and in high-moisture environments like bathrooms, it’s constantly expanding and contracting. You need to periodically check your hinge tension. According to the Blum Technical Specifications, their high-end hinges are rated for 200,000 cycles, but only if the cabinet box remains square. If your house settles and the box racks slightly, those hinges will start to grind. Every six months, I take a screwdriver and perform a quick ‘alignment check’ to stop cabinet doors from warping in humid bathrooms before the damage becomes permanent. It’s also vital to inspect the seals around your plumbing; even a tiny pinhole leak can cause the base of a custom vanity to swell and delaminate over time.
The future of custom home storage is modular and smart
Looking ahead, I predict we are moving toward a ‘hybrid’ model of custom cabinetry. We’re seeing a massive shift toward CNC-machined internal skeletons that users can finish with bespoke, hand-crafted faces. This blend of robotic precision and artisanal finishing is one of the top trends in vanity designs you need to know in 2025. It allows for tighter tolerances and more complex internal features, like integrated LED lighting and hidden charging stations, without the astronomical price tag of traditional full-custom builds. If you’re planning a project, I strongly suggest you try the ‘ledger-and-scribe’ method we discussed earlier; it’s the single best way to ensure your work looks integrated rather than just ‘placed’ against a wall. Go grab a compass and a block plane, and try scribing your next end-panel—it will change your standards of quality forever.
The Structural Truths Gravity Taught Me the Hard Way
After years of fixing ‘sad shelf syndrome,’ I realized that wood isn’t just a static material; it is a living entity that constantly fights against the environment. One of the most important lightbulb moments I ever had was recognizing that solid wood, while beautiful, is often its own worst enemy in long spans because of its weight. When I finally transitioned to torsion boxes, it wasn’t just about strength—it was about peace of mind. Even a step-by-step guide to vanity installation for beginners can fail if you don’t account for how a wall will compress over time. I once spent six hours learning how we fixed a tilted floating vanity with hidden leveling shims because I ignored the initial wall compression. The biggest takeaway? Always over-engineer the skeleton so the aesthetics can remain effortless.
The Gear That Separates Amateurs from Pros
You can have the best plans in the world, but without the right hardware, a heavy-duty install is just a gamble. I’ve found that high-torque structural screws and a reliable laser level are non-negotiable. If you are diving into vanity installation hacks that save time and money, you quickly learn that a cheap level will cost you more in rework than a pro-grade tool costs upfront. I also recommend looking into built-in storage ideas to declutter and enhance your home that utilize P-System connectors; they allow you to create invisible joints that are mechanically superior to standard pocket screws. These tools aren’t just for show; they allow you to achieve the precision required for those ‘seamless’ floating looks.
#IMAGE_PLACEHOLDER_E#
Your Turn to Build Something Truly Permanent
Building custom cabinetry is a journey from frustration to mastery. Whether you are installing a sleek shelf or trying to maximize your space with custom vanities, the secret lies in the hidden engineering we’ve discussed today. Don’t be intimidated by the complexity of torsion boxes or the tediousness of scribing to crooked walls. These are the details that define high-end craftsmanship. By focusing on the internal skeleton and using effortless storage solutions for a tidy stylish home, you can create pieces that don’t just look good on day one, but stay level and functional for decades. Go out there, grab your compass and your level, and start building. Have you ever struggled with a shelf that refused to stay level no matter what you tried? Let me know your biggest installation headaches in the comments below!