

I still remember the heart-sink moment when I pulled back the kickplate of my first big basement library project. I had used beautiful, traditional cedar shims to get everything perfectly level, but three years of seasonal humidity had turned those shims into literal wicks. They were sucking groundwater straight into the heart of my plywood cabinets. If you have ever noticed a faint, musty smell coming from your storage units, you might be facing the same invisible enemy. Today, I am going to show you exactly how to stop that rot before it starts using a simple moisture-proof shim strategy that most contractors skip. We are not just talking about leveling; we are talking about permanent protection for your investment.
Your Basement Floor is Sweating and It Wants Your Cabinets
Most homeowners do not realize that concrete is a porous material that never truly stops moving moisture. According to the Portland Cement Association, moisture vapor can move through solid-looking concrete slabs even if there is not a standing puddle in sight. This vapor drive is why my early mistake was so devastating. I thought I was being precise, but I was actually creating a bridge for decay. When you are planning creative built-ins for seamless storage, the foundation is where ninety percent of the long-term failures happen. I have seen gorgeous vanity installations ruined in less than two years because someone forgot that wood and wet concrete are a disastrous mix. By using non-porous materials to create a thermal break, you are essentially giving your cabinetry a set of galoshes. This is especially vital when you are implementing the moisture-proof base tactic for basement built-ins, which is the gold standard for below-grade work.
Is Plastic Really Enough to Stop the Rot?
You might be thinking that a tiny piece of plastic or a composite wedge can not possibly make that much of a difference. Trust me, it does. In my first year of doing this professionally, I had to tear out a full wall of shelving because I had not yet learned the importance of air gaps and non-organic leveling tools. The wood shims rotted, the cabinets sagged, and the drawers started binding. It was an expensive lesson in physics. By switching to high-density composite shims and a specific air-gap strategy, you ensure that your innovative built-in solutions stay as crisp and level as the day you installed them. Have you ever noticed your cabinet doors starting to bind or seen weird discoloration at the very bottom of your baseboards? That is your house telling you that moisture is winning the war. I want to hear from you—have you ever found mold hiding under your built-ins? Setting the stage correctly now prevents a world of hurt later, so let’s look at how we actually execute this shim strategy without losing our minds.Before you even touch a screwdriver, you need to map the floor. Basement slabs are notoriously wavy, like a calm sea that has been frozen in time. To get your leveling heavy media walls on carpet or concrete right, you must find the highest point of the floor in the area where your cabinets will live. If you start at a low spot, you will find yourself trying to bury the other end of the cabinet into the concrete halfway through the job. I once spent four hours shimming a single unit because I started at the ‘pretty’ side of the room rather than the ‘high’ side. Now, I use a laser level to find that peak and set my reference line there. This ensures that every shim you add is lifting the cabinet, never forcing it down.
Start at the Highest Point to Avoid a Slanting Nightmare
To execute this correctly, you need to treat the installation like a structural foundation rather than just furniture placement. Use a long 4-foot or 6-foot bubble level to check the floor’s pitch. This is very similar to the leveling move for vanities on slanted bathroom floors, where the slope can be deceptive. Once you identify the high point, that becomes your ‘zero.’ Every other part of the cabinet base will be shimmed up to match this height. I remember a project in a 1940s colonial where the floor dropped two inches over a ten-foot span. Without finding that high point first, the entire wall of bookshelves would have looked like the Leaning Tower of Pisa. 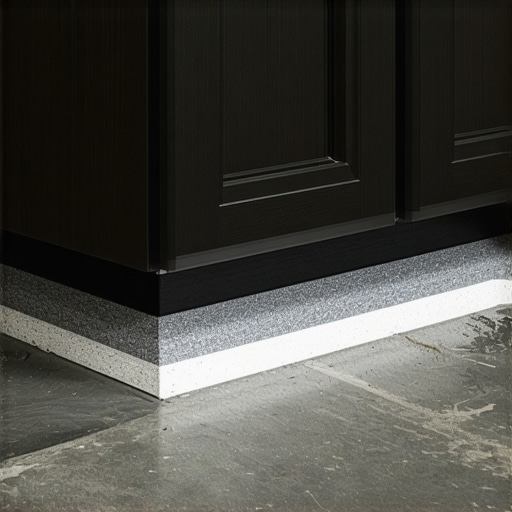
Why High-Density Composite Shims Beat Cedar Every Single Time
Think of cedar shims as tiny sponges. They are great for dry bedrooms, but in a basement, they are a liability. I switched to high-density composite shims years ago and never looked back. These are made from recycled plastics and wood fibers that are completely non-porous. When you use them to implement the moisture-proof base tactic for basement built-ins, you are creating a permanent plastic barrier between the thirsty concrete and your expensive wood. On a job in a particularly damp walk-out basement, I used these to lift a series of innovative built-in solutions just 1/8 of an inch off the slab. A year later, a small plumbing leak flooded the floor with a quarter-inch of water. Because the cabinets were sitting on plastic rather than wood, the water flowed right under them and out to the drain without the cabinets absorbing a single drop.
Seal the Bottom Before the Cabinet Touches the Floor
It is not enough to just level the unit; you have to block the vapor. Even if your floor feels dry to the touch, you should apply the moisture barrier strategy for below-grade vanities to your built-ins. This involves applying a thin bead of high-quality silicone or a specialized rubber gasket to the bottom of your cabinet’s kickplate or base frame. This acts as a secondary seal. If you are dealing with particularly stubborn slopes, you might also look at how to level garage cabinets on sloped concrete floors for inspiration on using heavy-duty adjustable feet. These mechanical levelers can be hidden behind a removable toe kick, providing both an air gap and easy adjustment if the house settles. I used this approach for a client who wanted a massive wall-to-wall library. By combining composite shims with a sealed base, we ensured that the moisture-proof base fixes we applied would last for decades, regardless of how much the basement ‘sweated’ during the humid summer months.Most people assume that if you buy high-end cabinets, they are ready for anything you throw at them. I call this the veneer trap. Just because the finish looks like a million bucks does not mean the internal engineering is up to the task of holding a three-hundred-pound quartz top or a full collection of law books. Everyone says that 3/4-inch plywood is the gold standard, but in my experience, thickness is a secondary concern to internal geometry. If you have a span wider than 30 inches, that plywood will eventually bow regardless of quality. According to the Architectural Woodwork Institute (AWI), shelf deflection should be limited to 1/4 inch to maintain structural integrity, a standard that most custom shops ignore. When I am building for heavy loads, I prefer using 4 internal steel stiffeners that stop massive bookcase shelves from warping over time.
Stop Assuming Your Cabinet Boxes are Indestructible
The hidden nuance that separates a ten-year cabinet from a fifty-year cabinet is how it handles shear force. I have seen countless homeowners invest in creative storage solutions for vanities only to have the bottom of the drawer blow out because they used standard staples instead of a heavy duty dowel strategy for wide drawer bases. It is a classic oops factor: we focus so much on the aesthetics of the built-in storage ideas to declutter and enhance your home that we forget the physics of the items we are storing. If you are planning a massive media wall, you must stop wobbly custom built-ins with 4 hidden steel plate fixes rather than just relying on more screws.
Can Your Shelves Actually Handle a Full Library?
This is the question I get most often from clients who are tired of seeing their expensive units sag. The truth is, standard construction is not designed for the concentrated weight of hundreds of hardback books. You need to think about the internal torsion box trick for extra long floating shelves to provide the necessary rigidity without the bulk. 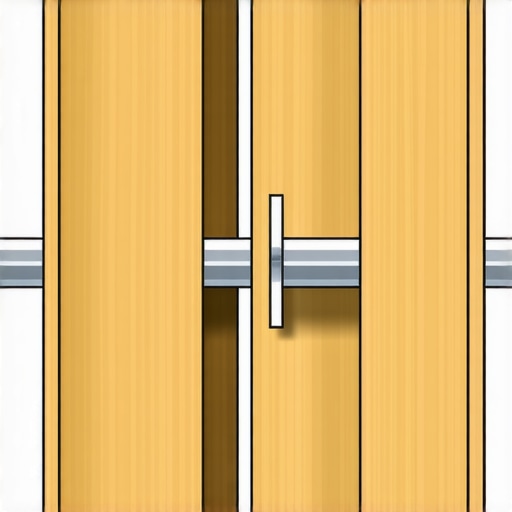 I remember a job where the client wanted a floating desk spanning eight feet with no visible support. Most contractors would have said it is impossible or added a clunky leg. By understanding why your built-in desk is bowing and the middle leg fix—or better yet, replacing that leg with hidden steel—you can achieve that impossible look safely.
The Lever Effect That Destroys Floating Vanities
A floating vanity is essentially a giant lever trying to pull itself off your wall. This is where the most dangerous mistakes happen. If you are not using the secret to mounting heavy floating vanities on old lath and plaster, you are risking a catastrophic failure that could take your plumbing down with it. I have seen gorgeous stone tops crack because the cabinet underneath shifted just a fraction of an inch. Using 7 tactics for supporting heavy quartz counters on standard wood vanities is not just being extra; it is a requirement for modern materials. Have you ever fallen into the trap of assuming sturdy-looking was the same as structurally sound? Let me know in the comments if you have ever had a shelf or a vanity start to dip on you. We can also look at how to stop floating vanities from dipping with steel plates to ensure your next project stays exactly where you put it.
The Three Tools I Never Leave My Shop Without
After twenty years of trial and error, I have narrowed my ‘must-have’ list for vanity installation for beginners and pros alike down to three specific items. First is a self-leveling cross-line laser. If you are still relying solely on a bubble level for an eight-foot run of cabinets, you are asking for cumulative error. Second, a high-quality digital angle finder is non-negotiable for perfect built-in gaps against uneven brick. Most walls are not just out of plumb; they are twisted. Third, and perhaps most importantly, is a set of specialized cabinet claws. These allow you to pre-align face frames with surgical precision before the first screw ever touches the wood. I started using these after a particularly frustrating afternoon trying to align a massive media unit alone, and they turned a two-person job into a solo cakewalk.
Keep Your Hardware From Sounding Like a Rusty Gate
Even the most expensive effortless storage solutions will eventually feel ‘cheap’ if the moving parts start to fail. According to the Kitchen Cabinet Manufacturers Association (KCMA) A161.1 Performance Requirements, high-quality drawer slides are tested for 25,000 cycles, but that assumes they stay clean and lubricated. In a workshop or basement environment, sawdust and humidity are the enemies of precision bearings. I recommend a dry PTFE lubricant for your slides twice a year. If you find your drawers sticking, check for debris before you start adjusting the screws. This is especially true when you need to address why your large kitchen drawers drag and the support fix, as the weight load accelerates wear on the nylon rollers. 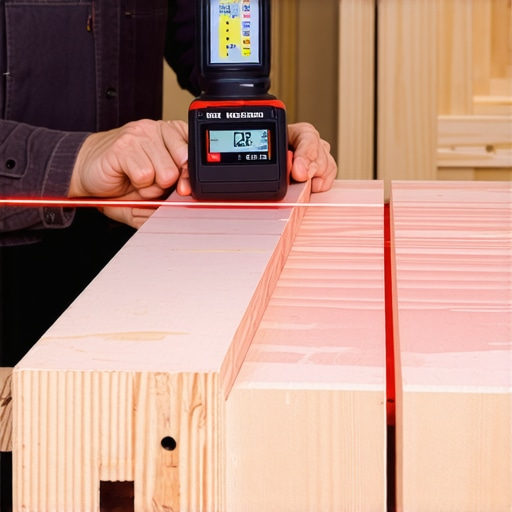
How do I keep these cabinets looking new for twenty years?
Maintenance is not just about cleaning the surfaces; it is about monitoring the structural ‘give’ of the house. Every six months, I do a ‘hinge check’ on all my projects. Wood expands and contracts, which can throw off your reveals. If you notice a door is slightly crooked, don’t wait for it to scrape the frame. Use the depth and lateral adjustment screws found on modern European hinges. Understanding why cabinet doors sag and the three hinge solution can save you from having to replace a damaged face frame later. Also, if you have soft-close features, keep an eye on the pistons. If they start to fail, you will need to look into why your soft-close drawers are slamming and the tension fix to prevent the constant impact from loosening your mounting screws.
The Future of Built-Ins is Brighter and Smarter
Looking toward the future, I see a massive shift toward integrated low-voltage lighting and IoT connectivity in top trends in vanity designs for 2025. We are no longer just building boxes; we are building functional hubs. This means you need to plan for wire chases and heat dissipation even in a simple bookshelf. If you are starting a new project this weekend, I challenge you to try one advanced move: instead of just screwing your base to the floor, use a hidden sub-base strategy that allows for airflow. It is a small change that pays huge dividends in longevity. If you have ever had a piece of hardware fail on you, what was the culprit? Let’s discuss it below.
Lessons from the Wet Basement Trenches
Over the years, I have learned that the biggest threat to your cabinetry isn’t the weight of the books or the kids slamming doors—it is the silent, upward creep of moisture from the ground. I used to think that a coat of paint on the bottom of a cabinet was enough protection, but I was wrong. Here are a few lightbulb moments from my career: First, always assume the concrete is damp even if it looks bone dry. Second, a laser level never lies, but a tired eye at 4:00 PM definitely does. Finally, remember that airflow is the enemy of rot; if you trap moisture under a cabinet with no way out, you are creating a petri dish. Using vanity installation hacks that save time and money can get you through the day, but only proper moisture barriers will get you through the decade.
The Gear That Keeps My Projects Square
If you are serious about DIY, you need more than just a hammer and a prayer. I personally swear by a 360-degree self-leveling laser for any run longer than four feet—it eliminates the “stacked error” that happens when you move a spirit level across multiple units. I also keep a stash of composite shims in my truck because they don’t crush or rot like cedar does. For sealing those critical gaps, I prefer a high-performance synthetic rubber sealant over standard caulk because it has incredible elasticity and sticks even to damp surfaces. These are the tools that separate a weekend project from creative built-ins for seamless storage that stay perfect for life.
Build for the Future of Your Home
Stepping back and seeing a perfectly level, rock-solid wall of cabinetry is one of the most rewarding feelings in the world. By taking the extra hour to implement the moisture-proof base tactic for basement built-ins, you aren’t just building furniture; you are protecting the structural integrity of your home and your peace of mind. Whether you are following a step-by-step guide to vanity installation for beginners or tackling a massive custom library, the foundation is everything. Don’t let the invisible moisture under your floorboards steal your hard work.
Have you ever encountered a hidden mold problem when removing old cabinets? Let me know in the comments below!