

I’ll never forget the sound of three hundred dollars’ worth of power tools hitting the concrete floor at 2 AM. It was a dull, heavy thud followed by the unmistakable skreeee of metal pulling out of gypsum. I’d spent the previous Saturday afternoon installing what I thought was a foolproof wall track system to get my clutter under control. I stood there in my pajamas, staring at a jagged hole in the drywall where a “heavy-duty” rail used to be. That was my wake-up call: the hardware store box might say it holds 200 pounds, but your wall doesn’t always agree. Today, I’m going to walk you through the mechanics of why these systems fail and the exact steps to ensure your storage stays put for good.
Stop the Sag Before It Starts
Most of us make the mistake of trusting the anchors that come in the box. I certainly did. In my early days, I figured if the manufacturer included them, they must be sufficient. I was wrong. The primary culprit is usually a combination of lever-arm force and poor substrate attachment. When you hang a heavy weed wacker on a hook that sticks out six inches, you aren’t just applying downward weight; you’re prying the track off the wall. If you aren’t using heavy duty garage rack bolts that wont snap under load, you’re basically playing a game of chance with your equipment. I’ve found that even the best systems need a bit of DIY reinforcement, such as horizontal steel bracing, to distribute that tension across multiple studs rather than relying on a single point of failure. [image_placeholder_1]
Will My Drywall Ever Support This Much Weight?
It’s a valid question. Many people are terrified that their garage walls are just too flimsy for serious storage. While it’s true that 1/2-inch drywall isn’t a structural element, the secret isn’t the drywall—it’s what’s behind it. I used to think I could cheat the system with ‘high-strength’ toggles, but eventually, the gypsum itself just crushes under the pressure. Fastening experts often note that standard drywall has almost zero structural pull-out strength, meaning the fastener is only as strong as the paper facing of the board. This means your rack might feel solid when you push down on it, but the constant outward pull is what eventually wins the war. Have you ever noticed your tracks starting to tilt forward before they actually fail? If so, you’re already in the danger zone. To avoid this, you should consider tactics for mounting heavy garage racks that involve creating a secondary support structure like the hidden plywood cleat for mounting heavy tool walls. We’re going to dive into how to bridge those gaps and make your setup bulletproof.
Build a Secondary Spine with a Plywood Ledger
To make a heavy-duty system work, you have to stop thinking of your wall as a flat surface and start thinking of it as a skeleton with skin. The ‘skin’—your drywall—is functionally useless for weight bearing. The ‘skeleton,’ or the studs, is where the real structural integrity lives. Whenever I am working on creative built-ins for seamless storage and home aesthetics, I start by creating a ‘sacrificial’ spine. This is a 3/4-inch piece of plywood, often called a ledger or cleat, that bridges at least three studs. By fastening this cleat to the studs first, you create a massive, reliable surface area for your racks or cabinets to bite into. Think of it like wearing snowshoes; you don’t sink into the snow because the weight is distributed over a larger footprint. I remember a project where the homeowner wanted a floating look for their heavy tools, and we had to implement the internal torsion box move for long floating shelves just to keep the units from bowing under the weight of several cast-iron saws. 
Flatten the Curve of Your Garage Walls
Most garage walls are about as straight as a mountain road. If you bolt a rigid metal track to a wavy wall, you’re introducing internal tension before you even hang a single hammer. This is where vanity installation hacks that save time and money really come in handy for general storage. You need to use shims or a scribing move for flawless cabinet gaps to ensure the track sits perfectly plumb. Years ago, I installed a massive pantry unit and ignored a slight bow in the drywall. Three months later, the doors wouldn’t close because the frame had twisted to match the wall’s curve. Now, I always check for gaps and fill them with tapered shims behind the ledger board before the final tightening.
Why the Tug Test is Your Best Friend
Once your ledger is up, you need to use 4 heavy duty garage rack bolts that wont snap under load to secure the actual storage hardware. But don’t just trust the torque of your drill. Every time I finish a section, I perform what I call the ‘human anchor’ test. I literally grab the rail and put my full body weight on it. If I hear even a whisper of a crack or see a millimeter of movement, I pull it apart. This saved me once during a step-by-step guide to vanity installation for beginners demonstration where a stud turned out to be half-rotted from an old leak. If I hadn’t tugged on it, that vanity would have eventually ended up on the floor. For those working with masonry, skip the plastic plugs and go straight for the concrete wedge anchor move for heavy garage racks; it provides a mechanical bond that won’t vibrate loose over time. By focusing on these mechanical connections, you ensure that the outward prying force of your heavy equipment is translated directly into the home’s framing, not the fragile gypsum skin.Everyone tells you to just ‘add more screws’ if a rack feels wobbly. In my experience, that’s the fastest way to turn your wall studs into Swiss cheese and actually compromise the structural integrity of the wood. The contrarian truth is that three perfectly placed, high-quality fasteners are significantly stronger than a dozen haphazardly driven ones. I’ve seen DIYers drill so many holes in a 2×4 that the wood eventually split under the very load they were trying to support. If you find yourself wondering why your garage shelves are pulling away from the wall, it’s rarely a lack of screws; it’s usually the wrong type of fastener for the specific shear force. One ‘oops’ factor that haunts even seasoned pros is the ‘lever effect.’ When you load up a deep shelf, the weight doesn’t just go down; it pulls the top of the shelf away from the wall. This is why I always use the structural header move for wide alcove shelving to lock everything in. Have you ever fallen into this trap where you thought gravity was your only enemy? Let me know in the comments.
Can Your Hardware Handle the Hidden Force of Torsion?
When we talk about advanced storage, we have to talk about torsion—the twisting force that happens when a load is unbalanced. This is the silent killer of expert guide to flawless vanity installation projects. If the vanity isn’t perfectly level, the weight of a stone top creates a twisting motion that can snap cheaper MDF frames. According to research from the Forest Products Laboratory on fastener withdrawal resistance, the specific gravity of your wood species dictates how much ‘pull’ a screw can take before the fibers fail. 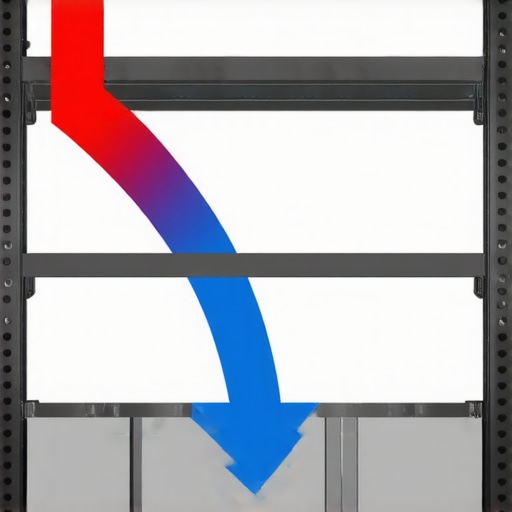 This is why I often rely on the internal torsion box trick for extra long floating shelves to counteract that natural physics.
Beat the Humidity Before it Warps Your Work
Another nuance people ignore is material expansion. In a garage or bathroom, humidity is your constant shadow. If you bolt a built-in tight against two walls without a tiny gap for expansion, the wood will eventually bow as it takes on moisture. I always recommend the moisture proof base tactic for basement built-ins or garages to prevent the wood from wicking up ground moisture. It’s these small, invisible adjustments that separate a weekend project from a lifetime fixture. If you don’t account for these environmental factors, the best hardware in the world won’t save your cabinets from eventually pulling away from the drywall.
Skip the Standard Drill and Reach for a High-Torque Impact Driver
If you’re serious about longevity, you need to retire your basic cordless drill for structural work. I’ve seen too many DIYers strip out the heads of high-quality fasteners because their drill lacked the rotational hammer action required to drive a lag bolt into seasoned lumber. When I’m tackling built-in storage ideas to declutter and enhance your home, I exclusively use a 1/4-inch impact driver. It provides the sudden bursts of torque needed to seat the screw without snapping the shank. This is particularly vital when you’re working with old-growth studs that have hardened over decades. The American Wood Council’s National Design Specification (NDS) for Wood Construction highlights that the withdrawal capacity of a screw is significantly reduced if the wood’s moisture content fluctuates drastically, which is exactly why a humidity-controlled environment is more than just a luxury for your tools. I also never start a project without a 4-foot box level and a self-leveling cross-line laser. If your starting point is off by even an eighth of an inch over four feet, that error will compound until your shelves look like a staircase by the time you reach the far wall. 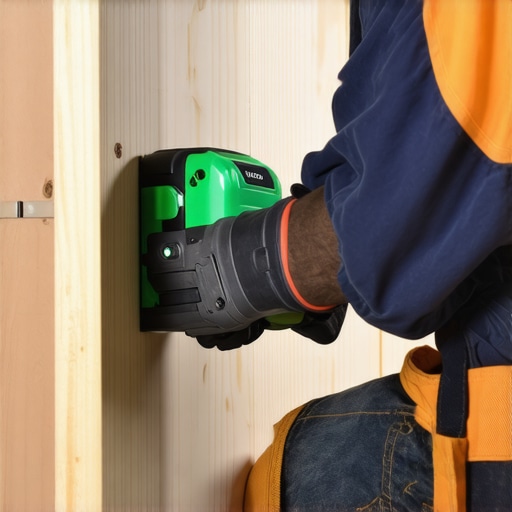
How do I keep my heavy-duty storage from failing after a few seasons?
Maintenance is the part of the project no one wants to talk about, but it’s the difference between a ten-year solution and a two-year disaster. Every six months, I do a ‘hardware sweep.’ I check the tension on the mounting bolts and look for any hairline cracks in the drywall around the ledger. If you find your drawers aren’t gliding like they used to, you might need to learn why your soft close drawers are slamming and the tension fix to prevent the impact from rattling the frame loose. Similarly, if you notice your sliding systems getting sticky, knowing how to fix loose pull-out pantry tracks early can prevent the entire unit from sagging. For wet areas, I always double-check the base. If you didn’t use the moisture proof base hack for mudroom lockers, keep a close eye on the wood fibers near the floor for any signs of swelling or ‘wicking.’
The Future of Storage is Modular and Tech-Integrated
We are moving toward a world where storage isn’t just static wood and metal. I’m already seeing a massive trend toward ‘smart’ storage where weight sensors can alert you if a shelf is reaching its structural limit. This is especially relevant when you follow an expert guide to flawless vanity installation tricks tips that includes integrated LED lighting and hidden power stations. In the next few years, I predict we’ll see more carbon-fiber reinforced shelving that offers the strength of steel with the weight of plywood, making the ‘mounting to studs’ struggle much more forgiving. For now, focus on the fundamentals. I challenge you to go into your garage or bathroom this weekend and perform the ‘tug test’ on your heaviest unit. If it moves, it’s time to rethink your anchoring strategy using the ledger methods we’ve discussed.
What Decades of Stripped Screws Taught Me
After years of fixing storage systems that literally pulled the drywall off the studs, I’ve realized that success isn’t about how many screws you use, but where they bite. One major lightbulb moment for me was realizing that most ‘heavy-duty’ kits are designed for laboratory conditions, not your real-world, wavy garage walls. I also learned that if a stud feels ‘soft’ when you drive a screw, don’t ignore it; that’s your house warning you about moisture or rot. Finally, always account for the ‘lever effect’—the further a hook sticks out, the more it wants to pry your track off the wall. If you are dealing with smaller spaces, checking out innovative storage solutions to transform your bathroom can offer great perspective on managing weight in tight quarters.
My Personal Rig for Zero-Fail Installs
To get the job done right, I rely on a specific kit that never lets me down. First, a high-quality 4-foot box level is non-negotiable for ensuring your ledger boards aren’t fighting gravity from the start. Second, I’ve swapped all standard wood screws for structural lag screws (like GRK or Spax) because they won’t snap under the shear force of a fully loaded rack. [image_placeholder_final_tools] For anyone looking for effortless storage solutions for a tidy, stylish home, these fasteners are the hidden heroes. I also highly recommend a self-leveling cross-line laser; it’s like having a second pair of hands that never gets tired. Lastly, always keep a set of tapered shims handy to bridge the gaps between your wall and your hardware, ensuring a flush fit every time.
Go Build Something That Lasts
Don’t let the fear of a drywall disaster keep you from organizing your space. Whether you are implementing built-in storage ideas to declutter and enhance your home or just trying to get the lawnmower off the floor, the principles of structural integrity remain the same. Take your time, find your studs, and never skip the ‘tug test.’ If you’ve ever had a project feel a bit shaky, you can always stop wobbly custom built-ins with 4 hidden steel plate fixes. You’ve got the knowledge—now go make that garage bulletproof.
Have you ever had a shelf or rack fail in the middle of the night? Let me know what happened in the comments below!