

I remember the smell. It wasn’t just the usual morning steam; it was that damp, earthy scent of wood that’s been wet for far too long. I’d spent an entire weekend installing what I thought was a dream vanity, only to watch the edges swell and the finish flake off within a single season. It was a classic mistake—treating a high-humidity bathroom like a dry bedroom. The moisture won. If you have ever touched the side of your cabinet and felt that tell-tale soft ‘squish’ of MDF or plywood, you know exactly the heartbreak I am talking about. Today, I am going to share the hard lessons I learned so your bathroom furniture doesn’t end up in a dumpster. [IMAGE_PLACEHOLDER_1]
Don’t Let Your Vanity Turn Into a Sponge
The bathroom is essentially an indoor rain forest. Without a proper defense, even the most expensive cabinetry will succumb to the relentless steam. I learned the hard way that a standard factory finish is rarely enough in a small space with poor ventilation. I used to think a quick wipe-down after a shower was plenty, but water vapor is sneaky—it finds every unsealed seam and raw edge. According to the National Kitchen & Bath Association (NKBA), moisture damage is the leading cause of premature cabinetry failure in residential remodels. That is why we need to talk about real, physical protection before you even pick up a screwdriver for your vanity installation.
Is all this extra waterproofing just overkill?
You might be wondering if you really need three layers of sealant and a physical barrier. I thought so too, until I had to rip out a ‘water-resistant’ unit that looked like it had been submerged in a lake. It is not just about the wood; it is about the hardware and the structural integrity. My experience with warping laundry room cabinets taught me that prevention is ten times cheaper than the cure. Have you ever noticed your cabinet doors starting to stick during the humid summer months? That is your first warning sign that the air is winning.
Start With the Floor and Work Up
My biggest error early on was letting the vanity sit directly on a tile floor that occasionally stayed damp. Now, I always use a waterproof shim move to create a tiny, invisible break between the floor and the wood. Even a fraction of an inch can stop capillary action from pulling water into the base. If you are working in a basement or a particularly damp area, you should definitely consider a below-grade moisture barrier strategy before you anchor the unit. It is these small, hidden layers that make the difference between a vanity that lasts five years and one that lasts fifty. Have you checked the bottom of your vanity recently for signs of swelling?
Seal Every Raw Edge Before It Sucks Up Steam
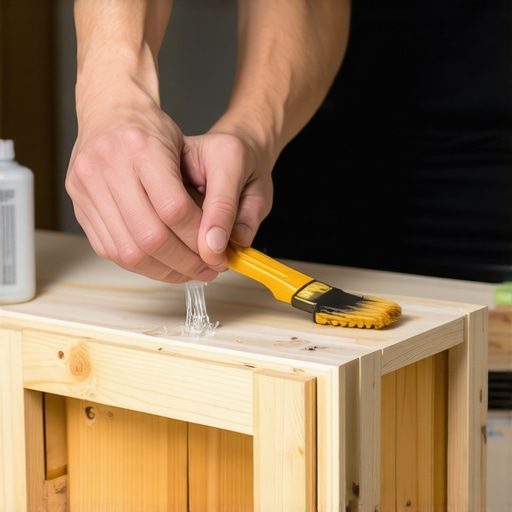
I used to treat vanity assembly like standard furniture—just bolt it together and walk away. That was my first mistake. Think of your vanity like a boat; if there is a single unsealed seam, the water will find it. Most factory-made units leave the back edges and the underside of the cabinet raw. This is where the ‘wicking’ happens. To stop this, I now apply a thin layer of waterproof wood glue or a clear polyurethane finish to every exposed edge of the carcass. I remember one specific job in a guest bath where I neglected the back panel. Six months later, the MDF had expanded so much it actually pushed the vanity two inches away from the wall. Now, I use the waterproof sealant move for vanity backsplashes to ensure no moisture can sneak behind the unit and sit against that raw wood.
The Sink Joint Is Your Critical Failure Point
The most common site for disaster is the tiny gap where the sink meets the countertop. If you don’t nail this, water will drip directly onto the floor of your cabinet every time you wash your hands. When you are performing your step-by-step guide to vanity installation for beginners, you must use a high-grade 100% silicone. Don’t go cheap here. I’ve seen ‘all-purpose’ caulks crack within weeks. A thick bead around the underside of the sink rim is your insurance policy. If you find your vanity plumbing is leaking into the cabinet base, it’s often because the sink seal failed, not the pipes themselves. I always tell homeowners that a five-minute caulking job saves a five-hundred-dollar cabinet bottom.
Defend the Inner Sanctum from Plumbing Drips
Even the best installation can’t stop a slow drip from a P-trap a year down the road. Most people store their cleaning supplies and extra toilet paper right under the sink, which hides small leaks until the wood is already ruined. I’ve started installing removable plastic liners or even stick-on vinyl tiles to the bottom of the cabinet. It’s one of those vanity installation hacks that save time and money in the long run. If a pipe drips, the water pools on the plastic rather than soaking into the wood. I also pay close attention to the cutouts for the pipes. I once spent an entire afternoon figuring out how we fixed deep vanity drawers that kept hitting plumbing, and the solution involved cutting the back of the drawer. Those new cuts are raw wood—seal them immediately or they will swell and jam the drawer slides by next winter.
Create a Breathing Room with Proper Gaps
Airflow is the enemy of mold. When you shove a vanity tight into a corner without any thought for ventilation, you’re creating a stagnant pocket for steam. While it feels counterintuitive to leave a gap, using a small scribe molding can hide the space while still allowing the wood to expand and contract. This is especially vital when choosing the perfect vanity style for your bedroom or bath. A freestanding unit with legs often fares better than a box-to-floor design because the air can circulate underneath. If you’ve already got a box-to-floor unit, ensure you aren’t sealing the very bottom so tightly that trapped floor moisture has nowhere to go.
Studs Alone Won’t Save Your Stone
Common wisdom tells you that if you find the studs, you are golden. But here is the contrarian truth: for the massive, heavy-duty materials we see in top trends in vanity designs you need to know in 2025, standard stud-screwing is often a recipe for disaster. I have walked into bathrooms where a floating vanity was literally peeling the drywall away because the installer did not account for the leverage of a hundred-pound quartz slab. You need to look into 6 heavy-duty wall fixes for massive quartz top vanities before you even think about the aesthetics. Most people assume the wall is flat and strong, but hidden issues like ‘bowed’ studs can create gaps that lead to structural failure once the weight is applied.
The Internal Frame Collapse You Never See Coming
The biggest ‘oops’ factor I see in modern remodels is ignoring the internal frame. Most stock cabinets are designed for light laminate or thin wood tops. When you drop a heavy stone top on them, the sides can start to bow outward or compress. This is exactly why your heavy quartz vanity is cracking the cabinet frame. I always add internal corner blocks and steel L-brackets to the carcass now—it is a five-minute fix that prevents a thousand-dollar replacement later. The Natural Stone Institute explicitly states that stone surfaces require a perfectly level, rigid support base to prevent stress fractures; even a millimeter of flex can cause a hairline crack that ruins the entire slab. 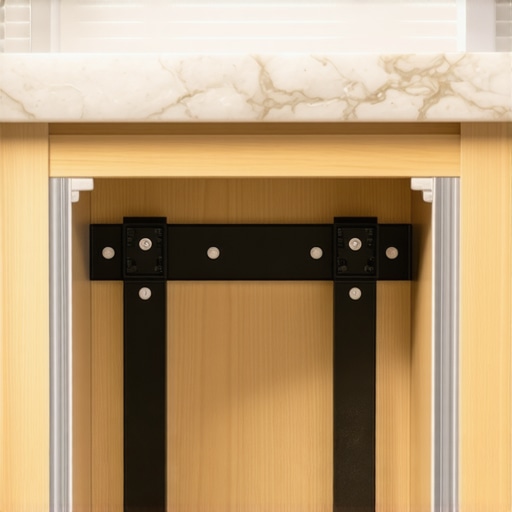
Will your sloping floor lead to a cracked countertop?
Most beginners think shims are just for looks, to keep the doors straight. But if you have a slight slope in your tile, the weight of the vanity will distribute unevenly across the legs or the base. This puts ‘racking’ pressure on the wood joints. I have seen beautiful sleek built-in vanities pull apart at the seams simply because the floor was off by a quarter inch. You have to master 7 tactics for leveling vanities on sloping tile floors to ensure the frame stays square under the load. If you are going for a modern look, supporting quartz counters on custom floating vanities requires even more precision with your anchoring system. It is not just about the bubble in the level; it is about ensuring every point of contact with the floor or wall is solid. I have seen too many DIYers get the plumbing right but the physics completely wrong. Have you ever fallen into this trap? Let me know in the comments.
Stop Guessing with a School Compass and Get a Scribe
I see it in almost every DIY video: someone taping a pencil to a scrap of wood and calling it a scribe tool. If you want that high-end, zero-gap look, you have to stop. I personally switched to a dedicated articulating scribe tool years ago because it allows for offset adjustments that a standard compass simply cannot handle. This is the only way to truly master the scribing tool for cabinets against textured plaster walls. When you are fitting a vanity against a wall that looks like the surface of the moon, precision is your only friend. I always tell my clients that the difference between a ‘hired pro’ look and a ‘weekend project’ look is that final 1/16th of an inch. If you are dealing with a basement environment, combine this precision with the moisture-proof shim strategy for basement built-ins to ensure that even a perfectly scribed unit doesn’t rot from the bottom up.
How do I keep my custom built-ins from sagging or shifting over time?
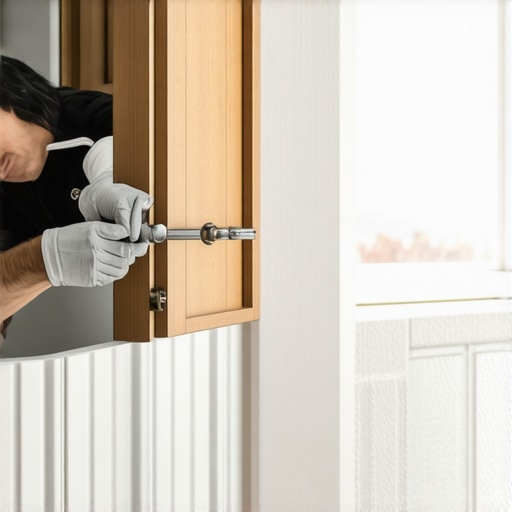
Maintenance is not just about cleaning the mirrors; it is about checking the physics of your furniture every six months. Wood is a living material—it breathes. I recommend doing a ‘hinge audit’ twice a year. If you find why your soft-close drawers are slamming, it is usually a simple tension adjustment on the internal piston, not a broken part. According to the Architectural Woodwork Institute (AWI) Quality Standards, maintaining an indoor relative humidity between 25% and 55% is the single most important factor for the longevity of permanent cabinetry. If your house humidity swings wildly outside these numbers, you will eventually need to learn how to fix drawer fronts that wont stay aligned as the wood expands and contracts. I keep a digital hygrometer in my tool bag—it is a twenty-dollar tool that prevents two-thousand dollars worth of phone calls about ‘warped’ doors that are actually just reacting to the dry winter air.
The Future Is Wired and Hidden
As we look toward the next few years of home design, the biggest shift I am seeing is not in the wood species used, but in tech integration. We are moving away from external power strips and toward 5 smart bathroom vanity wiring hacks for a flush cabinet finish. People want their electric toothbrushes and hair dryers hidden but constantly powered. This requires a different approach to internal cabinet design; you have to plan for heat dissipation and cable management from the start. I have started using the hidden cable management trick for built-in desks even in bathroom settings to keep internals organized. We are also seeing a massive trend in innovative storage solutions to transform your bathroom, where traditional shelves are replaced by tiered, powered pull-outs. If you are planning a remodel, do not just think about where the sink goes—think about where the lithium batteries will live. I challenge you to go into your bathroom right now and find one drawer that ‘slams’—use a small screwdriver to adjust the tension dial today and see how much more ‘premium’ your morning routine feels immediately.
The Lessons I Learned While Mopping Up MDF Sawdust
Over the years, I have realized that the most expensive mistakes usually happen because of what we don’t see. It is easy to focus on the beautiful shaker doors, but the real magic is in the moisture barriers and the internal bracing. If you are working in a tight environment, you might be maximizing space with innovative built-in solutions that require even tighter tolerances for humidity. Here are a few things I carry in my mental toolkit:
- The Sniff Test: If you smell dampness inside a cabinet, you have already lost the battle; find the leak before the wood swells.
- Weight Matters: Never assume a cabinet box can hold a heavy stone top without reinforcement; those corner blocks are there for a reason.
- Shadow Lines: A perfect installation is not about having zero gaps, but having consistent ones that allow for natural wood movement.
The Only Gear You Need for a Professional Finish
I have spent thousands on power tools, but when it comes to bathroom longevity, these three items are my non-negotiables. First, a high-quality articulating scribe—it is the secret to getting those creative storage solutions for vanities to look like they grew out of the wall. Second, a digital hygrometer; I leave one in every bathroom I remodel for a week to show the homeowner why they need to run their fan longer. Finally, once the heavy lifting is done, knowing how to install vanity mirrors on tiled bathroom walls completes the look without cracking expensive finishes. These aren’t just tools; they are the difference between a job done and a job mastered.
Go Build a Bathroom That Defies the Steam
You now have the blueprint to stop moisture from winning the war against your home. Whether you are tackling a DIY weekend project or overseeing a pro, these defensive measures ensure your vanity installation remains rock solid for decades. Your bathroom should be a sanctuary, not a source of maintenance stress. With the right smart storage solutions to optimize small spaces, you can create a room that is as functional as it is beautiful. Don’t be afraid of the plumbing or the heavy stone—just take it one sealed edge at a time.
Have you ever had a vanity explode from moisture damage after just a few years? Let me know your horror stories or success tips in the comments below!