

I was halfway through a precise miter cut on a gorgeous piece of walnut when my entire workbench decided to take a stroll across the garage floor. It wasn’t a slow drift; it was a violent, rhythmic shimmy that sent my coffee mug diving for the concrete and nearly cost me a finger. If you’ve ever felt your bench groan and sway under the pressure of a hand plane or a circular saw, you know that sickening feeling of instability. It’s not just a nuisance—it’s a safety hazard that turns a relaxing Saturday project into a high-stress gamble. Today, I’m going to show you exactly how we stopped the madness by securing our workstation to the slab. We aren’t just talking about bigger screws; we are diving into the world of concrete anchors to turn that wobbly table into a rock-solid foundation.
Stop the Vibration Before Your Project Ends Up on the Floor
The truth is, even the most beautifully built workbench is only as good as its connection to the earth. I spent years thinking that more mass was the answer. I piled old engine blocks and sandbags onto my bottom shelf, hoping gravity would do the work for me. Spoiler alert: it didn’t. All I ended up with was a heavy, oscillating monster that was harder to move and just as unstable. To get a truly professional result, you need to look at the structural screw choice for heavy duty garage workbenches combined with serious floor fasteners. When your bench stays put, your cuts get cleaner, your joints fit tighter, and your stress levels plummet. Have you ever had a project ruined because your work surface moved at the exact wrong moment?
Is drilling into your garage floor actually worth the hassle?
I get it—the idea of taking a hammer drill to your pristine (or oil-stained) garage floor feels permanent and a little bit scary. You might worry about cracking the slab or hitting a rebar. However, according to the Concrete Reinforcing Steel Institute, properly installed mechanical anchors in 2,500 psi concrete can hold thousands of pounds of tension and shear force, making it the most reliable way to stabilize heavy equipment. It’s a small price to pay for a shop that feels like a professional studio rather than a shaky shed.
My First Attempt at Stability Was a Heavy Failure
Early on, I made the classic mistake of thinking a few plastic wall anchors would be enough to keep a tall cabinet from tipping, and I tried a similar ‘shortcut’ with my bench by just wedging it against the drywall. I didn’t realize then that the concrete anchor rule for heavy duty garage shelving applies just as strictly to your primary workspace. The lateral forces of pushing a plane or even just leaning against the bench will eventually rip wood screws right out of a stud or wiggle them loose from a bottom plate. If you are also dealing with storage issues, you might want to look into 4 steel wall track tactics for heavy garage storage cabinets to compliment your floor-anchored bench. Once I stopped trying to ‘wing it’ with basic hardware and moved to wedge anchors, the difference was night and day. It felt like I was working on a mountain instead of a card table. [image placeholder]
Precision Mapping Saves Your Slab
Before you even touch a tool, you need to map out your footprint with surgical precision. I remember a rainy Tuesday when I tried to use standard lag shields in a hole that was slightly too wide; the bench felt solid until I started hand-planing a 10-foot oak slab, and the front leg started ‘breathing’ in and out of the floor. It was a disaster. To avoid this, place your bench exactly where you want it and trace the holes of your mounting brackets or legs directly onto the concrete with a permanent marker. If you are building a custom setup, this is the time to consider how 7 heavy duty floor bolts for securing mudroom entryway benches provide a blueprint for stability that works just as well in the garage as it does in the foyer. Moving the bench just an inch after drilling is nearly impossible, so get it right the first time.
The Hammer Drill Trick for Clean Holes
You cannot use a standard cordless drill for this; you need a hammer drill. Think of it like this: a standard drill is a screwdriver, but a hammer drill is a jackhammer and a screwdriver had a baby. It pulverizes the concrete while the bit whisks the dust away. Use a high-quality masonry bit that matches the diameter of your anchors exactly. A common mistake is letting the drill bit ‘walk’ across the floor, which ruins your alignment. I always start by ‘dimpling’ my marks with a center punch. This creates a tiny divot for the bit to sit in. Much like an expert guide to flawless vanity installation tricks tips, the secret to a professional finish is in the preparation of the mounting surface. Once you start drilling, let the tool do the work; don’t lean your entire body weight into it, or you risk snapping the bit or overheating the motor. 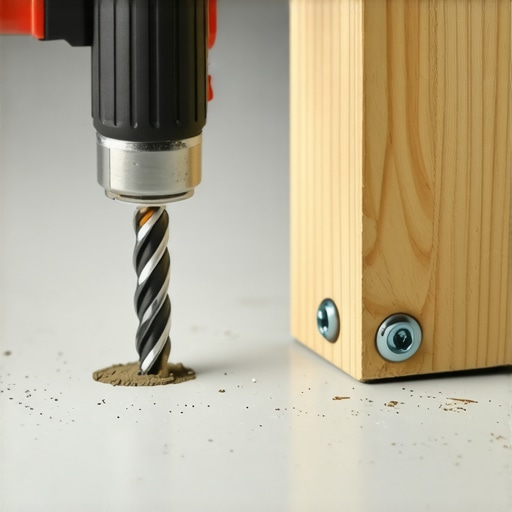
Select Fasteners That Won’t Snap Under Pressure
Not all anchors are created equal. For a workbench that deals with lateral vibration, wedge anchors are the gold standard. They work by expanding a small steel sleeve against the walls of the hole as you tighten the nut. This is essentially the concrete wedge anchor move for heavy wall hung garage racks applied to your floor. If you use cheap hardware, the shear force of a heavy project can literally snap the heads off your bolts. Look for 4 heavy duty garage rack bolts that wont snap under load to ensure your bench doesn’t become a projectile. I once saw a guy use plastic expansion anchors for a lathe stand; the first time he turned an unbalanced log, the stand walked right across the shop because the plastic just couldn’t bite into the concrete.
Secure the Base Like a Professional
Once your holes are drilled, use a shop vac or a blow-out bulb to remove every speck of dust. If there is dust in the hole, the anchor won’t seat properly. Tap the anchors in with a heavy mallet, keeping the nut on the threads so you don’t mushroom the top of the bolt. As you tighten the nuts, you’ll feel the resistance build—that’s the sound of the anchor becoming one with the earth. This process is very similar to certain vanity installation hacks that save time and money, where the goal is to create a permanent, non-shifting bond. If your floor is slightly sloped, use stainless steel shims under the legs before tightening everything down to ensure your work surface remains perfectly level.
Don’t Trust Gravity to Do a Mechanic’s Job
Most DIYers are taught that ‘heavy is stable.’ We’ve all seen the advice to build a bench out of 4×4 posts and double-layered MDF to solve vibration issues. But here’s the contrarian truth: mass alone is a lazy substitute for proper structural anchoring. While a heavy bench resists movement initially, it also stores kinetic energy. Once that 300-pound beast starts to rock, it’s much harder to stop than a lighter, properly anchored frame. According to the American Concrete Institute (ACI), mechanical fasteners provide a positive connection that prevents the ‘rhythmic oscillation’ that leads to joint failure in your furniture. I learned this the hard way when a massive oak table I was building started to walk because I relied on its weight instead of using 6 heavy duty wall fixes for massive quartz top vanities adapted for my shop layout.
Why do your anchors feel loose after only a month?
If you’ve ever tightened a wedge bolt only to find it wiggling four weeks later, you likely hit the ‘dust pocket’ trap. When we drill into concrete, the friction creates a fine powder that acts like ball bearings. If you don’t use a high-pressure blow-out bulb or a shop vac, the anchor grips the dust, not the stone. Over time, vibration shakes that dust loose, and your bench starts to dance again. This is a common nuance we see in vanity installation hacks that save time and money—if the foundation isn’t clean, the bond is a lie. Also, keep an eye on your slab’s moisture. Using the waterproof shim move for vanities on wet room floors can prevent your bench legs from wicking up ground moisture, which eventually rots the wood around your expensive bolts. 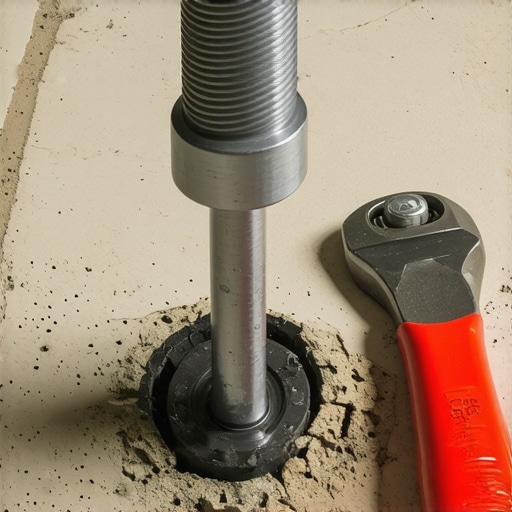
The Dangerous Edge Blowout Trap
One of the most expensive mistakes you can make is drilling too close to the edge of a concrete pour. There is a specific ‘critical edge distance’—usually about 5 to 10 times the anchor diameter. If you drill too close, the expansion force of a wedge anchor will literally pop a ‘cone’ of concrete out of the side of your slab. I’ve seen guys ruin a beautiful garage floor because they wanted their bench perfectly flush with the wall. Instead, you should learn how to bolt mudroom cubbies to sloped concrete safely by offsetting your fasteners. If your bench is against a wall, consider a hybrid approach: anchor to the floor away from the edge and use a ledger on the wall. This prevents the ‘lever effect’ that causes why your built in bookcase is sagging and the mid span fix from happening to your primary workspace.
Why Floating Units Fail Where Anchored Benches Succeed
There is a massive trend right now for ‘floating’ everything—from vanities to garage cabinets. People think that as long as they hit the studs, they are safe. But they ignore the shear stress on the screw shank. When you load a floating unit with 100 pounds of tools or a quartz countertop, you are asking a few pieces of steel to fight gravity 24/7 without any vertical support. This is where expert guide to flawless vanity installation tricks tips becomes vital knowledge. Without floor anchoring or a structural cleat, that unit will eventually pull the drywall away from the studs. It’s not a matter of ‘if,’ it’s ‘when.’ Have you ever had a cabinet start to pull away from the wall? It’s a terrifying sight. If you’re dealing with a tall unit, don’t forget the lateral support move for tall library bookcases to keep it from tipping forward during use. Have you ever fallen into this trap or had a slab crack on you? Let me know in the comments below.
Why SDS Plus Drills Win Every Time
If you are still using a standard cordless hammer drill for concrete, you are essentially bringing a knife to a gunfight. I personally switched to an SDS Plus rotary hammer years ago because the mechanical action is entirely different. A standard hammer drill uses two ribbed discs that click past each other, creating a high-frequency vibration that barely scratches the surface of 4,000 psi concrete. An SDS drill uses a pneumatic piston that delivers a massive, concentrated blow directly to the back of the bit. It’s the difference between tapping a nail with a spoon and hitting it with a sledgehammer. When I was working on my latest project, following a step-by-step guide to vanity installation for beginners, I realized that the same level of precision is needed for floor anchors as it is for plumbing. For the cleanest results, I recommend using a HEPA-certified vacuum attachment that pulls dust directly from the hole as you drill. This isn’t just about keeping the shop clean; it’s about ensuring the fastener has maximum contact with the concrete wall.
How do I keep my anchored systems stable for the long haul?
Maintenance is the part of the process most DIYers ignore until something starts to rattle. For mechanical anchors like wedge bolts, you need to perform a ‘torque audit’ about six months after the initial installation. Over time, the seasonal expansion and contraction of your garage slab can cause microscopic shifts. According to technical documentation from Simpson Strong-Tie, mechanical anchors can experience slight tension loss due to concrete creep. I set a reminder on my phone to take a torque wrench to every floor bolt twice a year. If you find a bolt that keeps loosening, it’s a sign that your bench is experiencing too much lateral force, and you might need to look into 6 heavy duty l-brackets for reinforcing custom built-in units to help distribute that load. Keeping the surrounding concrete sealed also prevents moisture from migrating down the bolt hole and causing internal corrosion. 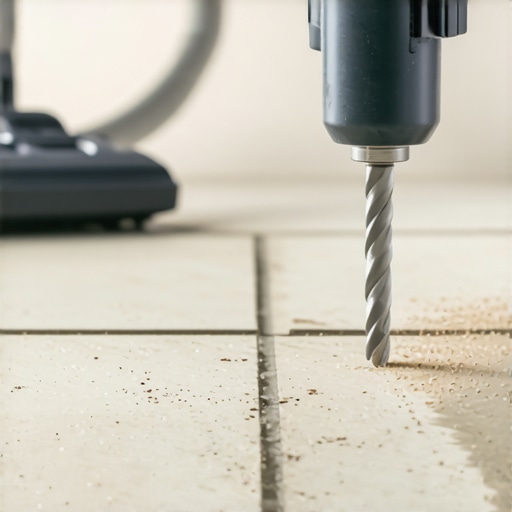
The Future of Garage Storage is Modular and Metallic
I predict we are moving away from the massive, immovable wooden workbenches of the past and toward a hybrid system. We are starting to see ultra-lightweight carbon fiber composites and high-strength aluminum frames that offer the same rigidity as solid oak but with a fraction of the weight. This shift makes creative built-ins for seamless storage and home aesthetics much easier to achieve in a utility space. These modern systems often use a rail-based anchoring method, similar to 4 steel wall track tactics for heavy garage storage cabinets, allowing you to slide and lock your workstation anywhere along a reinforced wall. It gives you the stability of a fixed anchor with the flexibility of a mobile shop. If you want to future-proof your setup, start integrating innovative storage solutions to transform your bathroom logic into your garage—think about accessibility and moisture resistance above all else.
Don’t Ignore the Impact of Floor Coatings
If you have an epoxy or polyaspartic floor, you have an extra layer of complexity. You cannot just drill through it and hope for the best. The heat from a masonry bit can sometimes cause the edges of the coating to delaminate or melt. I always use a diamond-tipped hole saw first to core through the epoxy layer before switching to my masonry bit. This creates a clean ‘shoulder’ for the anchor and prevents moisture from getting under your expensive floor coating. It’s the same level of care you’d use when following an expert guide to flawless vanity installation tricks tips. If you’re ready to take your shop to the next level, I challenge you to try the ‘double-anchor’ method on your heaviest tool stand this weekend—anchor it to the slab and the wall studs simultaneously to experience true zero-vibration work.
Why I Finally Stopped Fearing the Hammer Drill
The biggest hurdle for me wasn’t the work itself, but the fear of making a permanent mistake on my garage floor. I eventually realized that a few 1/2-inch holes are far less damaging than a 300-pound workbench falling over. One ‘lightbulb moment’ for me was discovering that most vibration-related failures happen because of the ‘dust trap.’ If you don’t use a blow-out bulb to clear the hole, you aren’t anchoring to concrete; you’re anchoring to loose powder. Another realization was that mass is actually the enemy of stability if it isn’t anchored—once a heavy bench starts to rock, its own momentum makes it harder to stop. Finally, I learned that creative built-ins for seamless storage and home aesthetics only look professional when the gaps are consistent, which is impossible if your floor isn’t perfectly level.
The Gear That Actually Survives My Shop
I’ve gone through plenty of cheap hardware, but a few specific tools have earned a permanent spot in my kit. First, an SDS Plus rotary hammer is non-negotiable for anyone drilling more than two holes; it saves your wrists and your bits. Second, I always keep a bag of stainless steel shims on hand. They are much better than wood for leveling heavy equipment because they won’t compress over time, similar to how you’d use the waterproof shim move for vanities on wet room floors to prevent rot. Lastly, I swear by Simpson Strong-Tie wedge anchors because their torque requirements are clearly documented, taking the guesswork out of structural safety. If you find the frame of your bench is still flexing, I recommend adding 6 heavy duty l-brackets for reinforcing custom built-in units to tie the top of the legs into the wall studs for maximum rigidity. [image placeholder]
Build a Foundation That Actually Lasts
Taking the time to install concrete anchors isn’t just about stopping a wobble; it’s about creating a workspace where you can actually focus on your craft. Whether you are tackling a complex furniture build or just following a step-by-step guide to vanity installation for beginners, the confidence that comes from a rock-solid foundation is life-changing. Stop fighting your tools and start working with them by locking your bench down once and for all. Have you ever had a project ruined because your work surface moved at the exact wrong moment, or do you have a favorite anchoring trick I missed? Let me know in the comments below.