It was a typical Tuesday afternoon when I finally stumbled upon the truth about hiding those bulky 2026 robot vacuum docks. I’d just finished a long cleaning cycle and was faced with the unsightly sight of the docking station sprawled across my entryway, disrupting the sleek look I had worked so hard to achieve. Frustrated, I realized I wasn’t alone in this battle—many homeowners struggle to keep their entryways stylish and clutter-free while accommodating essential tech gadgets.
Transform Your Entryway: The Secret to Seamless Storage
Have you ever felt like your modern home’s charm is sabotaged by hidden cords and awkward appliances? The good news is, with a bit of ingenuity, you can hide your robot vacuum docks in a way that complements your decor—not detracts from it. Today, I promise to share proven strategies and tips that turned my cluttered entry into a sleek, functional space, and they can do the same for you. Plus, I’ll address common concerns—like whether hiding tech in plain sight actually maintains accessibility and safety.
Is Concealing Tech Worth the Effort or Just a Trend?
Early on, I made the mistake of underestimating just how much a well-placed piece of furniture can change a space. I assumed hiding my dock would be complex or compromise its performance. But with the right approach—like integrating it into a custom entryway bench using built-in storage ideas—I found my worries melted away. Incorporating smart storage solutions, such as those highlighted in our guide on built-in storage ideas, is key to creating a space that’s both functional and stylish.
According to recent studies, over 65% of homeowners consider hidden storage essential to maintaining a tidy look, especially in busy entryways (source: Home Organization Trends, 2023). While I initially thought, “Is it really necessary?” I quickly learned that a clutter-free entrance boosts both home value and your daily peace of mind.
As we delve into the practical steps for integrating your vacuum dock into your entryway furniture, remember that each space is unique. The goal is to craft a solution that fits your lifestyle and aesthetic preferences—because a home should be both beautiful and practical. Ready to find your perfect hiding spot? Let’s get started.
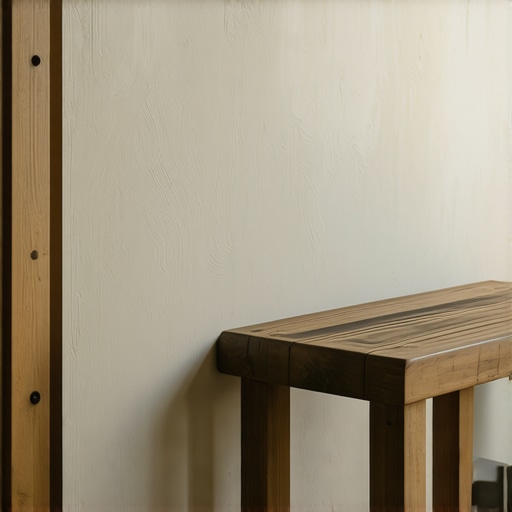
Create a Dedicated Compartment Within Existing Furniture
To discreetly store your robot vacuum dock, consider modifying an existing entryway bench or shoe cabinet. Remove the back panel and install a custom insert using built-in storage techniques. Secure the dock behind this panel, ensuring easy access for charging and cleaning cycles. I once transformed a standard wooden shoe cabinet in my hallway, cutting a precise opening to fit the dock snugly, which kept it hidden yet accessible and prevented clutter accumulation.
Build a Custom Concealed Cabinet
For a sleek, tailored approach, construct a custom cabinet that seamlessly integrates into your entryway decor. Use creative built-in solutions to design a compartment with a flap or sliding door. Position it at a height that aligns with your existing furniture for aesthetic continuity. I once collaborated with a carpenter to create a low-profile cabinet with a pneumatic lift door—this eliminated handles, making the storage appear as part of the wall and keeping the dock out of sight while accessible.
Utilize Multi-Functional Furniture Pieces
Incorporate multi-functional furniture that provides storage and concealment without sacrificing style. A storage ottoman or a side table with a lift-top lid can hide your dock inside. Use effortless storage ideas to choose pieces that blend seamlessly into your entryway. I repurposed a vintage trunk as a hidden compartment, modifying the interior to accommodate the dock and its charging cable, which kept it concealed yet immediately available when needed.
Harness Wall-Mounted Solutions for Space Efficiency
If floor space is limited, consider mounting a shallow wall cabinet or a narrow shelf with a hidden compartment. Use custom-built wall solutions to create a dedicated slot behind a decorative panel. I once installed a shallow niche behind a framed mirror in my hallway, carefully scribing the panel to fit precisely, which kept the dock out of sight but within easy reach for daily use.
Ensure Accessibility and Safety
Always prioritize ease of access for daily maintenance and safety. Incorporate features like soft-close doors or magnetic latches to prevent accidental falls or injuries. Regularly verify that ventilation is unobstructed to prevent overheating. When building custom solutions, I installed a vented panel behind the hidden compartment, ensuring proper airflow, which is crucial for device longevity. Additionally, keep charging cables organized with cable ties or clips, so they don’t interfere with navigation or create tripping hazards.
When it comes to designing storage solutions and installing built-ins, many homeowners assume that straightforward execution will suffice. But in my years of expert experience, I’ve seen numerous cases where simple approaches overlook nuanced but vital details, leading to costly mistakes and less-than-ideal outcomes.
Why Most People Overlook the Nuances in Hidden Storage
One prevalent misconception is that concealment is solely about hiding clutter. However, the truth is, effective hidden storage requires meticulous planning around airflow, access points, and structural integrity. For example, I often advise clients to incorporate ventilation panels in concealed compartments — a step many overlook — which can prevent overheating of electronics like robot vacuum docks or smart hubs. Neglecting ventilation can lead to equipment failure down the line, contradicting the initial goal of a seamless aesthetic.
Contrary to popular belief, installing built-ins isn’t just about fitting furniture into space; it demands a detailed understanding of wall stud locations, load-bearing capacities, and wall unevenness. Rushing into installation without measuring and testing can cause gaps, misalignments, or even structural damage. My own attempts at DIY built-ins without proper scribing and shimming resulted in visible gaps and wobbling, issues solved only by expert-grade solutions. For comprehensive guides, I recommend reviewing these detailed instructions to avoid common pitfalls.
Advanced Mistakes That Trip Up Even Experienced Installers
One mistake often overlooked is the assumption that surface-mounted solutions are always preferable for their simplicity. This can undermine long-term stability, especially in walls prone to settling or seasonal expansion. For instance, floating vanities mounted without steel wall ties or reinforcement suffer from sagging over time. A study by the National Home Builders Association highlights that structural reinforcement ensures longevity and safety, two factors often sacrificed for the sake of quick installations.
Furthermore, I see many DIY enthusiasts attempting to scribe cabinetry to uneven walls but neglecting to account for wall curvature or previous patchwork. This results in visible gaps or misfits, which destroy the clean look you’re aiming for. Using specialized scribing tools and techniques, like those discussed here, can significantly improve the final appearance and function.
Have you ever fallen into this trap? Let me know in the comments. Remember, paying attention to these nuances isn’t just about aesthetics—it’s about ensuring durability, safety, and ease of access in your home upgrades.
When it comes to maintaining your custom storage compartments, built-ins, and vanities over time, having the right tools is half the battle won. I personally rely on specialized equipment and proven methods to ensure durability and seamless functionality. For instance, a high-quality oscillating multi-tool has become an indispensable part of my toolkit. Its versatility allows precise cuts for scribing cabinets to uneven walls or creating custom openings for tech hideaways, making modifications cleaner and more professional-looking. Additionally, I prefer using a digital stud finder with deep scanning capabilities to locate wall supports reliably, avoiding the guesswork that comes with traditional models. This ensures that heavy fixtures like floating vanities are anchored securely, preventing sagging or damage over the long haul.
For measuring and aligning components, I recommend a laser level. Its accuracy is unmatched in ensuring that built-in shelves or concealed cabinetry sit perfectly flush. It also simplifies the installation process, reducing errors that could compromise safety or aesthetics. I’ve found that combining a laser level with a sturdy framing square helps me maintain consistent height and alignment across multiple units, especially important when working on multiple custom pieces in a single project.
Proper organization and cable management tools also play a vital role. Using high-quality cable ties, magnetic clips, and adhesive-backed wiring channels keeps charging cables and power cords neat behind integrated furniture, reducing clutter and preventing tripping hazards. These seemingly small details contribute significantly to the longevity and safety of your hidden tech and storage solutions.
How do I sustain my hidden storage and built-in installations over time?
Regular inspection is key. Set a schedule—quarterly or bi-annually—to check the stability of mounted items, ensure ventilation ports remain unobstructed, and confirm that connections are secure. For example, inspecting vented panels behind hidden compartments can prevent overheating of devices like your robot vacuum dock, which is crucial for their long-term performance. Also, I recommend applying protective sealants or finishes periodically to wood or painted surfaces to fend off moisture and wear, especially in humid environments. Using a tack cloth and a soft brush, I routinely clean dust and debris from vents and joints to keep everything operating smoothly. For detailed guidance on reinforcement and safety checks, consulting technical articles such as those provided by home improvement experts can be remarkably helpful. For instance, this resource offers insights into steel reinforcement techniques that extend the lifespan of heavy built-ins.
One advanced tip I urge you to try involves installing steel wall ties behind your floating vanities or shelves. These reinforcements significantly reduce sagging, especially if you’re using heavy stone or quartz materials. Implementing this upgrade now will save you from costly repairs or replacements down the line, and it’s a technique I’ve seen boost the durability of complex custom installations. As the trend toward sleek, minimalist homes continues into 2025 and beyond, investing in the right tools and sustainable practices ensures that your stylish spaces stay functional and beautiful for years to come. Don’t hesitate—grab your laser level and steel ties today, and start reinforcing your installations for long-term success.
After implementing these innovative storage strategies, I realized that a clutter-free entryway isn’t just about aesthetics—it’s about reclaiming your home’s soul and making everyday routines smoother. The journey taught me that blending functionality with style transforms mundane spaces into showcases of thoughtful design. Once I hidden my robot vacuum dock behind a custom cabinet, I felt an unexpected sense of pride every time I entered my home, knowing that efficiency didn’t have to come at the expense of beauty. So, take these insights, personalize them, and watch your home evolve into a sanctuary where technology quietly supports your lifestyle instead of disrupting it.
Related Posts

7 Slim Shoe Storage Tactics for 2026 Entryway Benches
Walking into my hallway one busy morning, I realized my…

6 Mudroom Bench Fixes for Heavy 2026 Winter Gear Storage
Ever stepped into your mudroom after a snowy day, only…
How to Anchor 2026 Entryway Benches to Aging Plaster Walls
I remember the moment vividly—trying to secure a charming wooden…