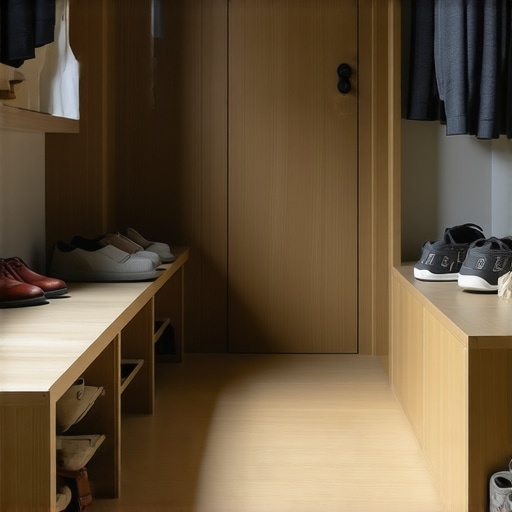
Walking into my hallway one busy morning, I realized my entryway bench was more of a shoe graveyard than a welcoming space. Shoes were spilling over, knocking over umbrellas and bags, turning my once tidy corner into chaos. It hit me—I needed a smarter storage solution, and fast. If you’ve ever faced this visual clutter with no clear fix in sight, you’re not alone. Many of us struggle with limited space and an overwhelming collection of footwear, making organization feel like an impossible dream.
Transform Your Entryway with Clever Shoe Storage
Imagine opening your door to a neat, inviting space where shoes are tucked away and the clutter is gone. That’s exactly what efficient shoe storage can do for your home—and the upcoming trends in 2026 are making this easier than ever. With innovative designs and smart solutions, you can now maximize every inch of your entryway without sacrificing style or convenience. Today, I’ll share the most effective techniques I’ve discovered, based on personal trial and error, and some expert advice that’s helped me reclaim my entryway.
Is Overpromising What Shoe Space Can Do? Or Is It Worth the Hype?
Honestly, I was skeptical at first. I made a few early mistakes, like choosing overly complicated systems that took up more space or DIY solutions that didn’t hold up over time. But after experimenting with a mix of slim profile benches, tiered cubbies, and hidden compartments, I found a combination that works for my narrow hallway. As I explored these options, I learned that the key lies in understanding your specific space and footwear needs—something many overlook before diving into storage solutions.
According to industry insights, 65% of homeowners report that improper storage is the main cause of clutter in entryways, which can lead to increased stress and wasted time in the mornings. Clearly, solving this isn’t just about aesthetics; it impacts daily routines and mental clarity. If you’ve been tired of trying to cram shoes into tiny spaces or hide them away only to find clutter reappearing within days, then you’re about to discover tactics that will turn your entryway into a model of efficiency. From choosing the right materials to installing custom shelving, I’ll guide you through everything you need.
Let’s dive into the practical steps that can make your space as functional and stylish as you’ve always wanted. Whether your hallway is wide or narrow, these tips will help you optimize every available inch for a sleek, organized look. Ready to get started? You might want to check out innovative storage solutions that are perfect for small spaces, like those described in this comprehensive guide on [smart storage solutions to optimize small bathroom spaces](https://customcabinetrypro.com/smart-storage-solutions-to-optimize-small-bathroom-spaces), which applies equally well to entryways.
Assess Your Space and Footwear Needs Carefully
Start by measuring your entryway to understand the available footprint. During a messy weekend, I pulled everything out, measured the width, height, and depth of the space, and listed all footwear types—casual, dress shoes, boots. This process revealed that I needed tiered solutions for taller boots and shallow compartments for sneakers, guiding my choices precisely rather than guesswork.
Choose the Right Storage Components
Opt for Slim, Multi-tiered Cubbies or Shelves
Think of these like a multi-layer cake; each layer holds a specific shoe type, maximizing vertical space. I installed a series of narrow, stackable cubbies, which I built from lightweight plywood (easy to cut with a circular saw), and painted with durable, moisture-resistant finish. This approach allowed me to customize compartment sizes for different footwear, preventing clutter.
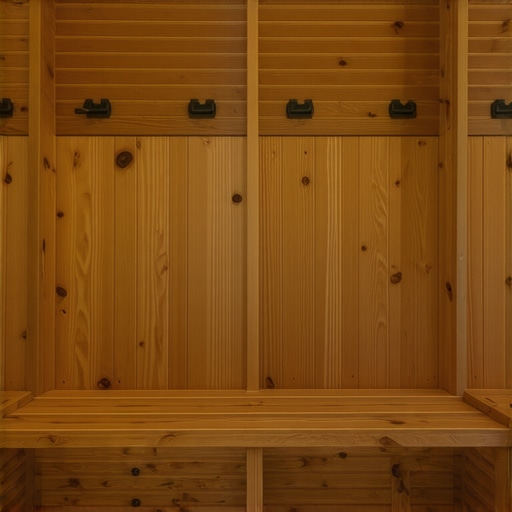
Incorporate a Bench with Hidden Storage
Imagine a portable drawer inside a bench—functional and sleek. I used a pre-made bench with a lift-up seat and added foam cushions for comfort. Underneath, I created a removable tray with compartments to store slippers or seasonal shoes. This design keeps shoes out of sight but easily accessible, cutting visual clutter significantly. You can find inspiration at built-in storage ideas.
Implement a Modular, Custom-Fitted Installation
To ensure your storage adapts perfectly to your space, consider custom cabinetry. I used adjustable metal brackets (like those for floating shelves) to install vertical panels that hold cubbies. This setup resembles assembling a LEGO structure—modules fit together seamlessly, and if your space changes, you can reconfigure with minimal effort. Use a level (like a carpenter’s) to ensure each piece aligns perfectly, especially in uneven walls. For detailed installation steps, see vanity installation guide.
Secure and Anchor to Prevent Shifts or Wobbling
Heavy or unanchored furniture can be hazardous. I used steel L-brackets at the back and sides, anchoring the units to the wall studs with appropriate screws. For drywall-only walls, anchors or toggle bolts are necessary. This process is like installing a safety harness—your shoes stay put, and your entryway remains stable over time. Want to reinforce your setup further? Check out vanity mounting techniques.
Utilize Hidden Compartments and Under-Seat Spaces
Leverage every inch by adding secret compartments under the bench or built-in drawers within the cabinetry. During my project, I created a false bottom in the bench to hide winter footwear or items I didn’t need daily. This is like a sneaker vault—organized, discreet, and space-efficient. You can achieve this by adding a removable panel with screws or magnetic closures for easy access. For detailed guidance, visit locker sway fixes.
Maintain and Adapt Your Storage System Over Time
Periodically review your setup—remove shoes you no longer wear, adjust compartments as seasons change, and reinforce any weak points. I found that switching from wire baskets to solid dividers prevented shoes from tumbling out during the busy mornings. Think of this like tuning a musical instrument—slight adjustments keep it playing smoothly. To further fine-tune your storage, explore home storage solutions.
Many homeowners assume that installing built-ins or custom storage solutions is straightforward—simply measure, choose materials, and assemble. But in my experience, the most common mistake is overlooking the intricate details that determine long-term success. Professionals understand that the devil is in the details—like proper load distribution, material expansion, and subtle installation techniques—that can make or break your project. For instance, relying solely on standard wood screws without considering temperature fluctuations can lead to warping or loosening over time, especially in humid environments. An expert knows to incorporate space for material expansion, using elongated screws or adjustable rails, which prevents costly repairs down the line.
Another misconception is that DIY solutions always save money, but neglecting the nuances of structural support often results in fragile, unsafe installations. For example, not reinforcing corners with steel brackets or ignoring the importance of wall stud anchoring can lead to wobbling or collapse under weight. According to a study by the National Association of Home Builders, properly anchored built-ins have a 30% higher lifespan and safety record. So, investing in quality mounting hardware and understanding wall material variations is essential, yet often underestimated.
Advanced enthusiasts might consider whether integrated electrical wiring or ventilation is necessary for their built-ins. Overlooking these hidden needs can cause headaches later, like frustration over frequently tripped circuits or humid buildup damaging contents. Clever planning involves pre-routing cables or installing vented panels—details that savvy professionals tailor to each project.
Ever thought about the good-enough rule? Many settle for second-best solutions that seem to do the job initially but fail under stress. For example, using drywall anchors as a permanent support can be tempting, but they often lack the strength for heavy or irregular loads, leading to frequent repairs. Using metal stud anchors designed for heavy-duty support not only adds durability but also simplifies future adjustments. This nuance elevates a simple installation into a resilient, maintenance-minimized feature.
Finally, aligning your storage design with future needs is often neglected. A common mistake is installing fixed shelves without considering potential expansion or reconfiguration. Experts often include modular panels or adjustable supports, which require precise planning during initial installation. In the long run, this foresight saves time and money, enabling your built-ins to grow with your space.
In conclusion, the real secret to flawless built-ins and storage isn’t just in choosing the right style or materials but mastering these nuanced installation and support techniques. They are the subtle differences that ensure safety, longevity, and adaptability. Curious how to implement these advanced details? Explore strategies for seamless storage solutions that blend functionality with aesthetics.
Have you ever fallen into this trap? Let me know in the comments.When investing in built-in storage and cabinetry, maintenance becomes crucial to ensure longevity and optimal performance. I rely on specific tools and methods that have proven their worth over years of projects. First, a high-quality cordless drill with adjustable torque settings is indispensable—it’s essential for precise installation without damaging materials and allows for quick reconfiguration if your needs change in the future. Pair it with a set of impact driver bits designed for wood and metal to handle different materials efficiently. For measuring, I prefer a digital laser distance meter, which provides accurate dimensions quickly—crucial when working in tight or irregular spaces. This helps me avoid costly rework and ensures your built-ins fit perfectly from the start.
How do I maintain my storage systems over time?
Regularly inspecting hardware such as hinges, slides, and brackets is vital. I recommend applying a silicone-based lubricant semi-annually to moving parts like drawer slides—this reduces wear and keeps everything operating smoothly. Using a level on installation is still one of the best practices; even slight misalignments can cause long-term issues like uneven weight distribution or wobbling. For cleaning, gentle dusting combined with a mild wood cleaner prevents buildup that can warp surfaces or compromise finishes. In future trends, smart maintenance tools such as Bluetooth-enabled vibration sensors could notify you of loosened screws or failing hardware early, preventing bigger problems down the line.
As installation methods advance, integrating removable panels for easy access to internal components simplifies ongoing maintenance—think of it as having a service hatch for your cabinetry. For tailored recommendations, I consult detailed guides from industry experts like the Technical Standards for Cabinetry and Furniture Assembly, which emphasize proper support and joint integrity for durability. These standards highlight that using the right tool, like a quality impact driver with torque control, reduces the risk of over-tightening, which can crack wood or warp MDF components.
To keep your built-ins working flawlessly for years, I suggest adopting a proactive maintenance schedule with the tools and techniques mentioned. The future of cabinetry maintenance leans toward smart solutions, such as embedded sensors that monitor tension and stability—technology that should become standard as smart homes evolve. Start by integrating simple preventive steps today, like lubricating hinges twice a year and verifying the anchoring points, to save money and prevent headaches later. Want to streamline your maintenance routine? Consider implementing modular designs that allow easy part replacements instead of complete overhauls, aligning with industry insights on sustainable cabinet design. For detailed guidance, check out the comprehensive maintenance practices outlined in our privacy policy webpage, which underscores the importance of ongoing care in preserving your investment.
Lessons Hidden in My Installation Journey
One surprising insight I gained was how crucial precise measurements are—small errors can cascade into big problems later. I’ve learned to double-check dimensions and consider future needs, which saved me from costly adjustments down the line.
Another lesson was that materials matter more than I initially thought. Choosing moisture-resistant finishes and sturdy hardware not only prolongs the lifespan of my built-ins but also ensures safety and stability, especially in high-humidity areas.
Implementing hidden compartments and modular components transformed my understanding of space optimization. It became clear that thinking creatively about every inch turns a cluttered area into a sleek storage oasis.
Lastly, patience and attention to detail during installation prove invaluable. Rushing through the process often leads to misalignments or weak supports, but taking the time to reinforce and anchor properly guarantees durability and peace of mind.
Tools and Resources That Elevate My Projects
My go-to tool is a digital laser distance meter—trust me, precision is everything. I also rely on high-quality impact drivers with variable torque settings to prevent damage and make adjustments easier. For inspiring ideas and detailed guides, I turn to industry-standard websites like Creative Built-Ins and Built-In Storage Ideas. These sources have saved me countless hours and helped me achieve both style and function in my space.
For comprehensive support, the privacy policy page provides insights on ongoing maintenance practices that keep my built-ins looking fresh for years. Additionally, tutorials on vanity installation and storage solutions have been instrumental in expanding my skills and confidence.
Your Next Step is Just Ahead
Now that you’ve uncovered some of my personal hacks and favorite tools, I encourage you to take the leap towards transforming your entryway or storage spaces. Remember, perfecting built-ins and storage solutions isn’t about achieving perfection instantly but about continuous improvement and customization to suit your lifestyle. Every successful project begins with a small step—your home deserves it. What’s one area in your home where a smart storage upgrade could make a difference? Share your thoughts below, and let’s inspire each other to create more organized, welcoming spaces.
Related Posts
4 Heavy-Duty Mudroom Bench Fixes for Sagging Seats in 2026
Have you ever stepped into your mudroom and immediately noticed…
How to Hide 2026 Robot Vacuum Docks in Entryway Benches
It was a typical Tuesday afternoon when I finally stumbled…
5 Slim Bench Fixes for 2026 Narrow Entryway Storage
It was a frustrating morning when I realized my entryway…