One afternoon, as I reached out to grab a book from my living room built-in, I winced. The shelves wobbled, and I felt that sinking feeling—literally—knowing that my once sturdy storage was starting to sag. It hit me then: I’d invested in a beautiful built-in, but over time, the weight, age, and shifting walls had taken their toll. I realized I wasn’t alone in this; many homeowners face the frustrating challenge of sagging or wobbly built-ins that threaten both safety and aesthetics.
Why Sagging Built-ins Are More Than Just an Eyesore
At first, I thought I could ignore the problem. But neglect leads to more damage—doors misalign, shelves buckle, and worst of all, heavy items might come crashing down. That’s when I discovered the true importance of addressing structural issues early. Sagging built-ins can compromise the safety of your home, especially when they hold heavy objects or electronics. Plus, they diminish the value of your space—and your peace of mind.
Recent studies reveal that improperly supported built-ins are among the top causes of household accidents. According to the CDC, falls caused by unstable furniture are a significant source of injuries, particularly in homes. Recognizing that, I committed to fixing my walls and shelves once and for all. So, if you’ve noticed your living room built-ins starting to sag, this article is for you. I’ll share six proven steel-core fixes that have kept my shelves sturdy and my worries at bay.
Is Reinforcement Really Still Necessary in 2026? My Early Mistake
Admittedly, in my early days of DIY, I underestimated the importance of steel reinforcements. I thought wood alone would suffice—big mistake. Without proper support, even the sturdiest-looking shelves can warp or pull away from the wall, especially with heavier loads. That mistake cost me money and time. Thankfully, I discovered that steel-core fixes are reliable and long-lasting for modern built-ins. For more insights on safe and effective installation techniques, check out this step-by-step guide. Now, let’s get into how you can prevent your lovely built-in from losing its charm and stability before it’s too late.
Assess the Damage and Strengthen Support
Start by examining your built-ins thoroughly. Use a level to check for wobbling shelves or uneven surfaces. Take note of any areas where the structure shows signs of sagging or shifting. Once identified, remove any objects and clear the area for a clean workspace. I remember my own messy first attempt—tools scattered, dust flying—but it was crucial for precision. Proper assessment prevents over-engineering and targets reinforcement where it’s needed most.
Remove and Prepare for Reinforcement
Carefully detach shelves or panels that are loose or wobbly. Use a drill to unscrew any weak points. Sand down rough edges or splinters to ensure a smooth surface for installation. During my project, I temporarily removed all items to avoid damage. This clarity allowed me to work efficiently and avoid reattaching components prematurely, which can lead to misalignment.
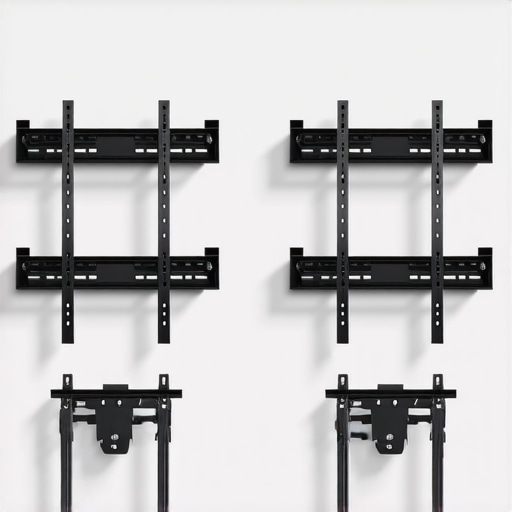
Select and Install Steel Support Brackets
Choose heavy-duty steel brackets designed for wall reinforcement, such as L-brackets or specialty wall ties. Think of these as the bones of your built-in—providing a sturdy, load-bearing backbone. Position brackets at wall studs—locate studs with a magnetic finder or punch small holes to locate drywall nails. When I installed mine, I marked the studs with a pencil, then pre-drilled for deep screws, ensuring solid anchorage. The key is securing brackets directly into studs to maximize load capacity.
Anchoring into Wall Studs for Maximum Support
Use a high-quality drill with a bit slightly smaller than your lag screws. Drive screws deeply into the studs at each bracket point. This creates a firm foundation, preventing future sagging. I also added washers to distribute pressure evenly. Remember: drywall anchors alone won’t hold heavy loads—proper stud anchoring is essential for lasting reinforcement.
Secure Shelves and Confirm Stability
After brackets are fixed, place shelves back onto supports or fasten them directly to brackets with screws. Check for wobble by applying gentle pressure. For stubborn shifts, add additional brackets or adjust existing ones. During my own fix, I used a clamp to hold shelves while drilling. Once secured, I used the level again to ensure perfect alignment, avoiding the typical disappointment of uneven shelves.
Final Checks and Safety Enhancements
Once everything is in place, double-check all screws and brackets. Use a stud finder app or a magnetic tool to confirm no loose fasteners. Consider adding steel wall ties or braces for areas prone to movement, especially if shelves hold heavy items. For a comprehensive safety upgrade, review options at this resource. My last step was to reattach all items and gently test the stability, giving me peace of mind for years to come.
Many homeowners assume that selecting the right cabinetry design is enough to ensure longevity and functionality. However, one of the most overlooked aspects is understanding the **nuances of proper support and installation techniques**. For example, a frequent misconception is that heavy-duty materials alone guarantee durability—yet without meticulous reinforcement and understanding of wall structures, even the sturdiest-looking built-ins can sag or fail prematurely. In particular, advanced support methods like steel wall ties or heavy-duty brackets are often underappreciated, despite their proven effectiveness in preventing sagging under heavy loads. An expert tip is to always secure your cabinetry directly into wall studs, instead of relying solely on drywall anchors, which are insufficient for supporting substantial weight. Experts like those from this resource emphasize that understanding wall framing and load distribution is crucial. A common trap here is oversimplifying the installation process by focusing only on aesthetics—forgetting that structural support underpins long-term safety and performance. It’s vital to use the correct fasteners, support brackets, and reinforcement strategies tailored to your wall type and the weight your built-ins will carry. Moreover, advanced DIYers might be tempted to skip professional assessments of wall conditions, risking uneven support and future damage. For those looking to upgrade, investigating innovative solutions like concealed steel braces can make a significant difference. Proper scribing skills also matter when fitting built-ins into irregular walls—neglecting this can introduce gaps and compromise support integrity. Remember, the key isn’t just appealing design but ensuring your storage solutions are resilient and safe over time. Do you ever fall into this trap of neglecting structural nuances? Share your experiences in the comments!
To deepen your understanding, explore this guide on built-in storage ideas and learn how expert installation changes everything. Incorporate these advanced strategies, and you’ll ensure your built-ins stand the test of time while keeping your home safe and stylish.
Keeping your built-ins and vanity installations in peak condition demands more than just initial craftsmanship; it requires a set of reliable tools and a strategic maintenance plan. I personally swear by certain equipment that has saved me time and headaches over the years, especially when it comes to ensuring long-term durability of my storage solutions.
Precision is Key: My favorite laser level
When reinstalling or adjusting built-ins, I rely heavily on a high-quality laser level. Unlike traditional bubble levels, laser levels project a straight line across a surface, allowing me to verify alignment over large areas with remarkable accuracy. This is crucial for ensuring that shelves, doors, and vanities stay perfectly level over time, preventing uneven wear or even structural failure. I recommend the guide on vanity installation for detailed instructions on using such tools effectively.
Power tools that make maintenance easier
Impact drivers and electric drills equipped with the right bits are my go-to. For example, when periodically tightening or replacing brackets and supports, the impact driver ensures secure fasteners without overexertion. I prefer models with adjustable torque settings to avoid stripping screws or damaging delicate materials. Investing in a versatile set of drill bits, including those designed for metal and masonry, allows me to adapt to different wall types while reinforcing supports or anchoring new fixtures for sustained stability.
Specialized software for ongoing assessment
Beyond physical tools, I’ve adopted maintenance software that logs repairs and schedules checkups. Programs like my project management app help me keep track of reinforcement dates, especially for complex multi-room built-in systems. This proactive approach prevents minor issues from escalating into costly repairs and extends the lifespan of my installations.
Predictive maintenance techniques promising a future of smarter storage
The trend is moving towards integrating sensor technology within storage fixtures. Imagine smart brackets that monitor load and vibration, alerting you via your smartphone when reinforcements are needed. While still emerging, such innovations, discussed in industry reports, could transform how we maintain our built-ins, making upkeep more efficient and less guesswork-based.
How do I maintain my storage solutions over time?
The secret is regular inspection and incremental reinforcement. I schedule biannual checkups, tightening brackets with my impact driver, realigning shelves with my laser level, and replacing any worn supports. Having a toolkit ready with the right equipment allows me to act swiftly, preventing small issues from turning into structural failures. You might want to consider adopting similar routines—trust me, the peace of mind is worth it.
If you haven’t already, try calibrating your supports with a laser level, especially after renovations or heavy use. It’s a small step that can make a big difference in the longevity of your built-ins. For more comprehensive guidance, revisit these installation hacks or explore innovative storage solutions to future-proof your home.
Top Missteps That Almost Got Me Stuck
I underestimated the power of proper wall support, thinking heavy-duty brackets were enough without studying wall types or load distribution. This oversight nearly led to catastrophic shelf sagging. Learning from that, I now double-check my wall materials and use tailored reinforcement strategies. It’s a reminder that every home is unique, and customizing your approach prevents costly mistakes.
Tools and Tactics That Saved My Built-ins
Investing in a high-quality laser level and impact driver transformed my DIY projects. The laser level ensured perfect alignment, while the impact driver made fastening into studs effortless. These tools aren’t just conveniences; they’re essentials that guarantee your built-ins stay sturdy and safe for years. Trusted resources like this detailed guide can help you get started with confidence.
Keep Your Storage Strong, No Matter What
Regular inspections and proactive reinforcement are your best friends. I schedule biannual checkups, tightening brackets and adjusting supports as needed. Smart brackets with load sensors might sound futuristic, but they’re rapidly becoming the norm for maintenance-free stability. The key takeaway? Consistent care, coupled with the right tools and support strategies, extends the life of your built-ins and keeps your home safe and stylish.
Will You Be the Next to Reinforce Your Space?
Taking the time now to assess and upgrade your built-in support can save you from future stress—and expenses. What’s the one reinforcement tip you’re eager to try first? Share your plans below, and let’s build safer, more beautiful homes together!
Related Posts
4 Steel-Rail Fixes for 2026 Wall-Mounted Media Units
I'll admit it: I once spent an entire afternoon struggling…

How to Scribe 2026 Living Room Built-ins to Slanted Walls
It was a moment of quiet frustration in my home…

3 Mistakes That Ruin Your Living Room Built-ins in 2026
It was a moment I won't forget. I stood in…