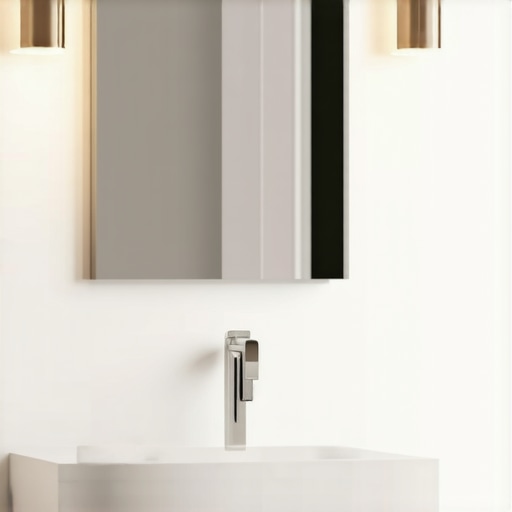
One afternoon, I was installing a sleek floating vanity in my bathroom, feeling confident I had all the right tools and techniques. Suddenly, as I applied pressure to mount the heavy fixture, I heard a sickening crack. Turns out, I hadn’t secured it properly—something I learned the hard way. That moment was my lightbulb moment: understanding the critical role of the right anchors is everything, especially with modern, stylish vanities that seem to defy gravity.
The Importance of Choosing the Right Anchors for Your Vanity
If you’re planning a bathroom makeover or just replacing your existing vanity, you probably want it to look flawless and feel secure. But what often trumps style over substance is the way it’s anchored to the wall. In 2026, with heavier countertops and more delicate materials, the stakes are higher. That’s where high-quality steel stud anchors come into play. They’re designed to handle the weight and stresses that typical drywall anchors just can’t manage.
Yet, many folks overlook the details, assuming all anchors are the same. I used to think a basic toggle bolt would suffice—until I discovered the potential disaster of using the wrong hardware. Installing a floating vanity isn’t just about securing it; it’s about creating a lasting, safe installation that can support years of use. Proper anchoring prevents dangerous falls and costly repairs, and it’s especially crucial when dealing with custom or heavy countertops.
Expect Challenges? Resolve Them with Confidence
Today, I promise to walk you through everything you need to know about selecting and installing 5 steel stud anchors. From avoiding common pitfalls to ensuring your vanity stays put—no matter how many times you open and close those drawers—you’ll gain practical knowledge rooted in real-world experience. Whether you’re a DIYer or hiring a pro, understanding these fundamentals can save you time, money, and frustration.
So, have you ever faced a wobbling vanity or, worse, a falling one? If that thought gives you a shiver, don’t worry. We’re about to dive into the core essentials that will make your installation sturdy, safe, and stress-free. Ready to turn that shaky project into a solid setup? Let’s get started.
Start with a Precise Wall Assessment
Before drilling into your wall, examine the space carefully. Use a stud finder to locate framing studs, since these are your best anchors for heavy vanities. Test multiple spots to identify the strongest points, marking them with a pencil. I once tried to hang a vanity over drywall alone—within weeks, it sagged, causing frustration and rework. Accurate wall assessment saves time and guarantees safety.
Select the Right Anchors and Hardware
Choose high-quality steel stud anchors rated for the weight of your vanity, especially if it has a heavy countertop. For drywall-attached sections without studs, toggle bolts and molly anchors are reliable options. When I installed my last vanity, I opted for steel stud anchors because they provide secure, long-lasting support, minimizing the risk of wobbling or failure.
Create a Level Mounting Surface
Use a level to draw a horizontal line on the wall where the vanity will be installed. This visual guide helps you align brackets and ensures a straight finish. I once neglected this step, resulting in a crooked vanity that took hours to correct. Taking the time to mark accurately pays off in a flawless, professional look.
Pre-Drill and Attach Mounting Brackets
Pre-drill holes into your wall at the marked locations, matching the diameter of your anchors. Secure mounting brackets to the wall using your chosen anchors and hardware. When I learned to use a drill with the appropriate bit size, the process became smoother, and I avoided damaging tiles or drywall. Make sure brackets are level and tight to prevent movement.
Position and Secure the Vanity
Carefully lift your vanity and align it with the mounted brackets. It helps to have an assistant for heavy pieces. Once in place, secure the vanity to the brackets, double-checking for levelness. In my last project, using shims behind the vanity ensured a perfect fit despite uneven flooring. This step guarantees stability and prevents future wobbling.
Final Checks and Adjustments
After installation, gently test the vanity by opening drawers and applying pressure. Look for any signs of looseness or misalignment. Tighten bolts if necessary. For added security, consider supplemental braces or steel wall ties, especially for floating vanities exposed to frequent use. Properly anchored vanities can last for years without issues, saving you time and costly repairs down the road.
If you want to explore more innovative ways to optimize your space, visit this guide on maximizing bathroom space with custom vanities.
Many homeowners assume that installing built-in storage and vanities is straightforward, but the reality is more nuanced. A common myth is that simply securing a vanity to the wall guarantees safety and durability, yet overlooking the importance of wall material and proper anchoring can lead to wobbling, or worse, collapse. Advanced installers know that the type of wall—be it drywall, plaster, or masonry—demands specific reinforcement techniques. For example, installing a vanity over drywall without using appropriate steel stud anchors often results in inadequate support, causing long-term instability. This oversight isn’t just an aesthetic concern; it poses safety risks that can be costly to fix later.
One underestimated detail involves the precise placement of anchors. A slip-up here can shift the entire fixture, especially when the vanity includes heavy materials like stone or concrete. Remember, the weight distribution affects how anchors perform, and uneven mounting can lead to cracks or detachments over time. Experts recommend pre-measuring and double-checking levels multiple times during installation, a step many DIYers tend to rush through. Additionally, the myth that all storage solutions are universally interchangeable can be problematic. Custom built-ins, tailored to specific wall contours and room usages, often outperform generic shelving or pre-fabricated units—yet many overlook their true potential.
Reflecting on common mistakes, one glaring error is ignoring the importance of ventilation and moisture control behind built-ins. Failing to include proper ventilation can trap humidity, leading to mold, warping, and hardware deterioration—problems that could have been prevented with targeted solutions like concealed vents or moisture-resistant materials. In fact, studies show that proper moisture management extends the lifespan of cabinetry and improves indoor air quality.
To avoid these pitfalls, consider leveraging advanced techniques such as scribing built-ins to uneven walls or reinforcing corners with hidden steel supports. For navigating complex interior layouts, consulting an expert or reviewing in-depth guides can make the difference between a durable installation and ongoing frustrations. For example, detailed steps on how to support heavy vanities on sloped or uneven floors are available to help you get it right the first time.
Have you ever fallen into this trap? Let me know in the comments. Remember, the devil is in the details—especially when it comes to installing built-ins and storage solutions that last.
Tools I Trust for Long-Term Durability
When it comes to ensuring your built-in storage and vanities stay in top shape over the years, having the right tools makes all the difference. I personally swear by a high-quality rotary drill like the Makita XFD07Z, which offers cordless convenience combined with powerful torque, making it ideal for pre-drilling and securing steel anchors in various wall materials. Additionally, a precision levels such as the Stabila 37816 ensures your installations are perfectly horizontal, preventing wobbles and misalignments that can compromise structural integrity over time.
For fine adjustments and shimming, I rely on a small, adjustable C-clamp and a set of stainless steel shims. These allow me to fine-tune the positioning of vanities, especially when dealing with uneven floors, and are invaluable for achieving a professional finish. Don’t overlook the importance of a good stud finder; I prefer the Bosch D-tect 150 due to its ability to detect live wires, pipes, and studs simultaneously, reducing the risk of costly mishaps during installation.
Software and Planning Tools That Make Life Easier
Proper planning is crucial for long-term satisfaction. I use a combination of digital design tools like SketchUp for creating detailed 3D models of the intended space, and the Creative Built-Ins planning guide to visualize custom storage solutions. These tools help me foresee potential issues with space utilization, wall thickness, and support reinforcements before a single screw is driven.
It’s also vital to keep a detailed installation checklist, which includes verifying wall materials, appropriate anchor types, and the locations of existing utility lines. Incorporating project management apps like Trello can streamline this process, especially when coordinating with contractors or managing multiple projects concurrently.
Future Trends in Maintenance and Upkeep
Looking ahead, trends point toward smarter maintenance solutions. IoT-enabled sensors embedded in built-ins could alert homeowners to issues like humidity buildup or structural shifts before they become visible problems. Additionally, advances in moisture-resistant materials will make long-lasting vanity installations more foolproof, reducing the need for frequent repairs. Embracing these innovations now can save you significant time and money down the line.
How Do I Maintain Built-Ins and Vanities Over Time?
Regular inspection is key. Check tightness of mounting hardware every few years, especially after significant temperature or humidity changes. Clear debris and dust from joints and moving parts, and apply a suitable protective coating or wax to wood surfaces periodically to prevent warping and deterioration. Additionally, monitor for signs of moisture intrusion or wall cracks that could indicate shifting support structures. Remember, catching issues early always costs less and prevents bigger problems later. For ongoing support, consult detailed guides like vanity installation hacks to refine your maintenance routine.”
}
The Biggest Lesson I Wish I Learned Sooner About Built-ins and Vanities
One of the most valuable insights I gained was realizing that even the most professional-looking installations rely heavily on the choice of anchors and support systems. Early in my DIY journey, I underestimated the importance of wall material compatibility, assuming that a standard screw or toggle bolt would suffice. It wasn’t until I faced wobbling fixtures and safety concerns that I discovered the critical role of steel stud anchors and proper reinforcement, which truly transformed my approach into a mastery of sturdy, long-lasting built-ins.
Curated Finds That Changed My Approach to Installation
- **The Book that Demystified Wall Materials and Support Strategies** — A comprehensive resource that deepened my understanding of how different wall compositions demand specific hardware choices. I highly recommend it for anyone serious about durable installations.
- **My Favorite Digital Planning Tool** — Using SketchUp allowed me to visualize support placements and anticipate potential issues, saving me time and ensuring precision. It’s become my go-to for designing custom built-in layouts that fit perfectly and support heavy loads.
- **Reliable Hardware Sources** — Sourcing high-quality steel anchors from suppliers I trust ensures that every project has the support it needs. Investing in premium hardware might cost more upfront but pays dividends in safety and longevity.
- **Helpful Maintenance Apps** — Keeping track of inspection schedules for mounted fixtures helps me catch early signs of wear or shifting, maintaining safety and aesthetic appeal over years.
Fuel Your Confidence and Build Something Lasting
Taking on built-ins and vanities with the goal of creating something both beautiful and durable is incredibly rewarding. Remember, every step—from wall assessment to choosing the right anchors—counts toward a project that you’ll be proud of for years to come. Embrace the process, keep learning, and don’t shy away from seeking expert advice or reading detailed guides. Your perfect, stress-free installation awaits—and the satisfaction of knowing it’s built to last is truly priceless.
What challenges have you faced in installing built-ins or vanities? Share your experience below and let’s learn from each other’s stories.
Related Posts
Fixing Wobbly Bathroom Vanities: 2026 Guide to Rock-Solid Mounts
I remember the exact moment I realized my bathroom vanity…
How to Stop 2026 Floating Vanity Vibrations with Steel Stud Ties
It was a frustrating morning when I finally looked closely…
5 Steel-Cleat Fixes for 2026 Floating Double Vanities
I remember the exact moment I realized I had underestimated…