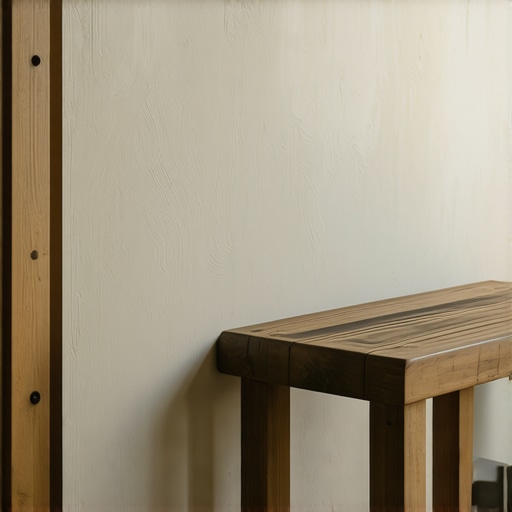
Imagine this: I was rushing out the door, eager to catch the bus, when I accidentally dragged my shoe across the entryway bench. The scrape left a nasty scuff on the floor, and I felt that familiar cringe—it’s like a tiny wound for your home. That moment hit me hard. I realized that my beloved bench, which I bought to organize my chaos, was slowly turning into a surface that damaged my beautiful flooring.
It’s a small thing, but floor scuffs can turn into big regrets over time, especially with heavy use and constant foot traffic. I used to think that just placing a mat was enough, but I quickly discovered that without proper protection, even the sturdiest floors can suffer from those annoying marks. That’s when I started looking into the best ways to safeguard my home, and I found that choosing the right feet for my entryway bench was a game-changer.
Today, I’m going to share with you how to select the best feet for your entryway benches to prevent unsightly floor damage. I’ve tested different options, read expert advice, and even made a few mistakes along the way—trust me, avoid those rookie errors!
Whether you’re frustrated with scratches, or simply want your furniture to stay pristine, this guide aims to help you decide which feet will provide the perfect buffer between heavy furniture and your precious flooring. After all, your home deserves that extra touch of care to keep it looking gorgeous.
The Impact of Footwear and Furniture on Floor Durability
Did you know that the type of furniture feet can influence how quickly your floors wear out? According to flooring experts, improper or rough furniture feet can cause scratches that ruin both hardwood and laminate surfaces. This is especially true in high-traffic zones like entryways, where shoes are constantly in contact with furniture.
From my experience, one overlooked mistake early on was neglecting to account for the weight and movement of the bench. I once chose cheap plastic feet because they looked sleek; however, they slid easily and scratched the floor when I moved the bench slightly. Since then, I’ve learned that selecting durable, well-designed feet isn’t just about aesthetics—it’s about protecting your home investment.
To make sure your entryway remains inviting instead of marred, I recommend exploring options like felt pads, rubber grips, or even sophisticated metal bases designed specifically to reduce floor wear. For more tailored ideas, check out some innovative [storage solutions](https://customcabinetrypro.com/effortless-storage-solutions-for-a-tidy-stylish-home) that include protective feet for various types of furniture.
Ready to dive into the best types of feet for your benches and how to choose them? Keep reading, and I’ll walk you through the top five options for 2026.
Choosing the Right Feet for Your Entryway Bench
Start by assessing your furniture’s weight, style, and the flooring type. Opt for soft pads like felt or rubber that act as buffers. For example, I replaced the plastic feet on my bench with felt pads, which dramatically reduced the scratches during rearrangements. Measure the furniture legs accurately to select compatible pads or feet, ensuring they fit snugly without slipping off over time. When purchasing, look for high-quality, durable materials to withstand daily use.
Installing the Feet Correctly
Remove existing legs or pads using a screwdriver if necessary. Clean the bottom of the furniture legs to remove dust and debris, which can cause slipping or uneven wear. Attach the new pads or feet securely, following manufacturer instructions. For example, I used adhesive-backed felt pads on my bench and pressed them firmly for a few seconds to ensure adhesion. Test the stability by gently rocking the furniture—if it wobbles, readjust or replace unstable pads before regular use.
Protecting Floors During Movement and Maintenance
When relocating furniture for cleaning or rearranging, lift the item entirely instead of dragging it. Use furniture sliders with soft bases to glide heavy pieces smoothly across surfaces without scratching. I once moved my heavy ottoman using a rolled-up towel as a makeshift slider—worked surprisingly well and prevented any floor marks. Regularly inspect and replace worn feet and pads to maintain maximum protection. Keeping a small kit with spare pads and tools nearby simplifies routine upkeep, saving you from future damage repairs and maintaining your home’s pristine look.
While many homeowners focus on the basics like choosing the right materials or configurations for their storage solutions and built-ins, there’s a lesser-known layer of complexity that can make or break your project—installation nuances that often trip up even experienced DIYers. Contrary to common belief, simply following the straightforward steps outlined in tutorials isn’t enough; mastering these subtleties can ensure durability, functionality, and aesthetics over the long run.
For example, a frequent mistake I see is ignoring the importance of proper wall framing support, especially when installing heavy built-in units or vanities. Many assume that anchoring into drywall alone suffices, but according to structural experts, this can lead to sagging or even dangerous collapses over time. Reinforcing with steel studs or using proper anchors tailored to the weight load is essential, and neglecting this can turn your elegant built-in into a safety hazard. You can explore innovative storage solutions that are designed for heavy loads and advanced mounting techniques to prevent such issues, but only if you implement them correctly during installation.
Another hidden pitfall is overlooking the environmental factors affecting materials. Moisture levels, temperature fluctuations, and even the home’s airflow can influence how your fixtures settle or warp. For instance, in humid climates, wooden vanities without adequate sealing or ventilation might swell, causing gaps or damage. Professionals recommend integrating moisture barriers and choosing materials specifically rated for your environment, as detailed in expert guides on vanity installation and built-in cabinetry. Not paying attention to these details can lead to costly repairs or replacements shortly after installation.
Why does proper scribing matter when installing built-ins or vanities?
Understanding the importance of precise measurement and adaptation to irregular wall surfaces is crucial. No wall is perfectly straight or plumb, yet many installers neglect to customize the fit, leading to unsightly gaps or stresses on the mounting structure. This oversight not only compromises aesthetics but can also cause long-term structural issues. Scribing allows you to contour the furniture to the wall, ensuring a seamless look and structural integrity. Advanced DIYers often employ tools like contour gauges or laser levels for this purpose; however, misjudging the wall’s irregularities or rushing the process can negate the benefits. To master this skill, consider consulting step-by-step guides that delve into the nuances of scribing and wall prep, ensuring your built-ins are both beautiful and durable.
Moreover, the choice of fasteners and the manner of attachment can be a silent culprit for instability. Using generic screws or neglecting to pre-drill can lead to cracks or pull-outs, especially with heavier units. Investing in high-quality anchors and understanding load distribution is often overlooked but vital, as detailed in specialized installation articles. Overlooking these details might save time upfront, but it invites future headaches—ranging from aesthetic flaws to dangerous structural failures.
Interesting to note, studies by the Building Research Institute underscore that meticulous installation practices significantly reduce repair costs and extend the lifespan of built-in furniture. For instance, employing steel reinforcement, precise wall anchoring, and environmental considerations can increase durability by up to 30%. So, next time you plan an installation, remember, it’s the tiny, often ignored details that define the success of your project.
Have you ever fallen into this trap? Let me know in the comments.
To ensure your custom-built storage and vanities stay durable and functional over time, investing in the right tools and adopting effective maintenance routines is crucial. A high-quality cordless drill with various bits, such as Phillips, Torx, and paddle bits, allows for quick adjustments and secure fastening during installation or later modifications. I personally rely on a Milwaukee M18 series drill because of its power, battery life, and lightweight design, which makes handling extensive projects more manageable. For measuring, a laser level has transformed my installation process, ensuring perfectly aligned built-ins on uneven walls—saving time and preventing costly rework. Regularly inspecting hinges, slides, and fasteners is essential; I use a small multi-tool kit equipped with screwdrivers, pliers, and lubricants to tighten or replace components as needed. Applying silicone-based lubricants to drawer slides and hinges helps prevent squeaks and ensures smooth operation, extending the lifespan of your furniture. As trends evolve, integrating smart maintenance—like installing moisture sensors or using software for tracking upkeep schedules—will likely become standard, especially for high-end vanity projects. Think about future-proofing your space by choosing modular components that can be easily updated or replaced without tearing apart entire installations.
### How do I keep my built-in storage systems functioning flawlessly over time?
A practical approach involves routine check-ups and timely upgrades. Cleaning and adjusting hinges, lubricating moving parts biannually, and replacing worn fasteners preserve structural integrity. For more extensive overhauls, such as upgrading shelving or adding integrated lighting, detailed guides like the one on [expert-built-in cabinets](https://customcabinetrypro.com/expert-built-in-cabinets-storage-solutions-for-seamless-spaces) can streamline your process. Don’t forget to document your maintenance activities and periodically reassess your tools—a well-maintained toolkit ensures you’re always ready for unexpected fixes or future enhancements. Investing in quality equipment upfront reduces long-term repair costs and keeps your installations looking and functioning like new. Try implementing a monthly inspection routine with your preferred toolkit, and you’ll notice how smoothly your built-ins operate for years to come. Ultimately, embracing a proactive maintenance mindset paired with reliable tools will keep your home’s built-in solutions standing strong against the test of time.
Lessons That Took Me by Surprise in Installing Storage and Vanities
One of the most unexpected insights I gained was how small details, like selecting the right furniture feet, can drastically extend the life of your floors and furniture. Initially, I thought that aesthetic choices were more important than practicality, but I quickly learned that durable, floor-friendly feet save headaches and repair costs down the line.
Another revelation was how environmental factors, such as humidity and temperature fluctuations, influence the materials and their longevity. I used to overlook this, leading to warping and gaps in my built-ins. Now, I always consider environmental compatibility when choosing materials and protective features.
Lastly, I underestimated the importance of routine maintenance, like inspecting and replacing pads or adjusting furniture legs regularly. This proactive approach keeps everything functioning smoothly and prevents minor issues from becoming major booboos.
Tools and Guides That Changed My Approach to Built-ins and Storage
My go-to toolkit includes a reliable laser level and a cordless drill with multiple bits. These tools facilitate precise installation and ensure that everything stays aligned—crucial when scribing built-ins to uneven walls. For learning more advanced techniques, I highly recommend the in-depth [step-by-step guide to vanity installation](https://customcabinetrypro.com/step-by-step-guide-to-vanity-installation-for-beginners). It’s a game-changer that boosted my confidence and craftsmanship.
To stay ahead of potential problems, I trust resources like [effortless storage solutions](https://customcabinetrypro.com/effortless-storage-solutions-for-a-tidy-stylish-home), which introduce innovative ideas for maximizing space while protecting surfaces. Investing in quality tools and credible guides has paid dividends by making my projects more durable and aesthetically pleasing.
Your Next Move is Closer Than You Think
Remember, installing or upgrading your built-ins and vanities isn’t just about following steps—it’s about mastering details that matter. By prioritizing protective features like well-chosen feet and routine maintenance, you’re safeguarding your home’s beauty and functionality for years to come. Don’t let small oversights turn into costly repairs or frustrations; instead, embrace thoughtful, proactive practices that elevate your space and skills. Start today, and watch your home transform into a masterpiece of durability and style.
What’s the tiniest detail you’ve overlooked that made a big difference? Share your story below—I’d love to hear how you protect your home’s investments!
,
One Reply to “Fix Floor Scuffs: 5 Best Feet for 2026 Entryway Benches”
Leave a Reply
Related Posts
How to Anchor 2026 Entryway Benches to Aging Plaster Walls
I remember the moment vividly—trying to secure a charming wooden…
4 Heavy-Duty Mudroom Bench Fixes for Sagging Seats in 2026
Have you ever stepped into your mudroom and immediately noticed…
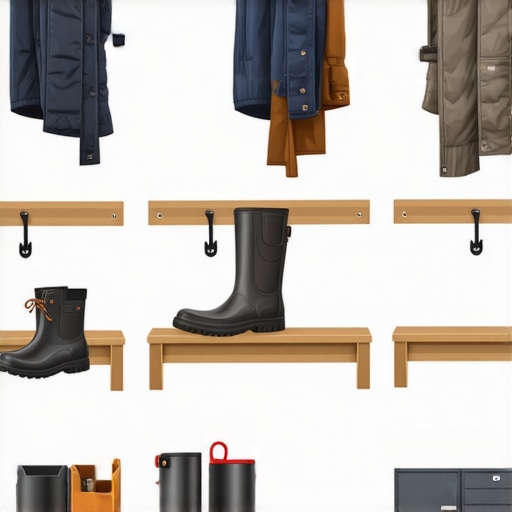
6 Mudroom Bench Fixes for Heavy 2026 Winter Gear Storage
Ever stepped into your mudroom after a snowy day, only…
Reading this post really resonated with me since I’ve also faced issues with furniture causing floor scratches, especially in high-traffic entryways. I used to overlook the importance of selecting the right furniture feet, but switching to rubber or felt pads made a huge difference in reducing floor wear. It’s fascinating how such a simple update can preserve the beauty of your flooring over time. I also learned the importance of moving furniture carefully—using sliders or lifting instead of dragging— to prevent marks or damage, which the post highlights so well.
One thing I’ve found helpful is periodically checking the condition of feet and pads, replacing them before they wear out completely. This proactive approach seems to extend the life of both the furniture and the floors. Have others here discovered particular brands or types of protective pads that are especially durable or provide better grip? Would love to hear your recommendations for heavy or awkwardly shaped furniture!”,