

I’ll never forget the sound of three hundred plastic DVD cases hitting the floor at 3:00 AM during a minor tremor. It wasn’t just the noise; it was the sight of my seven-foot-tall media tower swaying like a palm tree in a hurricane. I had spent weeks curating that collection, and in five seconds, I realized I’d built a wooden guillotine. Honestly, I’m lucky the whole thing didn’t come down on me while I was reaching for a midnight snack. That morning, I realized that living in a seismic zone means you can’t just lean a cabinet against a wall and hope for the best. Today, I’m going to share exactly how I transformed my shaky storage into a rock-solid fixture that doesn’t budge, even when the ground does.
The Night My Media Tower Decided to Fight Back
One of the biggest mistakes I made early on was trusting those cheap, thin nylon straps that come in the box. They might work for a toddler-proofing situation, but for a heavy media tower loaded with glass and electronics, they are practically decorative. I found out the hard way that when the earth moves, the centrifugal force on a tall unit is immense. If you aren’t using something like the hidden support rail for extra wide media centers or a heavy-duty steel L-bracket, you’re basically playing Russian roulette with your electronics. Have you ever felt that sinking feeling when you see your furniture start to ‘walk’ away from the wall? It is terrifying.
Is this level of reinforcement really worth the extra holes in my wall?
I get it—you don’t want to drill massive lag bolts into your beautiful drywall or plaster. But let me tell you, a few patchable holes are much cheaper than replacing a 75-inch TV or, worse, a trip to the ER. According to the USGS, roughly 33% of earthquake-related injuries are caused by falling furniture or non-structural items, not the building collapsing. That’s a staggering number that convinced me to take my anchoring seriously. For my larger setups, I’ve even started incorporating the plywood backing strategy to ensure those anchors have something substantial to bite into. While you’re at it, don’t forget that heat builds up in these units too; I always recommend using stealth ventilation tricks to keep your hardware from frying while it’s being kept safe. We are aiming for a setup that is both earthquake-proof and tech-friendly.
Stop Guessing Where the Wall is Strongest
If you’ve ever tried to find a stud in an old house, you know that stud finders are basically professional-grade liars. They beep at random, pick up electrical conduits, and sometimes just go silent when you need them most. But here is the reality: your media center is only as strong as the wood it’s biting into. If you are mounting into drywall alone, you aren’t anchoring; you’re just decorating the wall with future debris. I remember helping a friend install a massive custom unit where the walls were so out of plumb, a marble would roll off a shelf like it was on a playground slide. We had to use the scribing tool for cabinets against textured plaster walls just to get the unit flush enough to even think about anchoring it. Once we were flush, we didn’t just hope for the best; we mapped every single vertical support.
The Hidden Danger of Hollow Drywall
When you can’t find a stud exactly where you need one—which happens more often than I’d like—you have to get creative. For lighter items, people assume any anchor will do, but for a seven-foot tower, you need serious intervention. If you find yourself staring at a gap between studs, look into how to secure built-in cabinets to walls with no studs using specialized toggle systems or horizontal ledger boards that bridge the gap between the wood you can actually find.
Hardware That Won’t Snap Under Pressure
Most people head to the big-box store and grab the first pack of shiny brackets they see. That’s a mistake. In a seismic event, cheap metal doesn’t just bend; it shears. I’ve seen 1/8-inch steel snap like a dry twig because it wasn’t rated for lateral force. For my own media setup, I upgraded to 6 heavy-duty L-brackets for reinforcing custom built-in units. These aren’t the flimsy things you use for a spice rack; they are structural-grade supports that lock the unit’s frame directly to the home’s skeleton.
Strengthen the Frame to Prevent the Lean
It’s not just about the wall; it’s about the unit itself. A tall bookcase or media tower can literally fold in on itself if the back panel isn’t rigid. I once worked on a project involving a massive stone-topped unit where we were terrified the weight would crush the cabinet base during a tremor. We followed 6 heavy-duty wall fixes for massive quartz top vanities to ensure the vertical gable ends were reinforced enough to take the weight. For taller, narrower units, you absolutely need the lateral support move for tall library bookcases. This involves cross-bracing or internal steel plates that keep the box ‘square’ when the floor starts to roll. If the cabinet loses its shape, the doors will fly off, and the shelves will drop their contents like a bad habit. Think of it like a roll cage in a race car—it’s the internal structure that keeps everything alive when things get messy.
Stop Turning Your Studs Into Swiss Cheese
Everyone tells you that more screws equal more strength. In my experience, that’s exactly how you split a 2×4 and lose all your holding power. I call it the ‘Swiss cheese effect.’ If you drive four three-inch lag bolts into the same six-inch section of a stud, you aren’t reinforcing it; you are compromising the wood’s grain. The real secret to a rock-solid installation isn’t the number of fasteners, but the distribution of the load. For instance, when I’m dealing with heavy loads, I stop relying on standard wood screws and switch to 4 internal steel stiffeners that stop massive bookcase shelves from bowing, which actually lightens the burden on the wall anchors themselves.
Why Does My Floating Vanity Still Bounce Even With Steel Brackets?
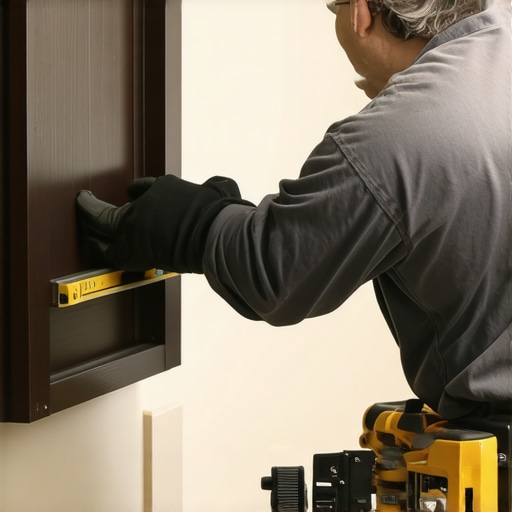
This is the question that separates the pros from the weekend warriors. You can use the most expensive brackets in the world, but if you haven’t accounted for the wall’s ‘flex,’ that quartz top is going to move. This usually happens because people overlook the shim-to-stud connection. If there is even a 1/16th-inch gap between the back of your cabinet and the actual wood of the stud, the bolt will act like a lever, bending under the weight. I’ve seen this lead to catastrophic failures where why your heavy quartz vanity is cracking the cabinet frame becomes an expensive reality. To combat this, I always use the scribing hack for fitting vanities against out-of-plumb walls to ensure the box is perfectly flush before the first bolt ever touches the wall. This eliminates the ‘air gap’ that causes that dreaded bounce.
The Structural Trap Most DIYers Ignore
The biggest ‘oops’ factor I see in the field involves ignoring the floor. We focus so much on the wall that we forget the floor is often the culprit for why things pull away. If your floor settles or isn’t level, it puts immense shear stress on your wall anchors. I once saw a beautiful built-in literally rip the drywall paper off because the floor dipped half an inch over three feet. According to the American Society of Civil Engineers (ASCE) 7-22 standards, the seismic and structural load on nonstructural components depends heavily on the rigidity of the attachment point. If your base isn’t solid, your wall anchors are doomed. This is why I obsess over 7 tactics for leveling vanities on sloping tile floors. Getting the base right means the wall anchors only have to worry about lateral movement, not the vertical weight of the unit.
Don’t forget the ‘silent killer’ of custom work: moisture. Even the best structural work fails if the wood rots from the inside out. I’ve gone back to jobs where a simple plumbing drip turned into a structural nightmare because of why your vanity plumbing is leaking into the cabinet base. Use an expert guide to flawless vanity installation tricks to ensure your seals are as tight as your anchors. Have you ever fallen into the trap of over-tightening your fasteners only to hear that sickening crack of the wood? Let me know in the comments below!
That sickening crack of wood splitting usually happens because we rely on ‘feel’ rather than physics. These days, I do not even touch a high-stakes project without my Wera Kraftform torque screwdriver. It might seem like overkill for a home project, but when you are trying to balance creative built-ins for seamless storage and home aesthetics with the reality of a 150-pound media tower, precision is your only friend. I set my driver to a specific Newton-meter rating—usually following the fastener manufacturer’s technical specifications—to ensure I am not over-stressing the wood fibers. This is especially critical when you are using vanity installation hacks that save time and money, because ‘fast’ should never mean ‘fragile.’ If you have ever stripped a lag bolt inside a wall, you know the nightmare of trying to extract it without destroying the stud.
How do I maintain these heavy units over time?
The secret to long-term stability is not just the initial bolt; it is the six-month follow-up. Homes are living, breathing things that expand in the summer humidity and shrink in the winter chill. I have seen rock-solid installations develop a slight ‘wiggle’ after just one season. In fact, FEMA P-74, ‘Reducing the Risks of Nonstructural Earthquake Damage,’ explicitly notes that even the best anchors can loosen over time due to building vibration and thermal cycling. I make it a habit to check the plumbness of my larger units every time the clocks change. If I notice even a hairline gap, I am digging into why your built-in bookcase is sagging and the mid-span fix that can bring it back into alignment. For those of you with sleek, modern setups, you should also be looking at how to stop floating shelf sag with internal torsion box engineering as part of your maintenance routine. A quick check of the moisture levels behind the baseboard, perhaps by employing 7 moisture barriers for vanities in high-humidity bathrooms, can prevent the wood from softening around your anchor points.
The Future of Walls That Talk Back
Looking ahead, I suspect the days of ‘dumb’ furniture are numbered. I am already seeing high-end architectural firms in Japan and California experimenting with smart-load sensors integrated directly into the mounting brackets. Imagine your phone buzzing with an alert because your media console has shifted 3mm after a micro-tremor, or because the moisture levels in the wall have spiked. We are moving toward a world where innovative storage solutions to transform your bathroom are not just about the shelves, but about the data they provide regarding the health of your home’s structure. Until then, we rely on good old-fashioned physics and the right tools. I am telling you, invest in a quality digital level and a torque driver; they are the difference between a ‘built-in’ and a ‘fell-down.’ I want you to try one thing this weekend: take a pencil and draw a tiny, faint line on the wall exactly where the top of your heaviest cabinet meets the drywall. Check it in three months. If that line is visible, your unit is sinking, and you need to revisit your anchoring strategy immediately using my expert guide to flawless vanity installation tricks. Don’t wait for the next tremor to find out your house is moving without your furniture.
The Expensive Lessons My Media Tower Taught Me
Gravity works 24/7, but a tremor happens in seconds. The biggest thing I learned after my own 3:00 AM disaster is that ‘good enough’ is just an invitation for the floor to meet your expensive electronics. I stopped trusting my hands to feel the tension and started trusting torque settings and physics. If your unit wobbles even a millimeter when you give it a firm shoulder-lean, it isn’t truly anchored—it is just leaning with style. You need to stop wobbly custom built-ins once and for all by ensuring the frame is locked to the house’s skeleton, not just the drywall paper.
- Never skip the pilot hole: Splitting a stud is the fastest way to lose all your holding power.
- Distribution is key: Two lag bolts spread out are always better than four clustered in a small area.
- The floor is your foundation: If the unit isn’t level at the base, the wall anchors will eventually shear.
#IMAGE_PLACEHOLDER_E#
My Go-To Kit for Building Structures That Last
I don’t go into any install without my Wera Kraftform torque screwdriver. It ensures every bolt is tight enough to hold but not so tight that it crushes the wood fibers. For precision, a Stabila digital level is non-negotiable; it catches the subtle floor slopes that cause units to pull away from the wall over time. I also constantly reference the FEMA P-74 guidelines for nonstructural earthquake safety—it is the gold standard for anyone living in a high-risk zone. When I’m looking for inspiration that balances safety with style, I often revisit built-in storage ideas to declutter your living space to see how the pros hide their structural reinforcements behind beautiful finishes.
Start Building for the Future Today
Taking these extra steps might add a few hours to your weekend project, but the peace of mind you get is permanent. You aren’t just building a shelf; you are creating a sanctuary that stays put no matter what happens beneath your feet. Implementing smart and effortless storage solutions for a tidy, stylish home is about more than just aesthetics—it is about protecting your family and your hard work. Have you ever felt a piece of furniture move during a storm or a minor tremor? Let me know how you handled it in the comments below!