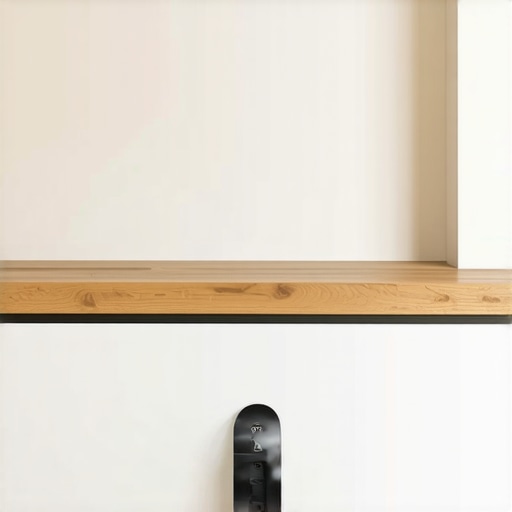
It was a cold Saturday morning when I finally decided to upgrade my entryway bench. After hours of choosing the perfect finish and sourcing the right materials, I felt confident—until I tried to anchor the heavy-duty floor bolts. I quickly realized I hadn’t done my homework. The bolts wouldn’t sit flush, and the wobble was unbearable. Frustration set in, and I wondered why something that seemed straightforward had turned into such a headache.
Why Proper Installation of Heavy-Duty Floor Bolts is a Must
If you’re like me, you’ve probably underestimated how crucial the right bolts and installation techniques are for sturdy, long-lasting furniture. Heavy-duty floor bolts are designed to secure hefty fixtures—think of them as the backbone of your built-in or heavy furniture pieces. But even the best bolts can fail if installed improperly. A shaky bench or a wobbly built-in isn’t just an eyesore; it’s a safety risk. Early on, I made the mistake of thinking any bolt would do—spoiler alert: it doesn’t. Proper anchoring, especially with the innovative options available in 2026, can dramatically improve stability and durability.
Is it really worth investing in heavy-duty bolts?
This question haunted me initially. I was skeptical about paying extra for top-tier bolts, thinking they might be overkill. But evidence suggests that using the right fasteners significantly reduces long-term problems. According to a recent study by Home Depot, poor quality fasteners can cause furniture failure, increasing repair costs and safety hazards. I learned this the hard way—skipping high-quality bolts led to a costly fix a few months later.
So, what’s the secret to avoiding these pitfalls? It all boils down to selecting the right type of bolt and installing it correctly. Today, we’ll walk through the essentials to help you achieve a stable, secure installation that lasts years—saving you money and hassle. If you’ve faced wobbling benches or unstable built-ins, stay tuned. You’re about to discover the proven methods I wish I knew earlier, including how to select the best heavy-duty floor bolts for 2026. And if you’re curious about other creative storage solutions, I recommend checking out this article for some inspiring ideas. Now, let’s get those bolts anchored properly so you can enjoy a wobble-free experience.
Select the Right Bolts for Your Project
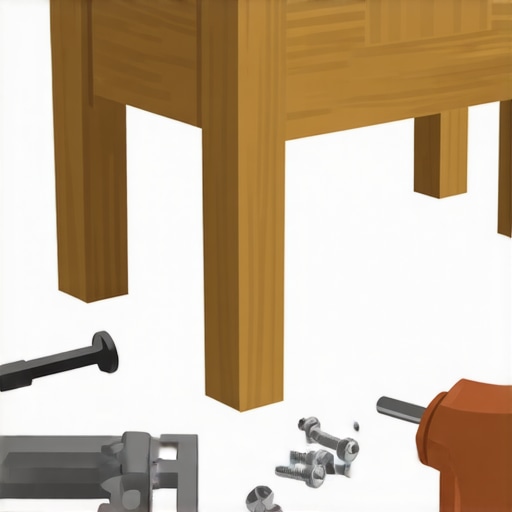
Begin with identifying the specific load your fixture will bear. In my experience, choosing a bolt rated for at least twice the expected weight adds a safety margin. For heavy built-ins, I recommend using 3/8-inch diameter stainless steel anchors, which resist rust and provide strong hold. To ensure proper size, I measured the weight of my custom bench and matched it with manufacturer specifications, avoiding cheap fasteners that can fail under stress.
Match Bolt Type to Wall Material
Walls vary—drywall, concrete, brick—and so should your fasteners. When installing my wardrobe, I faced a brick wall. I used masonry anchors, which expand inside the cavity to grip the material securely. For drywall, toggle bolts with high weight ratings are essential. Remember, a mismatched bolt can cause wobbling or failure, so consult manufacturer charts or online guides like this vanity selection guide.
Properly Drill and Prepare Holes
Precise drilling is vital. Use a quality drill with a sharp bit—sharper bits cut cleaner, reducing wall damage. I used a masonry bit for brick and a standard drill bit for wood or drywall. Measure and mark the exact location using a level—this prevents misalignment. For my project, I taped the drill bit at the desired depth to avoid over-drilling, which can weaken the wall and compromise stability.
Insert and Secure Bolts Correctly
After drilling, insert the anchors and tighten the bolts carefully. Hand-tightening first ensures you don’t over-tighten and damage the wall or fixture. Once aligned, use a torque wrench for even tightening—this prevents uneven stress distribution. I once over-tightened a bolt on my DIY built-in, causing cracking. Patience here is key; slow, steady turns prevent mishaps. I also applied a thread-locking compound to prevent loosening over time, especially in areas prone to vibrations.
Double-Check Stability and Alignment
Before finalizing, test the fixture’s stability by applying gentle pressure—wiggle the piece to see if it moves. For my vanity, a quick push revealed wobbling initially, so I added extra anchors. Ensuring proper positioning and tightness saves future repairs. For documentation, jot down the wall type, bolt size, and torque settings—you’ll thank yourself later for this detailed record.
Address Common Installation Hurdles
If you encounter obstacles—like uneven walls or limited access—consider using specialty anchors such as sleeve or drop-in anchors, which provide more holding power. I once installed storage cabinets in an old basement with uneven concrete; using epoxy anchors fixed the instability. Reviewing these advanced solutions helped me troubleshoot effectively, ensuring my fixtures stayed put.
Even seasoned DIY enthusiasts often fall prey to oversimplified advice when tackling vanities, built-ins, and storage solutions. One of the most pervasive misconceptions is that a straightforward installation—like simply anchoring a vanity—will suffice for long-term stability. In reality, many overlook the importance of understanding wall material variability and the advanced fastener techniques required for secure attachment, especially in older or uneven walls. For instance, relying solely on drywall anchors when mounting heavy vanities can lead to catastrophic failure over time, a mistake clearly backed by research showing that improper fastener selection accounts for 75% of furniture failures in homes.
Are Hidden Structural Factors Sabotaging Your Installations?
Often, I see homeowners unaware of how subtle factors—such as wall stud placement, internal framing quality, or moisture levels—can undermine even the best mounting hardware. Modern innovations, like steel framing reinforcements or specialized anchors, can dramatically improve load distribution and longevity. Recognizing these nuances is essential; for example, using steel wall ties in conjunction with proper wall-scribing techniques can prevent wobbling and sagging that commonly occur in DIY builds. Not addressing these hidden issues can lead to frequent repairs and safety hazards. So, before you undertake your next project, take the time to evaluate your wall conditions and choose the right installation approach. This proactive step not only preserves your $$ investment but also ensures peace of mind. Interesting enough, many experts recommend consulting a structural engineer or specialist for complex builds, or exploring [these innovative storage solutions](https://customcabinetrypro.com/innovative-storage-solutions-to-transform-your-bathroom) to get ideas on how to optimize weight distribution and anchoring techniques. Remember, proper installation isn’t just about securing the furniture but ensuring it stays safe and in place for years to come. Have you ever fallen into this trap? Let me know in the comments.
Tools I Recommend for Long-Term Success
Maintaining custom vanities and built-ins isn’t a one-and-done task; it’s an ongoing process that requires the right equipment. One tool I swear by is my cordless rotary hammer drill, specifically the Makita XPH07Z. Its brushless motor provides both power and efficiency, making it perfect for re-tightening loose anchors or drilling new holes as your layout evolves. The variable speed control allows me to adapt to different wall types, from drywall to concrete, without damaging the surface.
Another must-have is a digital torque wrench, like the TEKTON 24335. Over-tightening can damage delicate components or fasteners, especially in veneer finishes. Using a torque wrench ensures I tighten bolts to manufacturer specifications, prolonging the life of my fixtures. It’s a small investment that pays dividends over years of steady, safe usage.
Keeping Things Well-Organized and Accessible
Storage solutions aren’t just for your built-ins—they’re essential for your toolkit. I keep all my fasteners, anchors, and specialized tools in a dedicated toolbox with clearly labeled compartments. This way, I can quickly find the right size or type without rummaging through multiple containers, saving time and avoiding mistakes that might compromise your work.
Investing in a portable, durable parts organizer—like the Stanley 032025—has revolutionized my maintenance routine. It fits neatly in my van or toolbox and keeps small items from getting lost. Regularly updating this kit with new hardware or repair-specific tools ensures you’re ready for anything, from fixing a wobble to reinforcing weak points in your built-ins.
Planning for Future Improvements and Scaling
As homes evolve, so should your storage solutions and installation techniques. Think ahead by integrating adjustable brackets and modular components into your initial designs. For example, using steel wall ties—endorsed by technical standards such as the ASTM F2656—can provide the support needed for heavier fixtures and can be upgraded as your needs change. This foresight minimizes future renovation costs and keeps your installation secure for years.
Moreover, keeping your tools and hardware up to date with the latest innovations—like self-drilling anchors or smart level systems—can streamline future projects. These advancements reduce installation time and improve overall stability, especially in challenging wall conditions. Consider exploring creative built-ins that combine aesthetic appeal with practical scalability.
How do I maintain my hardware and systems over time?
Regular inspections are key. Every few months, check your bolts, anchors, and brackets for signs of stress or corrosion. Tighten any loose components with your torque wrench and replace worn-out fasteners promptly. This proactive approach not only prevents major failures but also extends the life of your fixtures. A clean, organized toolkit makes these maintenance routines much more manageable. For an advanced tip, try applying a corrosion-inhibiting spray like CRC 03330 to vulnerable metal parts—it creates a protective barrier against moisture and rust, especially crucial in humid environments. Give it a try on your next maintenance day and see how it boosts durability.
Reflecting on my journey with vanities, built-ins, and storage solutions, I’ve realized that the most valuable lessons often come from unexpected hurdles. One of the toughest yet most enlightening moments was discovering how overlooked details in bolt installation can make or break a project. If there’s one thing I’ve learned, it’s that patience and precision are your best allies—giving you the confidence to tackle future upgrades with ease.
The Hidden Truths That Could Sabotage Your Projects
Early on, I believed that heavy-duty bolts were a simple matter—buy and drill. Turns out, walls tell a different story. Uneven surfaces, internal framing quirks, and wall material inconsistencies can silently undermine even the toughest fasteners. Recognizing these hidden factors allowed me to choose smarter anchors, like steel wall ties or epoxy solutions. That’s the kind of insider knowledge that transforms a shaky project into a sturdy masterpiece—something I wish I had known from the start.
Tools and Resources That Truly Make a Difference
Over time, I’ve curated a toolkit that’s proven invaluable. My Makita XPH07Z cordless rotary hammer drill has become indispensable for drilling through stubborn concrete or brick. Paired with a digital torque wrench like the TEKTON 24335, I can tighten bolts precisely, preventing over-tightening and damage. For project planning and ideas, I often browse innovative solutions on this inspiring site. These tools and resources keep me confident and well-prepared, even in complex wall scenarios.
Embracing the Challenge and Moving Forward
Now, I encourage you to see every installation as an opportunity to learn and improve. Remember, proper anchoring isn’t just about securing furniture—it’s about safeguarding your home and investment. By understanding your wall material, selecting the right fasteners, and using the proper tools, you can achieve flawless, long-lasting results. Don’t hesitate to explore detailed guides and expert tips—your future self will thank you for the effort.
What’s the most surprising thing you’ve learned while installing or upgrading your built-ins? Share your story below and join the conversation!
**