

I still remember the heart-stopping thud that woke me up at three in the morning. It sounded like a car had driven through my garage door. When I stumbled out there in my robe, I didn’t find a vehicle; instead, I found my brand-new overhead rack sagging dangerously, one corner hanging by a literal thread of splintered wood. I’d followed the instructions, used the provided lag bolts, and thought I was set. I was wrong. My mistake was simple but nearly catastrophic: I underestimated how much weight a dynamic load puts on a single point of failure. If you’ve ever looked up at your ceiling and wondered if those bins are about to become a hood ornament for your car, you’re in the right place. Today, we’re going to talk about the “Concrete Wedge Bolt Move”—the professional-grade secret for anyone dealing with concrete or structural masonry ceilings who wants absolute security.
Why I Stopped Trusting Standard Hardware for Overhead Storage
After that 3 AM wake-up call, I realized that the hardware included in most kits is designed for the ideal scenario, not the real world where we overstuff bins and hang heavy bikes. I spent years perfecting my garage setup, and the biggest lesson I learned is that when you’re hanging hundreds of pounds over your prized possessions, “good enough” isn’t an option. Whether you are figuring out how to mount heavy bike racks to garage ceilings or installing massive cabinets, the anchor is the heart of the project. I used to think a standard plastic plug or a simple screw would do the trick, but I was mistaken. I even tried those cheap sleeves that promised the world but delivered nothing but stripped holes and frustration. The Concrete Wedge Bolt is a different beast entirely. It’s an expansion anchor that bites into the material as you tighten it, creating a mechanical bond that is nearly impossible to break. It’s the same technology used in heavy industrial construction. According to the American Concrete Institute (ACI), these mechanical expansion anchors provide some of the highest pull-out strengths in solid concrete, often exceeding the strength of the bolt itself. Have you ever felt that sinking feeling when you see a bolt starting to pull away from the ceiling? Tell me about your closest call in the comments below.
Will Wedge Bolts Actually Crack My Concrete?
It’s a fair question, and honestly, it’s the one I get asked the most by neighbors who see me drilling into my ceiling. There’s this fear that “expanding” a bolt inside a hole will cause the concrete to spiderweb or fail. I had that same fear until I realized that as long as you use the right bit and maintain proper edge distance, the concrete is much stronger than you think. In fact, following the concrete anchor rule for heavy duty garage shelving is significantly safer than relying on wood joists that can rot or split over time. I once tried to shortcut this by using a smaller bolt to “save the concrete,” and it ended up vibrating loose within a month. Now, I stick to the heavy stuff. If you’re moving from basic cabinets to more intense setups, you might even consider the heavy duty lag bolt rule for wood, but for concrete, the wedge bolt is king. It’s about more than just holding weight; it’s about peace of mind. We aren’t just putting up a shelf; we are engineering a storage solution that will outlast the house itself.
Stop Using a Regular Drill
You can’t treat concrete like drywall. To execute the concrete wedge anchor move for heavy wall hung garage racks, you need a hammer drill. A standard drill just spins and gets hot; a hammer drill punches the concrete while it turns, much like a tiny jackhammer. I learned this the hard way when I burned through three masonry bits trying to mount a simple bike rack. Now, I always match the bit size exactly to the bolt diameter. If you are using a 3/8-inch wedge bolt, use a 3/8-inch carbide-tipped bit. This creates a friction-fit that is the foundation of the mechanical bond.
Clean Holes Save Your Sanity
The biggest mistake I see—and one I made when mounting my first set of heavy garage storage cabinets—is leaving dust in the hole. Think of concrete dust as tiny ball bearings. If you don’t clear it out, the bolt won’t grab the walls of the hole; it will just slide against the debris. Cleanliness is the difference between a secure anchor and a dangerous failure. I once had a bolt seize up three-quarters of the way in because of a dust clog. I couldn’t get it in, and I couldn’t get it out. I ended up having to cut it flush with an angle grinder and start over two inches to the left. Now, I use a straw or a can of compressed air to blow out every speck before the bolt even touches the concrete.#IMAGE_PLACE_PLACEHOLDER_B#
Set the Depth Before You Strike
When you’re ready to drive the bolt, keep the nut on. This protects the threads from being mushroomed by your hammer. You want to hammer it in until the washer is flush against the bracket of your rack. If you’re working on something more complex like the plywood ledger trick for heavy garage overhead racks, ensure your ledger board is already in place so you’re anchoring through the wood and into the ceiling in one go. It’s like a puzzle where every piece has to be perfectly aligned before you commit to the expansion.
Tighten Until the Wedge Bites
This is where the magic happens. As you turn the nut with a wrench, the mandrel at the bottom of the bolt pulls up through a metal sleeve, forcing it to expand outward into the concrete. It’s the same principle as a ship’s anchor grabbing the seabed. You’ll feel the resistance increase significantly. Don’t over-torque it to the point of snapping the bolt, but give it a good, firm seat. When I was refining the concrete wedge anchor for heavy garage tool cabinets, I found that about three to four full turns past hand-tight usually does the trick for most residential concrete. If you’re worried about the concrete integrity, remember the concrete anchor rule for heavy duty garage shelving: stay at least five bolt diameters away from any edge to prevent the material from spalling or cracking under the pressure of the expansion.People often assume that if a cabinet is heavy, they just need to double up on the screws to keep it in place. This is a myth that leads to what I call the ‘Swiss cheese’ effect. By over-drilling into a single stud or a small area of masonry, you actually compromise the structural integrity of the material you’re relying on. In my years of fixing failed DIY projects, I’ve seen that it’s not about the quantity of fasteners; it’s about the physics of the load distribution. If you think the concrete wedge move was intense, try managing the sheer force of a floating bathroom unit. When dealing with modern bathroom trends, you need 6 heavy duty wall fixes for massive quartz top vanities because the weight of the stone alone can crush a standard cabinet box before you even turn on the faucet. Have you ever fallen into this trap of over-fastening only to have the wall crumble anyway? Let me know in the comments.
Why Your Level Isn’t Telling You the Whole Truth
Most installers trust their spirit level blindly, but the hidden nuance is that walls are almost never ‘plumb’ and floors are rarely flat. If you just bolt a rigid cabinet to a bowed wall, you are effectively putting the entire unit under ‘racking’ stress. This tension is exactly why your heavy quartz vanity is cracking the cabinet frame over time. The frame wants to stay square, but the wall is pulling it into a curve. To avoid this, you must master the scribing hack for fitting vanities against out-of-plumb walls. Instead of forcing the cabinet to the wall, you shape the cabinet to mimic the wall’s imperfections. 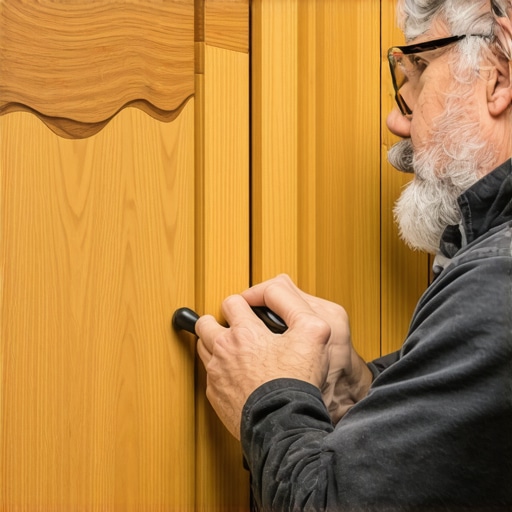 According to the Architectural Woodwork Institute (AWI), structural integrity in cabinetry relies heavily on maintaining the unit’s ‘squareness’ during installation; even a 1/8-inch deviation across a four-foot span can lead to drawer bind and door misalignment.
Is Your Substrate Strong Enough for a Floating Look?
The ‘Oops’ factor often happens behind the drywall. I’ve had clients want a sleek, floating media console or vanity, but their home uses metal studs or old, crumbling plaster. You cannot simply use a standard anchor in these scenarios. You need to look into how to secure floating vanities to double layer drywall or even use the cleat hack for mounting vanities to steel studs to ensure the unit doesn’t end up on the floor. For those working in older homes, how to anchor heavy closet organizers to crumbling plaster is a mandatory skill. Don’t forget about moisture either. Even if a wall looks dry, concrete and masonry in basements can ‘sweat,’ leading to rot. I always recommend the moisture barrier strategy for below grade vanities to protect your investment from the inside out. We aren’t just hanging boxes; we are engineering solutions that respect the physics of the home.
The Gear That Separates Pros from Weekend Warriors
I used to think my old plastic level was ‘close enough’ until I realized it was the reason my cabinet doors never quite lined up. Today, I don’t start a project without a digital level and a high-torque rotary hammer. When applying vanity installation hacks that save time and money, these tools aren’t luxuries; they are the baseline. When I’m setting up smart storage solutions to optimize small bathroom spaces, I use a laser line to map the entire room’s high and low points before the first bolt goes in. This isn’t just about speed; it’s about eliminating the human error that leads to a saggy shelf three years down the line. 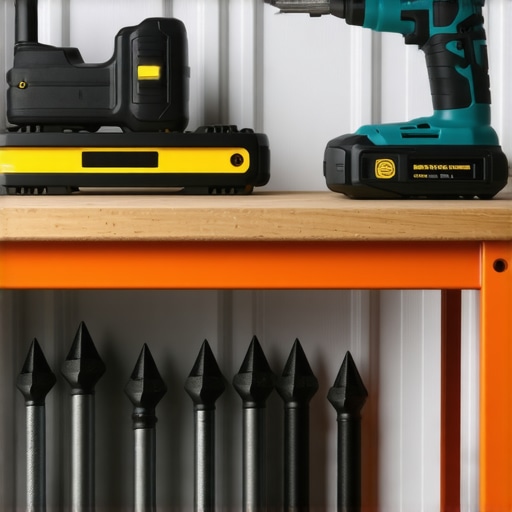
How do I keep my heavy installations from sagging over time?
The secret is a six-month structural audit. I know it sounds like overkill, but wood moves, concrete settles, and metal fatigues. I always check for signs of moisture, especially around the base, because understanding why your vanity plumbing is leaking into the cabinet base can save your anchors from rust and failure. According to the Hilti North American Product Technical Guide, mechanical anchors can lose a percentage of their clamping force if the substrate undergoes significant thermal cycling or vibration. I make it a habit to give every visible nut a quarter-turn test every spring. If you’ve followed my expert guide to flawless vanity installation tricks and tips, you’ll already have the access points needed to do this without tearing apart your drywall.
What the Next Decade of Home Storage Looks Like
Looking ahead, I predict we’re moving toward ‘active’ storage systems—cabinetry with integrated load-cells that can alert your phone if a shelf is nearing its weight limit or if an anchor is beginning to shift. Until that tech becomes affordable, your best defense is a proactive wrench. Go ahead and grab your socket set this weekend and check those overhead racks; you might be surprised what a few months of vibration from the garage door has loosened.
3 Hard Truths About Heavy-Duty Anchors That Save Your Ceilings
After decades of drilling into everything from soft brick to high-psi industrial concrete, I’ve realized that the most dangerous moment is when you feel ‘good enough’ about a bolt. Here are the lightbulb moments that changed my approach to safety:
- The ‘Spin’ is the Enemy: If a wedge bolt spins while you’re trying to tighten it, the hole is either too large or too dusty. I used to try and ‘fix’ this by jamming a piece of wire in there. Never do that. Pull it out, clean it, and if necessary, use a larger anchor.
- Vibration is a Silent Killer: Garage doors and overhead motors create constant micro-vibrations. This is why I stopped using plastic sleeves for anything overhead. Mechanical expansion is the only way to combat the slow loosening caused by a heavy door opening and closing every day.
- Concrete is ‘Alive’: It expands and contracts with the seasons. If you’re looking into built-in storage ideas to declutter and enhance your home in a humid climate, your anchors need to be corrosion-resistant. Galvanized or stainless steel is a must if you don’t want to see rust streaks running down your white walls in three years.
The Gear That Separates Solid Installs from Disaster
I don’t get paid to promote brands, but I do get paid to make sure things don’t fall. If you want to move beyond the basic step-by-step guide to vanity installation for beginners and tackle the heavy stuff, you need professional-grade hardware. #IMAGE_PLACEHOLDER_E# I personally trust Bosch SDS-Plus carbide bits because they don’t wander when you start the hole. For the anchors themselves, Red Head or Hilti wedge bolts are the industry standard for a reason—the quality of the metal mandrel is consistent, which means the expansion is predictable. Finally, keep a hand-pump blow-out bulb in your pocket. It’s a five-dollar tool that ensures your mechanical bond is between metal and stone, not metal and dust.
Start Your Next Project with Structural Confidence
Taking that first step to drill into your structural ceiling or floor is intimidating. I get it. But once you feel the way a wedge bolt bites and locks into place, you’ll never want to go back to flimsy screws and plastic plugs. Whether you are searching for innovative storage solutions to transform your bathroom or securing a massive rack over your car, remember that the strength of the unit is only as good as the anchor behind it. Don’t be afraid to over-engineer; the peace of mind you get when a storm hits or the kids start climbing on the shelves is worth every extra penny spent on quality bolts. If you ever feel like a project is beyond your current skill level, don’t hesitate to contact us for expert advice. Your home is your biggest investment—treat its structure with the respect it deserves. Have you ever had an anchor fail on you when you thought it was secure? Let me know your story in the comments below.