

I still remember the feeling of cold sweat hitting my neck as I watched my brand-new, six-foot-tall mudroom unit slowly tip away from the wall. I’d spent two weeks in my workshop building those lockers, and they looked perfect—until they met my garage floor. The concrete wasn’t just slightly off; it was a deliberate, aggressive slope designed to shed water. My “perfect” project looked like a funhouse mirror. Have you ever stood back from a project only to realize the ground beneath you was working against everything you just built?
The Gravity-Defying Struggle of Uneven Floors
I used to think a level was just a suggestion for small projects, but with mudroom cubbies, gravity is a relentless critic. If your slab is sloped, your cubbies won’t just look crooked; they’ll be structurally compromised. I didn’t know then that you can’t just slap a cabinet down; you often have to learn how to scribe built-in cabinets to slanted floors to get a professional finish. When the base doesn’t meet the floor flush, all the weight transfers to your wall anchors, which isn’t what they’re designed for. My biggest mistake early on was trying to use standard wood screws and cheap plastic anchors. Total disaster. They pulled out within 48 hours because they couldn’t handle the shear force of a leaning unit. Now, I use a more robust structural cleat strategy for heavy mudroom lockers to ensure everything stays put. It’s about creating a bond between the wood and the masonry that doesn’t care about a two-degree pitch. I remember thinking that a few wood shims would solve it. I was wrong. The shims eventually compressed under the weight of winter coats and boots, and the whole unit started to groan every time someone sat down. It was embarrassing and, frankly, a bit dangerous. That’s why we need to talk about techniques like the leveling leg move for mudroom cubbies, even on concrete. It gives you the precision adjustability you need without the visual clutter of a stack of shims.
Is bolting into concrete actually worth the extra effort?
You might be tempted to just let the weight of the unit hold itself down, but that’s a recipe for a tipping hazard, especially if you have kids climbing on the benches. According to the International Residential Code (IRC) R309.1, garage floors must be sloped to facilitate drainage toward a main door or drain, which means your mudroom-garage hybrid is guaranteed to be uneven. Today, we are going to fix that. I’m going to show you how to use heavy-duty floor bolts and anchoring techniques that won’t rot out or wiggle loose over time. We will transform that slanted concrete from a headache into a rock-solid foundation for your home’s busiest zone. If you have ever felt like your house was fighting your DIY dreams, you are in the right place. Have you ever had a heavy piece of furniture start to ‘walk’ away from a wall because of a floor slope? I’ll guide you through the exact concrete anchor rules I use to keep things vertical.
Start With the Highest Point of the Slope
Before you ever touch a drill, you have to find the benchmark. On a garage or basement floor, the concrete is almost never a flat plane; it is a series of waves and pitches. Use a long level or a rotary laser to find the highest spot in the area where your cubbies will sit. This is your zero point. I learned this lesson the hard way during a renovation in a tight utility room. I started building from the left side, only to realize by the time I reached the right side, the floor had dropped over an inch. My bench looked like it was sinking into the earth. If you want a professional result, use the ledger board move for level mudroom benches to establish a perfectly horizontal line on the wall before the cabinet even enters the room.
Scribe the Base Instead of Relying on Shims
Once you have your level line on the wall, you will likely see a wedge-shaped gap between your cabinet base and the floor. Shims are great for kitchen cabinets, but for heavy mudroom units, they are a point of failure. Over time, the weight of people sitting and heavy gear causes the shims to compress or slip, leading to creaks. The real pro move is to learn how to scribe built-in cabinets to slanted floors. You basically use a compass to transfer the floor’s profile onto the wood and then trim the bottom of the cabinet. This creates a continuous contact point that distributes the weight evenly. 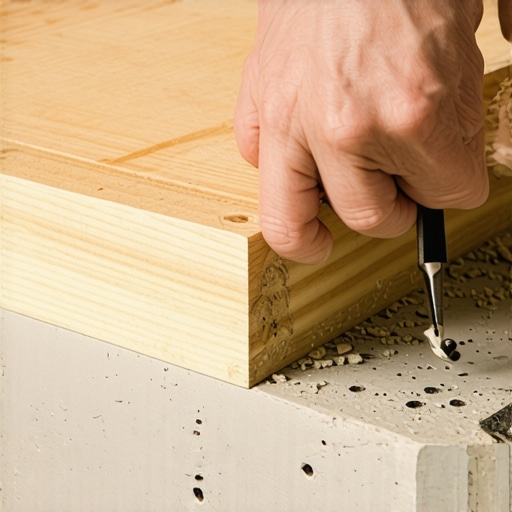
Which Anchors Will Actually Hold in Concrete?
Standard screws will snap or pull out of masonry once the wood starts to expand and contract with the seasons. You need hardware that bites into the concrete and stays there. I remember a client project where the bench felt solid on day one, but after a month of heavy use, it started to ‘walk’ away from the wall because the anchors were too shallow. For these heavy-duty applications, I follow the concrete anchor rule for heavy-duty garage shelving: use at least 2.5 inches of embedment. I prefer using heavy-duty floor bolts specifically designed for shear strength. If the concrete is particularly crumbly or old, I often employ the plywood plate move for secure entryway bench anchoring to create a wider footprint for the fasteners to grip.
Stop the Creaking with Internal Steel Reinforcements
Gravity isn’t the only enemy; lateral force from people sitting down and shifting their weight can tear your joints apart. Even if the unit is bolted to the floor, the top sections can still sway. This is why a structural cleat strategy for heavy mudroom lockers is vital. You need to tie the upper cubbies into the wall studs using more than just a few finish nails. I’ve started hiding 6-heavy-duty L-brackets for reinforcing custom built-in units inside the toe kicks and behind the face frames. They provide the rigid skeleton your woodwork needs to survive decades of use without ever developing that annoying groan every time someone sits down to tie their shoes.
Most DIY guides tell you that as long as the bench is level, you’ve won the battle. I’m here to tell you that a level bench on a crooked wall is just a slow-motion disaster. If the wall is leaning back even a quarter-inch, your face frames will eventually pull away because you’ve created a wedge of tension. I’ve seen countless pros ignore this, leading to that heartbreaking moment where you see why your built-in face frames are separating from the wall. The National Kitchen & Bath Association (NKBA) guidelines for cabinet installation suggest that vertical surfaces must be plumb within 1/8 inch over any 8-foot distance to avoid mechanical stress on joins. In a garage or mudroom, the concrete movement and wall bow often exceed this significantly. If you don’t use the scribing hack for fitting vanities against out-of-plumb walls, you’re basically forcing the wood to act like a giant spring. Eventually, that spring is going to pop or cause the finish to check. This internal tension is often the silent culprit when homeowners ask why your mudroom bench is creaking and the hidden screw fix—it’s not just the floor; it’s the structural torque you’ve built into the unit. 
Can a sloped floor actually crack your custom cabinetry?
The short answer is yes. When you anchor a rigid box to a floor that is diving away, and then bolt it to a wall that is perfectly vertical, the cabinet frame becomes a lever. Over years of seasonal humidity changes, this can cause the wood to split at its weakest points. It’s also why many people struggle to stop drawer bind on heavy pantry pull outs; the drawer glides are no longer parallel because the box has been ‘racked’ out of square. One common myth is that a ‘sturdy’ build can resist these forces. In reality, the more rigid the material—like oak or high-density plywood—the more likely it is to crack rather than flex. I always advise using a floating base strategy where possible. By building a separate kick-box that handles the floor’s geometry, you isolate the decorative cabinetry from the stress. This is a level of detail usually reserved for expert-level vanity installation, but it’s just as vital in a mudroom. Let’s look at the ‘Oops’ factor that ruins many high-end builds: the moisture wick. If you scribe your wood base perfectly to a concrete floor without an inconspicuous barrier, the end-grain will pull moisture from the slab. This often mimics plumbing failures, leaving people wondering why your vanity plumbing is leaking into the cabinet base. If you skip the small details, you’ll find yourself constantly trying to fix uneven gaps in custom built-in doors because the frame is shifting as the house moves. Have you ever fallen into this trap? Let me know in the comments. By utilizing 7 tactics for leveling vanities on sloping tile floors, you can ensure that the aesthetic matches the engineering, providing a result that doesn’t just look level but is built to stay that way for twenty years.I’ve learned that the difference between a project that lasts five years and one that lasts fifty often comes down to the gear you use during the final 10% of the build. You can’t just walk away once the last screw is driven. Wood is a living material that reacts to the environment, and if you don’t account for its ‘breathing,’ your hard work will literally pull itself apart. This is why I never start a basement or garage project without a high-quality green-beam laser level and a moisture meter. According to the USDA Forest Products Laboratory’s Wood Handbook (General Technical Report FPL-GTR-282), the moisture content of wood in most indoor environments should be between 6% and 8% to minimize dimensional changes. If you are building in a damp garage, you must use the moisture barrier fix for vanities on cold basement floors to prevent the wood from swelling past those safe limits. I personally use a 6-mil poly film or a dedicated liquid-applied membrane on any surface that touches the concrete. It’s a five-minute step that saves you from a total structural failure a few seasons down the road.
The Specialized Gear That Saves Your Back and Your Sanity
I’m often asked why I don’t just use a standard 4-foot spirit level. The answer is parallax error. When you’re trying to align a six-foot-tall locker unit across a ten-foot span, a small bubble between two lines just isn’t precise enough. I switched to a 360-degree self-leveling laser years ago, and it changed everything. It allows you to see exactly where the floor drops in relation to the ceiling across the entire room at once. If you’re dealing with tight spaces, you might also need the scribing tool for cabinets against textured plaster walls to get that seamless, built-in look that makes guests ask if the unit grew out of the wall. 
How do I maintain my custom storage units over time?
Maintenance isn’t just about dusting; it’s about mechanical upkeep. Over the first year, as your house settles and the seasons change, you will likely notice why your mudroom locker doors won’t close and the hinge shift occurs. This is normal. I keep a dedicated ‘maintenance kit’ in my shop that includes a set of Pozidriv screwdrivers (which prevent stripping cabinet hinges) and high-quality PTFE-based dry lubricant for the slides. If you notice your heavy drawers starting to drag, don’t wait for them to fail. You need to stop pantry pull outs from jamming with this slide alignment trick early on. A quick adjustment of the mounting clips or adding a shim behind the rail can prevent the ball bearings from grinding down. Also, keep an eye on your drawer faces; I’ve written about how to fix drawer fronts that won’t stay aligned because the constant vibration of slamming doors can loosen even the best sub-front screws.
Where the Custom Storage World is Heading Next
I predict that we are moving toward a ‘hybrid-modular’ future. We are seeing a massive shift toward creative built-ins for seamless storage and home aesthetics that incorporate hidden tech, like wireless charging stations built directly into the wood grain. The trend is moving away from the heavy, monolithic looks of the 90s toward lighter, cantilevered designs that make the room feel larger. However, these floating designs require even more engineering discipline. If you’re ready to take your shop skills to the next level, I challenge you to try the ‘zero-clearance scribe’ on your next project—skip the caulk and fit the wood perfectly to the wall using a back-beveling technique. It’s the ultimate mark of a master craftsman.
Lessons the Concrete Finally Taught Me
Looking back at that first tipping locker, I realize that the most valuable tool I have now isn’t a fancy saw—it’s the patience to prep the foundation. First, I learned that a level line on the wall is only half the battle; if the floor is dropping, you have to compensate from the bottom up, or you’ll see exactly why your mudroom bench is pulling away from the wall as soon as the seasons change. Second, never trust a ‘flat’ wall. I now automatically check every corner for square because even a slight bow will fight your face frames. Third, don’t skimp on moisture protection. Concrete is like a sponge, and a 6-mil poly barrier is the cheapest insurance policy you can buy for your hard work.
My Precision Kit for Rock-Solid Installations
If you’re ready to get serious about built-in storage ideas to declutter and enhance your home, there are three tools I never leave the shop without. A self-leveling 360-degree laser level is non-negotiable for finding the high point of a garage floor. For fasteners, I swear by 1/4-inch concrete wedge anchors for the floor and structural screws for the wall studs. Finally, invest in a quality scribing tool; it turns a DIY project into a professional-grade masterpiece that looks like it was born in the room.
Start Your Built-In Journey Today
Building something this substantial can feel intimidating, but remember that even the most complex project is just a series of small, manageable steps. By mastering the floor slope and the wall scribe, you aren’t just building furniture; you’re creating a permanent part of your home’s legacy. Whether you are tackling a mudroom or a bathroom, following a step-by-step guide to vanity installation for beginners can give you the confidence to expand into other rooms. You have the knowledge and the strategy to beat that sloped concrete—now it’s time to get your hands dirty and create some creative built-ins for seamless storage and home aesthetics.
Have you ever had a project look perfect until you tried to open the first drawer or door? Let me know about your most challenging floor or wall in the comments below!