

I remember the precise “thwack” of a heavy stack of books hitting the floor at 3 AM. It wasn’t a ghost; it was my floor-to-ceiling partition deciding it was tired of standing up straight. It was leaning like a palm tree in a hurricane, and my heart skipped a beat as I realized my “masterpiece” was actually a vertical liability. I’d spent three days building what I thought was the ultimate divider, but I’d ignored the basic laws of physics. That terrifying moment taught me that gravity doesn’t care about your Pinterest board. If you don’t anchor your tall units correctly, you’re not just organizing your home—you’re setting a trap. Today, I’m going to share the exact strategy I use to make sure these units stay rock-solid for decades. [image_placeholder]
Why Your Partition Unit is a Ticking Time Bomb Without Real Anchors
The problem with most floor-to-ceiling dividers is that they have a high center of gravity and a very narrow footprint. When we try to integrate creative built-in storage ideas to declutter, we often focus so much on the shelves that we forget about the lateral force. Even a slight bump can cause the whole thing to shift. Early in my career, I made the amateur mistake of trusting standard L-brackets and plastic wall anchors. I thought they’d hold. Spoiler alert: they didn’t. The drywall simply gave way under the tension, and I spent the weekend patching holes and apologizing to my wife. That’s when I realized the Floor-to-Ceiling Bolt Strategy wasn’t just an option; it was a requirement for anyone who didn’t want their integrated wardrobe pulling away from the ceiling.
Does This Extra Hardware Actually Make a Difference?
You might be thinking that bolting into the floor and ceiling is overkill. “Can’t I just wedge it in tight?” you ask. The answer is a hard no. Buildings breathe. Floors settle and ceilings sag over time. According to the U.S. Consumer Product Safety Commission, a piece of furniture falls and injures someone every 17 minutes, which is why structural anchorage is vital for tall units. By using specific bolts that bite into the subfloor and the ceiling joists, you create a structural bridge that resists the tipping leverage that destroys standard furniture. This is especially true if you are dealing with built-ins on carpet, where the padding creates an unstable, squishy base.
The Secret to Lateral Stability You Aren’t Using
If you’ve ever felt that slight “wobble” when you pull a heavy drawer out of a tall unit, you know exactly the fear I’m talking about. We need to stop thinking about partitions as furniture and start thinking about them as temporary walls. To get that built-in-forever feel, you have to master the lateral support move used for heavy library bookcases. It’s the difference between a unit that creaks when you walk past it and one that feels like it’s part of the house’s skeleton. Have you ever noticed your shelves starting to lean, or have you ever had a close call with a tipping cabinet? Let me know if you have faced this specific problem before in your own home projects. Let’s look at the actual hardware that stops the sway for good.
Get Your Unit Rock Solid with Structural Ties
The first thing you have to do is find the bones of your house. You aren’t just screwing into drywall; you’re looking for the joists in the ceiling and the solid subfloor beneath. Think of it like a bridge—without those anchor points, the whole thing is just floating. I once worked on a unit where the owner thought the crown molding would hold it up. It didn’t. When we finally used 6 heavy-duty l-brackets for reinforcing custom built-in units hidden behind the face frames, the unit stopped creaking immediately.
Find the Skeleton Behind the Drywall
Finding the joists isn’t just about waving a plastic tool around; it’s about listening to the density of the ceiling. In a 1920s bungalow project, the plaster was so thick it confused every sensor I owned. I had to use a tiny finishing nail to probe every half-inch until I felt the resistance of old-growth Douglas fir. It took an hour, but it meant the difference between a unit that sits and a unit that stays. Once the joists are located, you aren’t just aiming; you’re engineering a path for the weight to transfer. I recall having to use the scribing tool for cabinets against textured plaster walls just to get a flush fit before I could even think about bolting it down. 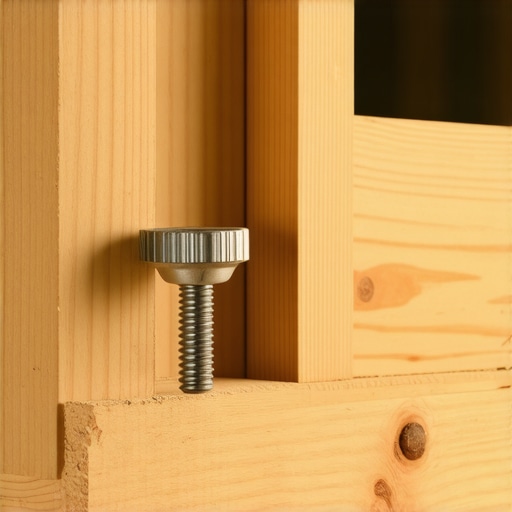
Why Heavy Duty Lag Bolts Win Every Time
When it comes to the actual connection, throw away the screws that came in the box. You need structural fasteners. I follow the heavy-duty lag bolt rule even for indoor partitions. These bolts are designed to handle shear force, which is the exact side-to-side pressure a tall unit faces. For the floor, if you’re on a concrete slab, you’ll need to use the concrete sleeve secret to ensure the base doesn’t kick out if someone bumps it. This creates a mechanical bond that no standard wood screw can match.
Stop the Sway with Internal Bracing
Think of lateral support like the cross-bracing on a skyscraper. Without it, the unit wants to parallelogram—to fold into a messy pile of kindling. This is where you apply 4 hidden steel plate fixes. By integrating these plates into the central shelving or the back panel, you lock the geometry of the unit. I remember a library project where the shelves were 10 feet wide; we had to use the hidden support rail for extra-wide media centers to stop the bowing and the sway. It felt like overkill at the time, but three years later, those shelves haven’t moved a millimeter.
The Leveling Act You Cant Ignore
Most floors are about as level as a mountain range. If your base is tilted, your 8-foot unit will be leaning several inches by the time it reaches the ceiling. I always use a combination of shims and the leveling leg move to get the base perfectly plumb. If you’re installing this in a bathroom or wet area, don’t forget the waterproof shim move to prevent wood rot at the foundation of your partition. Even a slight pitch in the tile can cause the vertical uprights to pull away from the wall anchors, so take your time with the bubble level before driving those final structural screws.Once that level is perfect and the unit is plumb, most people think the hard part is over. In reality, you’ve only just set the stage for long-term stability. The biggest mistake I see in modern cabinetry isn’t poor leveling; it is the fundamental misunderstanding of load paths. People often assume that as long as they find a stud, the job is done. I am here to tell you that’s a dangerous simplification. In the world of innovative storage solutions to transform your bathroom, we are seeing a massive trend toward floating units and heavy stone tops that create immense leverage. The “Oops” factor most DIYers—and even some seasoned pros—miss is the sheer force exerted on the cabinet’s hang rail. If you are mounting a floating unit, you need to look at 7 reinforcement tactics for wall-hung bedroom vanities. Have you ever fallen into this trap of overestimating your wall’s strength? Let me know in the comments.
Can your wall framing actually support a cantilevered stone top?
According to the National Kitchen & Bath Association (NKBA), the dynamic load of someone leaning on a vanity, combined with the dead weight of the stone, can exceed 400 pounds of downward pressure. If you haven’t reinforced the internal structure of the unit itself, you’ll soon find why your heavy quartz vanity is cracking the cabinet frame. I have walked into homes where the drywall was literally crushing under the weight because there was no backing plate to distribute the load. This is why I swear by an expert guide to flawless vanity installation tricks that focuses on the hidden skeleton rather than just the visible finish. 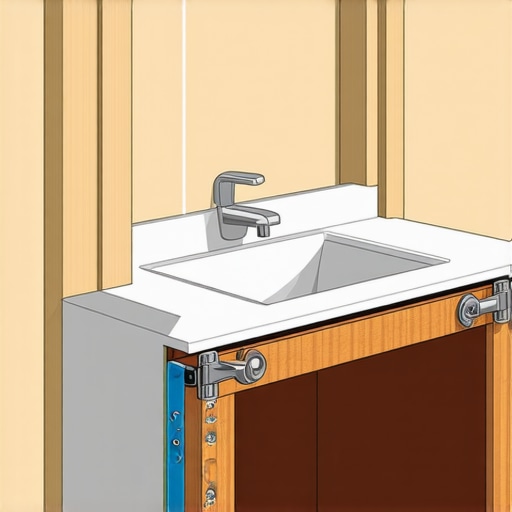 Let’s talk about the “shear vs. tension” trap. Most people buy screws based on how hard they are to pull out of a board. But for a floor-to-ceiling partition or a heavy vanity, the real enemy is shear force—the weight trying to snap the screw head right off. I have seen cheap zinc screws snapped like twigs behind a “professionally” installed built-in because the installer didn’t account for lateral movement. This is where I go against the grain of common advice: don’t just use more screws; use the right alloy. Even vanity installation for beginners should emphasize that standard drywall screws have zero structural rating and should never be used for weight-bearing units. In high-moisture environments, standard steel fasteners are your enemy. I have seen “permanent” installs fail in three years because of microscopic oxidation that weakened the anchor point. You need to consider the waterproofing fix for high-use vanities and use stainless or coated structural screws. Don’t let your creative built-ins for seamless storage become a liability just because you saved five dollars on hardware. When you maximize your space with custom vanities, you are playing a game of physics, and physics always wins if you cut corners. Before you hang that next cabinet, check the shear rating of your fasteners and ensure your sleek built-in vanities are actually anchored to the home’s structure, not just its skin.
If you think your job ends when the last screw is driven, you’re in for a rude awakening three years down the line. I’ve seen beautiful creative built-ins for seamless storage literally start to tear themselves apart because the homeowner didn’t account for the ‘living’ nature of a house. To keep these units rock-solid, you need to transition from a builder’s mindset to a maintenance mindset. This starts with the tools you choose to trust. I don’t touch a project of this scale without my Bosch green-beam self-leveling laser. Why? Because a standard spirit level is only as good as the person holding it, and over a 10-foot span, a 1/16th-inch error at the base translates to a massive gap at the crown. When you are trying to scribe built-in cabinets to slanted kitchen floors, that laser line is the only thing standing between a professional finish and a DIY disaster.

Don’t Trust Your Eyes Alone
Beyond the laser, I swear by the high-torque impact driver for the final seating of structural screws. Standard drills often strip the heads of heavy-duty fasteners before they are fully recessed into the studs. I personally use GRK structural screws because they have a ‘zip-tip’ that prevents wood splitting, which is crucial when you’re working with the tight tolerances of innovative storage solutions to transform your bathroom. If you’re dealing with shelving that starts to dip under the weight of a heavy collection, don’t just add more wood. Instead, look into the hidden tension rod fix for bowing shelf units. It’s a low-profile way to pull the geometry back into alignment without sacrificing the aesthetic you worked so hard to build.
How do I keep my custom units from sagging after five years?
The secret to longevity isn’t just strength; it’s the ability to handle movement. Wood is a hygroscopic material, meaning it constantly expands and contracts with the seasons. According to the USDA Forest Products Laboratory’s Wood Handbook, a piece of kiln-dried lumber can still experience significant dimensional change depending on the relative humidity of your home. This is why you must check your fasteners annually. I tell my clients to do a ‘hardware audit’ every spring. Look for why your built-in bookcase is sagging or if any drawer fronts won’t stay aligned. A quarter-turn on a loose mounting screw can prevent the entire unit from shifting out of plumb. When you maximize your space with custom vanities, this is doubly important, as moisture from showers accelerates the degradation of standard hardware.
Looking toward the future, I predict we will see ‘smart’ hardware becoming the norm. We are already seeing prototypes for cabinet hinges that can alert your smartphone if they detect a structural shift or a moisture leak behind a vanity. Until then, you are the sensor. My best advice for the ambitious DIYer? Don’t wait for a crack to appear. Go back in six months after your first major season change and re-verify that your sleek built-in vanities are still tight against the wall. Try this today: Grab an impact driver and check the primary wall-anchor screws on your heaviest unit—you might be surprised how much the house has breathed since you installed them. Proper maintenance is the difference between a legacy piece and a pile of scrap wood.
The Hardest Lesson I Learned About Vertical Stability
Over the years, I’ve realized that the most dangerous assumption you can make is that a wall is flat or a floor is level. One lightbulb moment happened when I saw a partition I’d built three years prior; it hadn’t fallen, but the crown molding had a significant gap because I didn’t account for the house settling. Now, I always build in a ‘floating’ top cap to hide that seasonal movement. Another realization: never trust a stud finder blindly. I now use a rare-earth magnet to find the actual screws in the drywall, as it is the only way to be 100% sure you’re hitting the center of the timber. Also, before you drill, check the opposite side of the wall for outlets or plumbing—missing a pressurized water line by an inch is a lesson you only want to learn once. Finally, remember that weight distribution is your best friend. Instead of two massive bolts, using four smaller structural screws spread across the top plate provides much better resistance against the leverage of a tall unit.
[image_placeholder]
The Gear That Keeps My Projects from Toppling
If you want professional results, you have to stop using the hardware found in the ‘bargain bin’ at big-box stores. I personally rely on GRK Fasteners because their structural screws don’t require pre-drilling and they never snap under the shear pressure that tall units exert. For layout, the Bosch GLL3-330CG Laser is my go-to tool; it allows me to see exactly how much a wall leans before I even cut my first board. I also suggest keeping a stock of 6 heavy-duty l-brackets for reinforcing custom built-in units for those hidden corners where you need extra peace of mind. For those who are just starting their DIY journey, I highly recommend checking out this step-by-step guide to vanity installation for beginners to master the fundamentals of secure wall-mounting.
Building a Home That Stands the Test of Time
Taking the time to anchor your projects correctly is about more than just physics; it’s about the peace of mind that comes with knowing your family is safe. When you invest in creative built-ins for seamless storage, you are adding permanent value to your life and your property. Don’t be intimidated by the technical side of the Floor-to-Ceiling Bolt Strategy. Once you drive that first structural screw into a solid joist, you’ll feel the difference in stability immediately. You’re not just building furniture; you’re engineering a better, safer home environment. Have you ever struggled with a wobbly shelf or a unit that just wouldn’t stay level no matter what you tried? Let me know in the comments below!