It was a typical Saturday morning when I finally decided to tackle my cluttered garage, only to realize my heavy-duty storage racks were wobbling, and some even threatening to topple over. That lightbulb moment hit me hard—I’d overlooked the importance of secure anchoring, especially for those hefty steel shelves I thought I had nailed down. Have you ever faced a similar headache, where your storage solutions seem more like a potential hazard than help? Well, you’re not alone. Today, we’re diving into the world of **5 Heavy-Duty Anchor Fixes for 2026** that will give your garage a much-needed safety boost and peace of mind.
Why Secure Anchoring Is a Garage Game-Changer
Is this hype or truly necessary?
When I first started, I assumed standard screws would do the trick. Turns out, I was making a costly mistake. Early on, I learned that relying on flimsy fixings can lead to disaster, especially when heavy tools and bulky gear are involved. According to a recent safety study, improperly fixed garage racks and shelves can lead to serious injuries as well as property damage. That’s why investing in robust, heavy-duty anchors isn’t just smart; it’s essential. If you want your garage to be a haven of organization without lurking risks, proper anchoring is non-negotiable. I wish I had known this earlier, as I had to redo my entire setup after a shelf came crashing down during a particularly energetic vacuuming session. To avoid that embarrassment—and potential injury—you need to understand the best fixes available. We’re going to explore practical solutions that ensure your storage stays put, no matter how heavy the load or how uneven your walls might be. Ready to get your garage safe and sound? Let’s dive into the first set of fixes and learn how to anchor heavy shelving the right way.
Identify the Best Anchoring Points
Start by examining your garage walls for suitable anchoring spots such as studs, concrete, or brick surfaces. Use a stud finder or a masonry drill to locate these points accurately. Remember, fixtures in drywall alone won’t suffice for heavy loads, so aim for solid materials. When I did this in my garage, I marked the studs with chalk to ensure precise placement before drilling, which made the process smoother and prevented unnecessary wall damage.
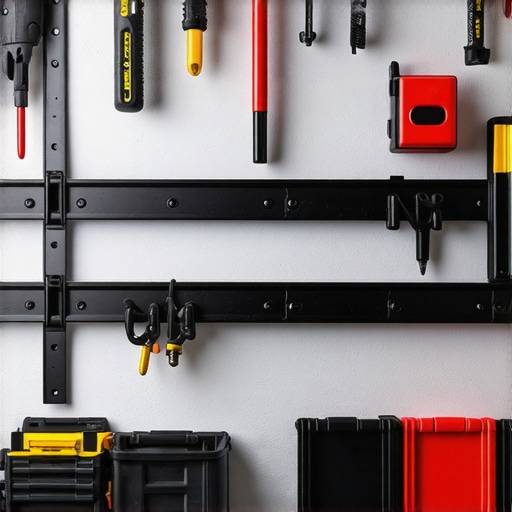
Choose the Right Heavy-Duty Anchors
Select anchors based on your wall type and the weight capacity needed. For wood studs, heavy-duty lag bolts or screw anchors are ideal, while toggle bolts or expansion anchors work better in masonry or concrete. Visualize your wall as a backbone—using the appropriate anchors is like giving your shelves a sturdy spinal cord, supporting everything without wobbling. I personally went for concrete sleeve anchors when installing my steel shelving, which provided excellent grip and stability.
Ensure Compatibility and Load Capacity
Read the manufacturer’s specifications carefully to match the anchors with your wall and shelf weight. Overloading anchors risks pulling them out and causing accidents. I once underestimated the weight of my heavy-duty storage bins and used anchors too small, which led to wobbling. After replacing them with larger, more robust anchors and redistributing the load evenly, my shelves became rock solid.
Pre-Drill with Precision
Pre-drilling creates a clean hole, reducing wall stress and preventing cracking. Use a drill bit that matches your anchor size; this is like creating the perfect socket for your fastener—tight and snug. Hold the drill straight to avoid angled holes that weaken the fixing. In my project, I used painter’s tape on the wall as a guide to drill precise holes, resulting in cleaner installation and improved stability.
Secure the Anchors Firmly
Insert your anchors into the drilled holes, then tighten the screws or bolts until snug. Avoid overtightening, which can strip the anchors or damage the wall. Think of it like tightening a bolt on a bike—you want firm support without overdoing it. I used a torque wrench to ensure consistent tightening, which helped prevent overtightening and maintained the integrity of the wall fixings.
Double-Check the Stability
After installation, test the shelf’s stability by applying gradual pressure. If you notice any wobbling, reassess the anchors and re-tighten or replace them as needed. This step is like testing a bridge’s support beams before allowing traffic—better to be safe. Once, I found my shelves slightly wobbling after initial fixing, so I added extra anchors and used steel braces for reinforcement, transforming my wobble-prone setup into a secure storage zone.
Additional Reinforcements for Heavy Loads
For particularly heavy or high-traffic shelves, consider adding steel plates or braces across the joints. This distribution of force minimizes stress on individual anchors. Something similar is discussed in the article about fixing bowed built-in shelves. Using steel braces gave me peace of mind that my garage racks could handle whatever I threw at them, from bulky tools to stacked storage boxes.
Many homeowners assume that installing vanities and built-in storage is straightforward, but beneath the surface lie nuanced pitfalls that can compromise both aesthetics and functionality. One common misconception is that a beautiful vanity automatically guarantees durability and ease of use. However, choosing the wrong mounting hardware or neglecting wall support can lead to sagging or even catastrophic failure over time. For example, many rely solely on drywall anchors, which are inadequate for heavy loads. Experts recommend assessing wall materials carefully and incorporating steel braces or wall studs for added strength, as discussed in [Effortless Storage Solutions](https://customcabinetrypro.com/effortless-storage-solutions-for-a-tidy-stylish-home). A prevalent myth is that pre-made vanities fit all spaces; the truth is, customized solutions often yield better results, especially for awkward corners or uneven surfaces. Skipping precise measurements and scribing techniques—like those detailed in [How to Scribe Built-Ins to Uneven Walls](https://customcabinetrypro.com/how-to-scribe-2026-built-ins-to-uneven-walls)—can cause gaps, misalignments, and a less polished look. The ‘Oops’ factor comes when homeowners overlook the importance of reinforcement for heavy countertops or appliances, which can cause warping or detachment with time. Advanced users know that integrating steel supports or hidden steel plates behind the veneer can prevent such issues. A critical question for sophisticated setups is: How can I ensure long-term stability without sacrificing design flexibility? Studies show that incorporating steel reinforcements and strategic anchoring significantly extend the lifespan of built-in features (see [7 Steel Bracing Fixes](https://customcabinetrypro.com/7-steel-brace-fixes-for-2026-kitchen-island-vanities)). The takeaway? Don’t get lulled into the trap of superficial beauty; invest effort in understanding wall support, load distribution, and hidden reinforcements. For more expert tips on avoiding common installation pitfalls, explore [How to Mount Floating Vanities](https://customcabinetrypro.com/vanity-installation-hacks-that-save-time-and-money). Have you ever fallen into this trap? Let me know in the comments.Maintaining your custom vanities and built-in storage solutions requires more than just initial installation finesse; it demands reliable tools and strategic approaches to ensure longevity. One gadget I swear by is a high-quality cordless drill with variable speed settings, precisely because it allows me to either tighten or delicately adjust fixtures without risking over-tightening or damaging delicate surfaces. Additionally, a digital torque wrench has become indispensable—by setting exact torque levels, I prevent overtightening that can strip screws or crack materials, especially in sensitive areas like thin drywall or veneer finishes. For measuring and alignment, a laser level ensures your vanities stay perfectly plumb over time, which is crucial for both aesthetic and functional reasons, especially when dealing with uneven walls or floors. The trend is shifting toward smart tools equipped with Bluetooth connectivity—some newer models can log adjustments and alert you if a fixture begins to loosen, seamlessly integrating maintenance into your routine. Predicting where this tech trend leads, I envision smart diagnostic tools becoming more affordable and widespread, offering predictive maintenance alerts and detailed load assessments to catch potential issues before they escalate. How do I maintain vanities and built-ins over the years? Regular check-ins with these tools can save you costly repairs later on. For example, periodically verifying the tightness of mounting bolts with a torque wrench ensures everything remains secure, reducing sagging or detachment risks. When addressing storage solutions specifically, I recommend a stud finder that not only locates framing but also maps electrical wiring and plumbing—saving time and avoiding accidental damage. To stay ahead, I also incorporate a bright LED headlamp during adjustments—illuminating hidden spots and making fine-tuning safer and more precise. Ultimately, combining these tools with a proactive maintenance mindset keeps your craftsmanship looking pristine for years and enables scalable upgrades, such as installing additional built-ins or expanding existing vanities with minimal fuss. If you’re looking to lift your maintenance game, start by integrating a digital torque wrench into your toolkit, and schedule quarterly checks; you’ll be amazed at how this simple step prolongs the life of your investments. Don’t forget to revisit your storage and vanity alignments periodically—small adjustments now prevent major overhauls later. For expert tips on refining your installation techniques, check out [Vanity Installation Hacks That Save Time and Money](https://customcabinetrypro.com/vanity-installation-hacks-that-save-time-and-money). Ready to upgrade your toolkit? Try using the torque wrench during your next fixture adjustment and see how it improves your results.In tackling my garage upgrades, I realized that embracing a mindset of continuous learning has been my most valuable lesson. The toughest lesson I learned was that even the most robust-looking shelves can become dangerous if not anchored correctly—never underestimate the power of a small detail like choosing the right anchor for the wall material. I also discovered that myths about DIY repairs—like ‘more is better’—can lead to overtightening and wall damage; patience and the right tools are key. The importance of understanding your wall type and load distribution has become crystal clear—skipping this step can turn your DIY into a nightmare. Ultimately, the biggest revelation was that prevention, through proper reinforcement, saves time, money, and potential injuries, making every effort worth it when you see your organized, safe garage standing tall.
## My Essential Toolkit for Garage Anchor Fixes
Having the right tools transforms the daunting task of anchoring into a manageable one. A high-quality cordless drill with variable speed and a digital torque wrench have been game-changers for me, ensuring precise and safe fastening. For accuracy, I rely on a laser level to guarantee that shelves are perfectly aligned, and a stud finder that also detects electrical wiring helps me avoid mishaps. These tools, trusted through personal experience, have empowered me to confidently tackle any garage project, no matter how heavy or tricky the load.
## Finding Inspiration in Home Improvement Success Stories
Reading about how others have successfully reinforced their garage storage has been inspiring. For instance, I learned from seasoned DIY enthusiasts on online forums about steel plates behind drywall for extra support—an idea I adopted for my own setup. Books like “Effortless Storage Solutions” opened my eyes to innovative methods for maximizing space while maintaining safety. Visiting websites specializing in built-in solutions introduced me to design ideas that blend style and strength. These resources, recommended for their practical insights and real-world applications, continue to motivate me to refine and improve my garage storage with confidence.
## Your Turn to Elevate Your Garage Game
Remember, the journey to a safe and organized garage isn’t a one-time effort but an ongoing process of assessment and improvement. As you implement heavy-duty anchor fixes, embrace the tools, tips, and resources that resonate with your style and needs. The satisfaction of knowing your storage solutions are secure and reliable makes every drill bit and bolt worth it. If you have experienced a lesson or tip that transformed your setup, share it below—your insights could help someone else build a safer, more efficient space.
Related Posts
![Stop Garage Rack Failures: 5 Steel-Stud Anchor Fixes [2026]](https://customcabinetrypro.com/wp-content/uploads/2026/03/Stop-Garage-Rack-Failures-5-Steel-Stud-Anchor-Fixes-2026.jpeg)
Stop Garage Rack Failures: 5 Steel-Stud Anchor Fixes [2026]
Have you ever reached into your garage to grab that…
4 Steel Wall-Track Tactics for Heavy 2026 Garage Storage
I recall the moment vividly — standing in my cluttered…

6 Steel Stud Tactics for 2026 Garage Racks That Actually Hold
I remember the moment clearly: I was frantically trying to…