I vividly remember the moment I realized my entryway was more cluttered than functional. Shoes, bags, and a mismatched mishmash of random items kept spilling over, turning what should have been a welcoming space into a chaotic mess. No matter how many hooks or baskets I added, nothing seemed to stick. It was like fighting a losing battle every day.
Why Finding the Perfect Entryway Bench Is a Game-Changer
That’s when I had my lightbulb moment: an intelligently designed, hidden entryway bench could solve multiple problems at once. Not just a place to sit while putting on shoes, but a smart storage solution that seamlessly blends style and function. As homes become smarter and more tech-integrated, especially by 2026, leveraging clever hacks for entryway organization is more important than ever.
Think about the potential. With the right setup, you can keep clutter out of sight, maximize space, and even hide charging stations or tech accessories—making your home look sleek and effortless. According to a recent study, organized entryways can reduce morning chaos by up to 30%, saving you precious time—even more reason to get it right. Effortless storage solutions can turn your chaos into calm.
What if your biggest fear is that these hacks won’t last or look amateurish?
Early on, I made the mistake of installing a DIY bench with flimsy materials—it looked great initially but couldn’t handle the weight of winter gear or daily use. Trust me, I learned the hard way that quality matters. Thankfully, by researching the best hardware and installation techniques, I’ve discovered ways to build visually appealing, durable entryway benches with hidden storage compartments. Curious about the mistakes I made? Vanity installation hacks saved me time and money — and can do the same for your entryway upgrade.
Ready to transform your entry? Let’s dive into five innovative ways to hide, optimize, and smarten up your entryway with clever bench hacks designed for the near future—and for real life.
,
Start with a Clear Layout
Before installing anything, sketch your entryway’s dimensions and identify high-traffic zones. Measure the space accurately using a tape measure—think of it as laying a blueprint for your renovation journey. Once measured, mark potential locations for the bench, storage compartments, and hooks with painter’s tape to visualize the final look. I did this on a Sunday afternoon, and it immediately highlighted areas for improvement, especially where a built-in could replace clutter. This step ensures your built-in does not obstruct door swings or create cramped feels.
Choose Durable, Quality Materials
Opt for sturdy wood or high-quality MDF with laminated surfaces—these are like the frame of a great bicycle: essential for smooth operation and longevity. When I built my bench, I selected birch plywood because of its strength and attractive grain. For added stability, consider backing the structure with steel brackets or reinforcement plates, especially if you plan to store heavier items. This approach mirrors the steel reinforcements used in professional vanities, as explained in creative built-in tips. Quality materials prevent sagging or warping over time, saving you from future headaches.
Assemble with Precision
Use a drill and pocket-hole jig to join pieces seamlessly—think of it as sewing fabric but with more precision. I pre-drilled holes to avoid splitting the wood and joined the panels with wood screws, spacing them about 16 inches apart. A combination of clamps and level tools kept the components flush and aligned, much like assembling a flat-pack furniture in a way that ensures stability. Keep carpentry simple: follow the measurements, double-check your cuts, and dry-fit parts before screwing in permanently. This method minimizes mistakes that could cause wobbliness or misalignment, an issue I faced early on with my first DIY build.
Hide Storage with Smart Design
Incorporate sliding doors or concealed compartments to keep clutter out of sight. I added a shallow toe-kick drawer that slides open at the base for shoes—this is similar to the hidden drawers you see in luxury vanities, detailed in scribing built-ins. To hide charging stations or tech clutter, integrate recessed power outlets and USB ports directly into the bench, making them nearly invisible. Use cable management clips and grommets to keep cords tidy—technology in 2026 relies on cleaner, smarter setups.

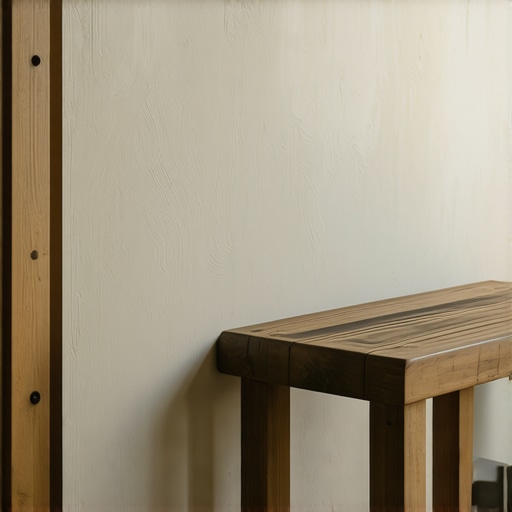
Visual walkthrough of installing a hidden entryway storage bench with integrated outlets and concealed compartments.
Finish with a Protective Coat
Apply a durable sealer or laminate to protect against scuffs, moisture, and daily wear—like armor for your furniture. My final step was sanding the surface smoothly and applying three coats of water-resistant varnish. This added a professional touch while ensuring longevity, especially when storing wet umbrellas or muddy shoes. Remember, a well-sealed finish preserves your investment for years and keeps your entryway looking polished.
While many DIY enthusiasts believe that installing built-in storage or vanities is straightforward—mainly involving measuring, cutting, and assembling—there are critical nuances that often go unnoticed, leading to costly mistakes. One widespread myth is that using standard cabinetry hardware suffices for all weight and usage types; in reality, heavy-duty steel brackets and expert reinforcement techniques are essential for longevity, especially with stone or quartz countertops. According to a study by the American Institute of Architects, improperly reinforced built-ins can lead to sagging and structural failure within just a few years. Failing to reinforce floating vanities is a classic example of neglecting the hidden complexities that add significant value and durability to your project. Many assume that hidden storage compartments are simple to incorporate—but overlooking intimate details like moisture barriers, precise scribing to uneven walls, or cable management can turn an elegant solution into a nightmare. For instance, improper sealing around outlets or gaps in custom corners lead to mold and dust accumulation over time. Advanced builders know that integrating features like recessed power outlets and concealed compartment hinges through careful planning ensures seamless functionality and aesthetics. Don’t underestimate the importance of choosing materials with matching expansion properties; mismatched expansion can cause warping or gaps, especially in fluctuating climates. When installing vanity cabinets in humid bathrooms, opting for moisture-resistant finishes and proper sealing measures is crucial to prevent mold and degradation. I’ve seen many overlook this, resulting in frequent repairs. Also, the installation process itself hides a myriad of tricky steps—like anchoring into uneven plaster, drywall, or metal studs—requiring specialized techniques. Understanding how to anchor heavy cabinets securely—using steel plates or metal wall stud ties—can mean the difference between a fixture that stays put and one that becomes a hazard. For advanced DIYers or contractors, knowing these nuances prevents dangerous accidents and costly redo’s. Are you aware that the most common blunder is neglecting the load-bearing capacity of the mounting surface? Experts recommend consulting structural plans or reinforcing the wall before installing heavy fixtures, especially when dealing with stone or quartz vanities. To stay ahead, check out detailed guides such as step-by-step vanity installation tips. Remember, the beauty of custom-built solutions lies in the details—getting them right ensures your investment stands the test of time. Have you ever fallen into this trap? Let me know in the comments.
To ensure your investment in built-in storage solutions and vanities remains functional and visually appealing over time, regular maintenance with specialized tools and thoughtful techniques is essential. One of my go-to practices involves inspecting hardware and structural components every six months, using a digital stud finder like the Bosch Digital Multi-Scanner. This device helps verify that anchors remain secure in wall studs, especially important when shelves or heavy cabinetry are involved, preventing unexpected shifts or damages. I personally prefer this model because of its high sensitivity and the ability to detect not just studs but also wires and pipes, reducing the risk of accidental drilling into existing infrastructure.
In terms of cleaning, I recommend using a soft microfiber cloth with a mild, non-abrasive cleaner supplemented by a gentle vacuum with a brush attachment to remove dust from concealed compartments and vents—this prevents dust buildup, which can impair mechanisms and lead to unpleasant odors. For lubricating hinges and soft-close mechanisms, I use a silicone spray like Gel-Lok Multi-Purpose Lubricant; it’s non-gumming, dries quickly, and withstands temperature fluctuations, making it perfect for concealed hinges and sliding doors.
When it comes to storage solutions, I advocate for periodic review and reorganization. Modern software such as effortless storage solutions can help plan optimal configurations, especially as your collection of tools and accessories expands. Labeling interior compartments with a label maker like the Dymo LabelManager 160 keeps everything accessible and minimizes clutter.
Looking ahead, automation and smart home integration will increasingly assist in preserving and maintaining your built-ins. Smart sensors that detect humidity levels can signal when to apply sealers to prevent warping, while app-connected maintenance schedules can remind you when lubrication or inspection is due.
How do I maintain my built-ins and vanities over time? In my experience, pairing regular inspections with modern tools like digital stud finders and quality lubricants greatly extends their lifespan and keeps them looking pristine. For example, routinely checking the anchors with a multisensor scanner and applying silicone spray to moving parts can prevent costly repairs down the line. I encourage you to try out one of these advanced tips today—perhaps beginning with inspecting your wall anchoring points with a high-quality stud finder—to see tangible improvements in your cabinetry’s durability and function.
Lessons That Changed My Approach to Built-Ins
One of the biggest lessons I learned is the importance of precise wall reinforcement, especially when installing heavy stone or quartz vanities. Skipping this step can lead to sagging and structural issues down the road. I once underestimated the load capacity of drywall and paid for it with a wobbling fixture.
Secondly, I discovered that seamless integration of power outlets and cable management transforms a good built-in into a truly smart solution. Hidden charging ports not only declutter your space but also enhance the overall sleekness—something I wish I had prioritized earlier in my projects.
Lastly, never underestimate the value of detailed planning. Sketching layouts and visualizing the placement of hidden compartments prevented many rework days. If you’re considering a built-in upgrade, these insights can save you time and money while elevating your home’s functionality.
Tools and Resources That Make the Difference
My go-to toolkit includes a high-quality digital stud finder like the Bosch Digital Multi-Scanner. It detects wires, pipes, and studs accurately, preventing costly mishaps during installation. For creating smart, durable storage, I rely on the guides linked in creative built-in tips. These resources have helped me optimize every inch of space with professional results.
Additionally, I consult the vanity installation hacks to streamline my process, avoiding common pitfalls and ensuring tight, sturdy mounts. If you’re venturing into complex projects, investing time in these resources will pay dividends.
For ongoing maintenance, I suggest using a silicone spray for hinges and regular inspections with a reliable stud scanner. Staying proactive with care preserves the integrity of your built-ins and keeps them looking new for years.
Your Next Move Towards a Smarter Entryway
Every well-designed built-in or vanity begins with a solid plan, diligent material choice, and attention to detail—principles that set apart amateur attempts from professional finishes. Embrace these lessons, leverage trusted tools, and don’t be afraid to innovate; your space will thank you for it. Remember, creating a functional and stylish home doesn’t happen overnight—each step is part of a rewarding journey.
What challenges have you faced when installing or maintaining built-in storage or vanities? Share your experiences below—your story might inspire someone else to take that first brave step!
One Reply to “5 Hidden Entryway Bench Hacks for 2026 Tech & EV Chargers”
Leave a Reply
Related Posts

Fix Floor Scuffs: 5 Best Feet for 2026 Entryway Benches
Imagine this: I was rushing out the door, eager to…
How to Anchor 2026 Entryway Benches to Aging Plaster Walls
I remember the moment vividly—trying to secure a charming wooden…

7 Heavy-Duty Floor Bolts for 2026 Entryway Benches
It was a cold Saturday morning when I finally decided…
I absolutely relate to the frustration of dealing with a cluttered entryway. Before I installed my built-in bench, I struggled with shoes and bags everywhere, which honestly made the space feel uninviting. I love the idea of integrating hidden compartments and smart storage for tech accessories—especially as homes get smarter by 2026. One tip I discovered was using a wall-mounted charging station with cable grommets to keep cords tidy and out of sight. It truly made a difference in keeping the area sleek and functional. I’m curious, has anyone tried customizable modular components that can be reconfigured as your needs evolve? I think that flexibility could be a game-changer for growing families or those who like to update their decor frequently.