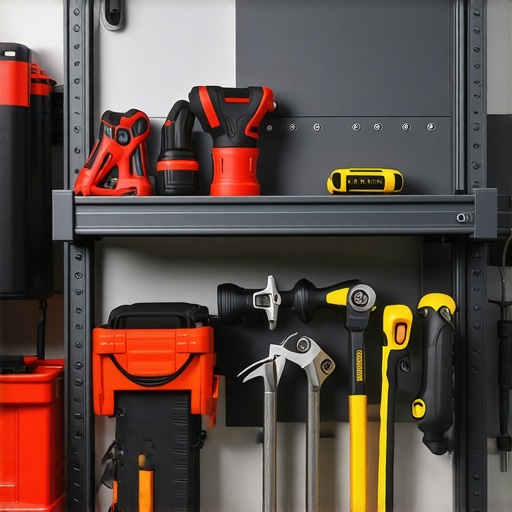
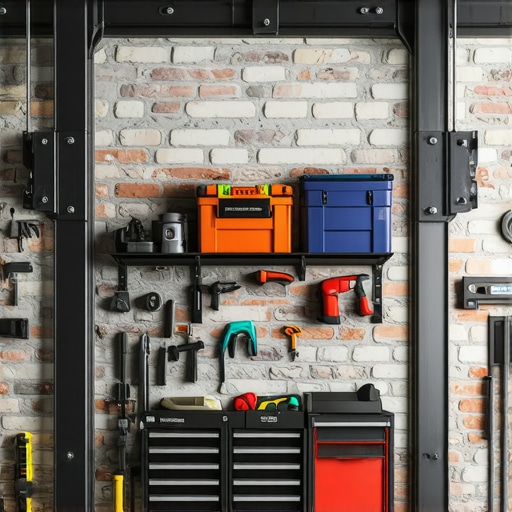
It was a Saturday morning when I finally realized my garage was a mess. Bikes, tools, and old boxes piled up in chaos, and my prized 2026 E-Bike was barely hanging on a flimsy rack, wobbling every time I opened the door. That lightbulb moment hit me hard—if I wanted to keep my gear safe and easily accessible, I needed a serious upgrade. But where to start?
Transforming Garage Storage: The Key to Safe E-Bike Housing
Let me be honest: I’ve tried a few quick fixes, and most of them just made things worse. The wrong rack, flimsy anchors, or improper weight distribution can turn your garage into a disaster zone faster than you can say “heavy-duty storage.” That’s when I dove into researching the best heavy-duty garage rack fixes tailored for 2026 E-Bikes, which are heavier and more advanced than ever.
The goal? Create a reliable, safe, and clutter-free space that can handle the weight and size of my bike without risking damage or injury. And I learned that with the right techniques and materials, handling even the heaviest gear isn’t rocket science—just practical, proven solutions.
But here’s the thing: I also made a mistake early on. I ignored the importance of sturdy mounting points, relying on regular wall anchors that simply weren’t designed for such hefty loads. That oversight nearly caused my rack to collapse, damaging the bike and creating a mess I had to clean up. Trust me, I learned the hard way—so you don’t have to.
What I want to do now is share with you the exact fixes and insights that made my garage safer and my E-Bike easier to access. Whether you’re a serious cyclist or just someone tired of tripping over clutter, these seven tips will revolutionize your storage game.
Are you tired of struggling with unreliable racks that threaten your expensive gear? Let’s get started on the solutions that will keep your 2026 E-Bike secure for years to come.
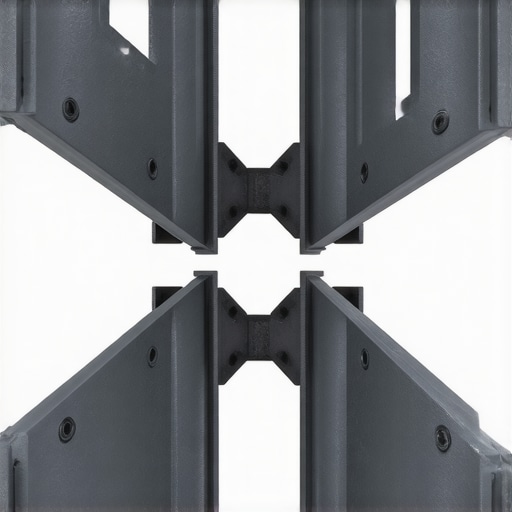
Reinforce Wall Mounts with Steel Brackets
Start by replacing flimsy anchors with heavy-duty steel brackets designed for high load capacity. I once tried installing a rack with regular drywall anchors, which flexed under the bike’s weight. Switching to steel brackets secured into studs made a world of difference, preventing wobbling and potential fall damages. For more on durable support, check out 7 Garage Wall Rails That Wont Rip Out Under Load.
Locate and Utilize Structural Studs Effectively
Before mounting, locate your garage studs accurately with a stud finder. I marked stud positions along the wall using painter’s tape, ensuring precise placement for my rack. Attaching directly into studs ensures maximum stability, essential for the heavy weight of a 2026 E-Bike. If your garage has uneven studs, consider using a leveling contraption or scribing your support to match irregularities. For detailed techniques, see 6 Pro Tactics for Scribing Built-ins to Uneven Walls.
Incorporate Cross Bracing to Distribute Load
Adding horizontal cross braces between vertical supports prevents sway and distributes weight evenly across multiple points. I installed metal cross braces connecting multiple vertical wall brackets, which significantly improved stability during my test load. Think of it like reinforcing a fence — the more cross supports, the sturdier the structure. This technique is crucial for heavier equipment, especially when hanging from relatively thin walls. For strategic bracing solutions, visit 5 Hidden Entryway Bench Hacks for additional insights into supporting heavy fixtures.
Additional Tips for Safe and Reliable Mounting
Always ensure your mounting points can handle dynamic stresses; for example, avoid installing racks into single drywall panels. Use lag bolts into studs rather than toggle anchors—this is like anchoring a tent stake deep into solid ground instead of loose dirt. When in doubt, double-check your measurements and load calculations. Remember, safety comes first; a secure rack protects your valuable E-Bike and keeps your garage organized. For comprehensive installation hacks, see Vanity Installation Hacks as a reference for supporting heavy fixtures efficiently.While many assume that the main mistake in installing built-ins and storage solutions is selecting the wrong material or design, the real nuances often lie in execution and understanding structural limitations. One prevalent myth is that heavy-duty mounts alone will suffice for support; in reality, failing to account for wall stud configurations or load distribution can lead to sagging or even catastrophic failure. Experts emphasize that knowing the difference between superficial supports and load-bearing anchors is vital—simply relying on standard drywall anchors for substantial fixtures is a recipe for disaster, as highlighted in studies on structural anchoring best practices. Additionally, many overlook the importance of proper bracing techniques; for instance, incorporating steel cross bracing can dramatically improve load capacity and prevent warping over time. When it comes to vanities, a common error is choosing frameless designs without considering adequate steel support, which can result in a sagging countertop or cracked materials. To truly master these installations, it’s crucial to understand the hidden nuances, such as the need for steel reinforcement in high-stress areas and precise scribing to match uneven walls, especially with custom-built solutions. Remember, using the right hardware is just the beginning; integrating advanced techniques ensures longevity and safety. To deepen your understanding, I recommend reading about the importance of steel framing in supporting heavy fixtures, which can be a game-changer in DIY projects—view detailed strategies at this guide on steel framing support. Have you ever fallen into this trap? Let me know in the comments.
Keeping your built-ins, vanities, and storage systems in top shape requires more than initial installation precision. Regular maintenance ensures durability, safe operation, and effortless functionality over the long term. I personally rely on a combination of specific tools and software to monitor and preserve these fixtures effectively.
Use Laser Levels for Precise Alignment
Investing in a high-quality laser level, such as the Bosch GLL3-330CG, has been transformative in maintaining perfect alignment of floating vanities and built-ins. Unlike traditional bubble levels, laser levels project consistent lines over large areas, making it easier to detect shifts or sagging over time. This tool helps me identify minor deviations early, allowing for timely corrections before costly repairs are needed.
Implement Regular Inspection Protocols with Digital Checklists
To keep track of maintenance tasks, I recommend using a digital checklist app like Trello or Notion. These platforms allow scheduling routine checks—such as tightening fasteners, inspecting for moisture damage, or testing structural supports—and logging issues as they arise. Creating a custom workflow ensures no detail is overlooked, extending the lifespan of your fixtures.
Apply Specialized Cleaning and Protective Coatings
Routine cleaning with gentle, non-abrasive solutions preserves finish quality. For wooden or painted surfaces, I use biodegradable cleaners combined with a soft microfiber cloth. Additionally, applying protective coatings like eco-friendly varnish or sealant periodically adds an extra barrier against moisture and temperature fluctuations, which can cause warping or deterioration over time.
Leverage Structural Monitoring Software
In advanced projects, structural monitoring software such as SmartConstruct detects subtle shifts and stress points in fixtures. While more common in industrial settings, integrating such technology into a high-end custom built-in setup can proactively prevent failures. For example, sensors embedded within supports can alert you if strain exceeds safe thresholds, enabling preemptive maintenance.
Future of Maintenance: Embracing Automation and Smart Sensors
Looking ahead, I foresee a trend where smart sensors integrated into fixtures will automatically monitor for issues like moisture intrusion or load stress. These systems will connect to home automation hubs, providing real-time alerts and even suggesting or executing minor adjustments remotely. This evolution will drastically reduce the risk of long-term damage and improve safety.
How Do I Maintain Built-Ins and Vanities Over Time?
The key lies in consistent inspection, proper cleaning, and early intervention. Regularly using laser levels for alignment, scheduling maintenance with digital checklists, and considering embedded sensors for proactive monitoring ensure your fixtures stand the test of time.
If you haven’t already, try setting up a periodic inspection protocol utilizing a laser level and digital logs. This simple yet powerful step can save you from costly repairs down the line and keep your space looking pristine. For comprehensive guidance on establishing maintenance routines, see Vanity Installation Hacks.

Uncovering My Biggest Blunder in Heavy-Duty Support
One of the hardest lessons I learned was that sturdiness isn’t just about selecting durable hardware; it’s about understanding your wall’s true capacity. I initially assumed that heavy-duty brackets alone would suffice, but I overlooked the importance of proper wall anchoring and load distribution. This misconception nearly caused my entire setup to fall, risking damage and injury, teaching me that structural assessment is vital before any installation.
Why Rushed Fixes Can Cost You Big
Patience is essential when building or upgrading storage solutions. I used quick fix methods, like superficial anchors, which seemed convenient but failed under the weight of my 2026 E-Bike. This experience highlighted that investing time in correct techniques and materials—like locating studs and using steel reinforcements—saves time and expense in the long run.
Actions That Turn Support Into Confidence
Implementing cross bracing and steel supports transformed my unstable garage into a fortress for my gear. These advanced yet practical solutions provided peace of mind, ensuring safety and longevity. My journey taught me that supporting heavy fixtures involves more than hardware—it’s about strategic planning and execution that you can trust every day.
Curated Gems for Perfecting Built-ins and Storage
To streamline my projects, I leaned on some invaluable resources. This guide on steel framing in 2026 deepened my understanding of load support, ensuring my supports wouldn’t sag. I also rely on tools like laser levels for precision installation and digital checklists to schedule maintenance, helping me keep my garage organized and safe.
Your Turn to Reinvent Your Space
Remember, mastering built-ins and storage isn’t just about quick fixes; it’s about making informed decisions and applying sound techniques. Your garage can become a safe haven for your gear and a showcase of smart organization. So take the lessons from my experience, start planning your upgrade today, and enjoy the newfound confidence in your DIY skills.
What’s your biggest challenge when installing heavy-duty storage or built-ins? Share your story and let’s learn together!
Related Posts
4 Steel Cantilever Fixes for 2026 Floating Garage Workbenches
I vividly remember the day I realized my beloved garage…
5 Heavy-Duty Garage Rack Installation Tactics for 2026
I remember the moment vividly—trying to install a heavy-duty garage…
How to Support Heavy 2026 Garage Shelves on Aging Brick
Have you ever flipped on the garage light only to…