

I remember staring at a beautiful floor-to-ceiling bookcase plan and then looking down at the clunky, metal baseboard heater running right along that very wall. It was a chilly Tuesday in October, and that long, beige strip of metal felt like a total project-killer. Most people think you have to choose between a warm room and creative built-ins for seamless storage and home aesthetics, but I am here to tell you that you can have both. I learned the hard way that ignoring the heater is a recipe for warped wood and a very unhappy fire marshal. Years ago, in my first fixer-upper, I built a small storage unit right against a heater without a second thought. Within a month, the bottom shelf looked like a Pringle, and the smell of toasted pine was constant. It was a disaster. Today, I am going to show you exactly how to navigate this tricky installation so you can maximize your space without the structural drama. We are going to talk about airflow, thermal barriers, and how to keep your home cozy without sacrificing your style.
Don’t Let Your Heater Dictate Your Room Layout
If you are planning a big project, you might be tempted to just cut the heater out or move it entirely. Stop right there. Moving HVAC or electrical is expensive and often unnecessary if you use a few stealth venting moves for built-in units. The goal is to create a chimney effect that allows the hot air to rise naturally through the cabinetry and back into the room. I once saw a neighbor try to block a heater with a heavy oak cabinet; not only did his room stay freezing, but he also ended up with a cracked frame from the heat stress. To avoid this, we use a kickspace heater or a custom-built plenum. This ensures the heat actually reaches your toes rather than just cooking the underside of your shelves. Have you ever had to abandon a design idea because a radiator or heater was sitting right in the middle of your perfect wall?
Is it actually safe to build wood cabinets over a heat source?
It is the number one question I get, and the skepticism is healthy. If you do it wrong, you are creating a fire hazard. However, with the right clearances, it is a standard practice in high-end custom work. According to the National Fire Protection Association (NFPA), most heating equipment fires are caused by placing combustible materials too close to the heat source, but that distance is something we can easily manage with clever engineering and the right materials. Using internal structural tricks and metal liners can provide that extra layer of peace of mind. We are looking for a solution that honors both the physics of heat and the beauty of built-in storage ideas. In the next section, I will walk you through the exact measurements I use to keep things breezy and beautiful.
Create an Air Highway Inside the Cabinetry
To make this work, you have to think like a chimney sweep. You aren’t just building a box; you are building an air duct that looks like a bookshelf. The most effective method is creating a plenum—a pressurized chamber that directs air. I remember a job in a drafty Victorian where the only spot for a media center was right over an old hydronic radiator. Instead of blocking it, we built a 4-inch deep void behind the back panel. We used the stealth venting trick for heat-generating media cabinets to pull cool air in from the floor and exhaust it out the top. The result? The electronics stayed cool, and the room was warmer than it had been in years because the built-in actually helped circulate the air. If you just slap a cabinet over the heater, you’re creating a Dutch oven. You need at least 2 inches of clearance between the heater and any wood surface, even if you’re using heat-reflective foil.
Divert the Heat with a Custom Plenum
This plenum is essentially a secondary wall inside your cabinet. You want the air to enter through a toe-kick vent, wash over the heater, and rise. If you’re installing creative storage solutions for vanities, you can use a similar technique. I once spent three days retrofitting a bathroom unit because the homeowner didn’t realize that trapping that heat would eventually melt the glue on their edge banding. We had to use 6 heavy-duty l-brackets for reinforcing custom built-in units to create a floating internal shelf that wouldn’t sag when the radiator kicked on. Always line the interior of this ‘heat box’ with a radiant barrier. It reflects 97% of the heat back into the air stream rather than letting it soak into your expensive plywood.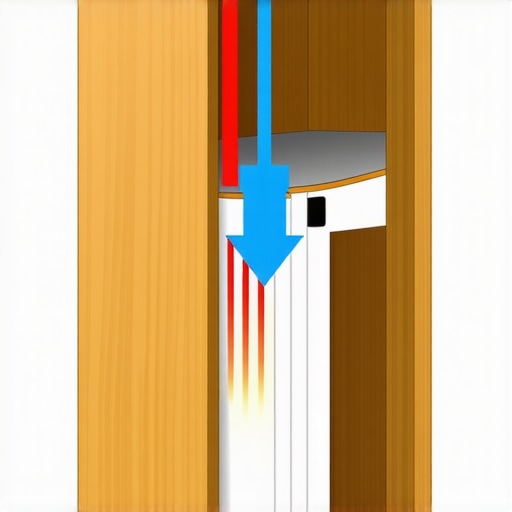
Why MDF is Your Worst Enemy Near a Radiator
I see DIYers use MDF for built-ins all the time because it’s cheap and paints well. But put MDF near a consistent heat source and it will off-gas and crumble. Stick to high-quality Baltic birch or solid hardwood. In one messy project, I saw an entire wall of shelving bow because the heat caused the moisture in the MDF to evaporate unevenly. To prevent this, I always suggest the moisture-proof baseboard move for basement built-ins as a secondary defense. It’s not just about the heat; it’s about the rapid cycle of drying and cooling that ruins structural integrity.
Seal the Path to Prevent Dead Air Pockets
If you don’t seal the edges of your air channel, heat will leak into the cabinet guts and warp your doors. I use high-temp silicone or foil tape to ensure the air only goes where I want it. When doing a expert guide to flawless vanity installation, you have to be precise with your scribing. Using the scribing secret for floor-to-ceiling built-ins on carpet or tile ensures that your vent stays aligned with the floor opening. If there is even a half-inch gap where it shouldn’t be, the convection current breaks, and your ‘chimney’ becomes a heat trap. This is why I always dry-fit the plenum and run the heater for an hour with a thermal camera before I nail the face frames on. It’s the only way to be 100% sure you aren’t building a slow-burning bonfire.
While most guides focus on the aesthetic finish, we need to talk about the hidden structural reality that most DIY tutorials completely ignore. There is a common belief that as long as your cabinet is level and screwed into a stud, it is permanent. In my experience, that is a dangerous oversimplification. I have spent years repairing ‘custom’ units that looked stunning for exactly six months before the doors started sticking and the joints began to pull apart. The culprit? We focus too much on the level and not enough on the square and the load. If you are working on innovative storage solutions to transform your bathroom, you have to account for the fact that modern design is pushing materials further than ever before.
Most Cabinets Aren’t Built for Modern Stone
Everyone tells you to buy a standard stock vanity and just drop a slab of quartz on top. This is a massive mistake. A standard 36-inch vanity box is often constructed from 1/2-inch particle board or thin plywood with a few plastic corner blocks. When you add a 3cm quartz top, you are placing nearly 200 pounds of dead weight on a structure designed for much lighter loads. Over time, the vertical load causes the side panels to bow outward, which is exactly why your heavy quartz vanity is cracking the cabinet frame. To prevent this, I always integrate internal solid wood blocking or 6 heavy-duty wall fixes for massive quartz top vanities to transfer that weight directly to the floor or the wall studs, rather than letting the cabinet box carry it all.
Can your vanity really handle the weight of a double-thick quartz top?
It is a question of structural physics. The Natural Stone Institute (formerly the Marble Institute of America) specifies that stone needs continuous support, yet many built-ins leave huge gaps for plumbing that weaken the overall integrity. If your cabinet is out of square by even an eighth of an inch, the stone won’t sit flat, creating a pressure point that will eventually cause a hairline fracture in your expensive countertop. This is why I obsess over the scribing hack for fitting vanities against out-of-plumb walls. It’s not just about the look; it’s about ensuring every square inch of the cabinet is providing the support the stone requires.
The Water Damage Trap You Aren’t Seeing
The biggest ‘oops’ factor I see in bathroom built-ins isn’t the heat from the baseboards we discussed earlier—it is the capillary action of water. Most installers seal the top of the vanity but forget the base. In a bathroom, water inevitably hits the floor. If your vanity sits directly on the tile without a barrier, the end grain of the wood will suck that moisture up like a straw, leading to rot and mold within a few years. This is why your vanity plumbing is leaking into the cabinet base and rotting it from the inside out before you even notice a drip. I always use a plastic or composite shim to keep the wood just a hair above the floor level. Have you ever fallen into this trap and noticed your cabinet base swelling? Let me know in the comments. We need to be more intentional about the ‘bones’ of our projects if we want them to last a lifetime.
I take that ‘bones’ philosophy into my tool bag every morning. If you want to move from a DIY look to a professional-grade finish, you have to stop relying solely on a standard tape measure for your finish work. I swear by a green-beam laser level when implementing 7 tactics for leveling vanities on sloping tile floors. A standard bubble level can be off by a fraction over an eight-foot run, but a laser provides a constant reference point that ensures your cabinetry doesn’t fight gravity. Pair that with the scribing tool for cabinets against textured plaster walls, and you will have a unit that looks like it grew directly out of the drywall. When I am installing a unit, I am not just looking for a tight fit; I am looking for a fit that accounts for the house settling over the next ten years.
How do I keep my custom built-ins from failing over time?
Maintenance in the world of custom cabinetry is less about deep cleaning and more about mechanical checks. Twice a year, specifically when the seasons shift and the humidity in your home fluctuates, you should be checking your hinge adjustments. Wood is a living thing, and as it breathes, it moves. You might notice that learning how to fix drawer fronts that won’t stay aligned is often just a matter of a half-turn on a Pozidriv screw. If you ignore these small shifts, you end up with binding, where the wood rubs against itself, stripping the finish and leading to structural fatigue. You also need to stop pantry pull-outs from jamming with this slide alignment trick: apply a quick spray of dry PTFE lubricant on the metal rails. Unlike standard oils, it does not attract dust and keeps heavy drawers gliding like they are on ice.  According to the Kitchen Cabinet Manufacturers Association (KCMA) A161.1 standard, cabinetry should withstand specific humidity and temperature cycles without finish failure. This is why I always investigate how to stop garage cabinet doors from swelling in humidity if my clients have non-climate-controlled spaces like mudrooms or workshops. If your installer did not seal the back edges of the plywood or the underside of the base, even the highest KCMA standards won’t save you from an inevitable warp.
Why the Future of Storage is Modular and High-Tech
Looking ahead, I see a massive shift toward what I call ‘smart cabinetry.’ We are already seeing top trends in vanity designs you need to know in 2025 that include integrated moisture sensors and internal LED lighting that triggers via motion. The next level is true modularity—built-ins that can be reconfigured as your lifestyle changes. We are moving away from the static, immovable box and toward systems that can adapt to our needs. My challenge to you is this: take five minutes today to crawl under your vanity or into the back of your built-ins and check for the moisture ‘wicking’ I mentioned. If you see any swelling at the seams, it is time to apply a bead of clear silicone or a moisture barrier before the damage becomes permanent. It is a tiny fix that protects a lifetime investment.
The Hardest Lessons from a Decade in the Workshop
Building over heat sources taught me that physics always wins. If you don’t give the air a place to go, it will make its own way out by cracking your joinery. Another lightbulb moment was realizing that sleek built-in vanities with modern design tips only stay sleek if they are anchored to the studs, not the drywall. I’ve seen beautiful units sag because someone trusted a plastic anchor for a heavy load. Lastly, never underestimate the power of a moisture barrier. I’ve started using the moisture barrier fix for vanities on cold basement floors for every ground-floor project now, regardless of whether the client thinks they have a dampness problem. It is cheap insurance for an expensive project.
The Short List of Gear That Makes or Breaks Your Build
I don’t go into any project without a few non-negotiables. First, a high-quality scribe tool. Using the back-bevin trick for scribing cabinets to out-of-plumb walls is the difference between a ‘DIY look’ and a professional finish. Second, a solid set of vanity installation hacks that save time, like using a dedicated composite shim kit instead of cedar shingles that can compress over time. I also highly recommend keeping a thermal camera handy if you are working around heating elements; it’s the only way to verify your plenum is actually working before you nail in the face frames.
Bring Your Dream Storage to Life
Designing and installing your own custom units is one of the most rewarding ways to transform your living space. Whether you are tackling a small bathroom or a massive wall-to-wall library, focus on the ‘bones’ first and the aesthetics second. By prioritizing airflow and structural support, you are creating effortless storage solutions for a tidy home that will actually stand the test of time. Don’t be afraid to take that first measurement and start your vanity installation journey today.
Have you ever had to design a built-in around a tricky radiator or a baseboard heater? Let me know how you handled the airflow in the comments below!